Step 3, Record, Step 4 – Honestech VHS to DVD 7.0 Deluxe User Manual
Page 67: Preview
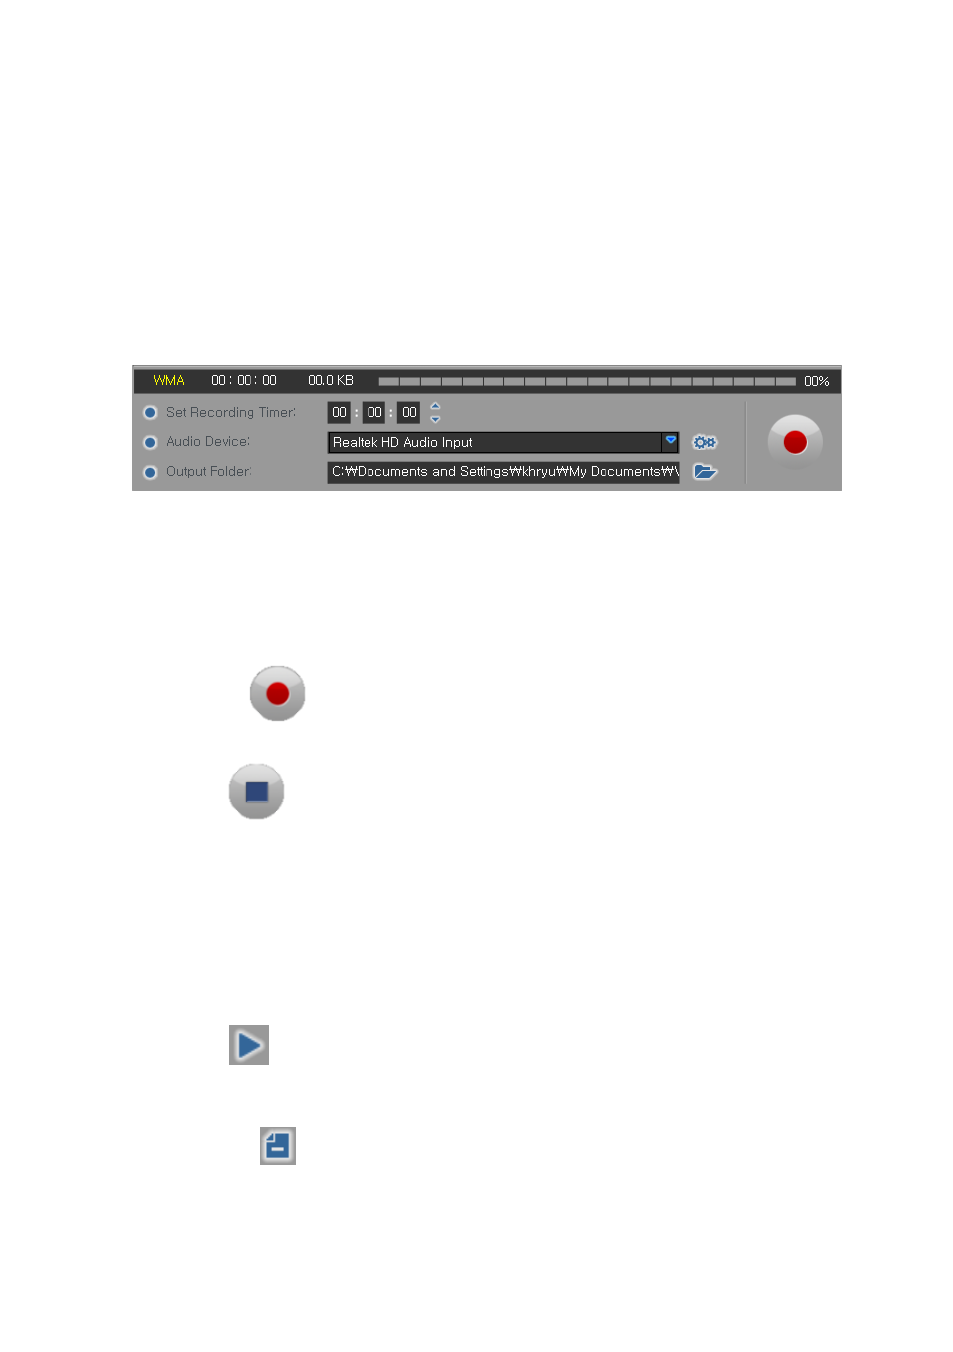
67. VHS to DVD 7.0 Deluxe
8.3. Step 3
– Record
Before clicking record, you will want to check your recording settings listed below and make
any necessary adjustments.
Set Recording Timer
– setting a recording time enables the Audio Recorder to stop
recording once the time entered has elapsed. The timer will not start until the Record
button is clicked. *This is an optional setting and is not necessary for recording.
Output Folder
– this is the location on your computer's hard drive where all audio
recordings will be saved permanently. Click the Folder icon on the right to change the
output folder location. *Changing the Output Folder location is not recommended unless
space is low on the current drive.
Record
– click the record button when you are ready to capture your video.
(This button will change to a Stop button when clicked)
Stop
– click the stop button when you are ready to halt or cancel the recording process.
Any audio that has been recorded will appear in the Track List at the bottom of the recording
screen.
8.4. Step 4
– Preview
Play
– click the play button to playback any recorded audio file from the Track List.
*Click and highlight a specific audio file in the track list to play it.
Remove
– Use the remove button to the right of the Play button to remove any audio
files from the Track List.
*Click and highlight a specific audio file in the track list to remove it.