HP Velotechnik Go SwissDrive system for HP Velotechnik User Manual
Page 29
Notes for the user
27
Picture 22: Disconnecting the motor connector
5. Loosen the M10 axle nuts using a 17 mm
ring/open-ended spanner.
6. Note the presence of the torque arm on
the left-hand side. It is essential that this be
refitted when the wheel is being refitted.
Danger! When both nuts are
being loosened, the rear wheel could fall
out. Secure the rear wheel in the frame
using one hand or, given its heavy weight,
enlist the help of a second person.
To make it easier to remove the rear wheel,
pull the derailleur back slightly by hand. Lift
the pedelec/e-bike or s-pedelec up a little and
give the wheel a thump so that it drops down
and out.
7. You have removed your rear wheel
including the motor.
Attention! If you completely
removed the nuts from the axle, the
torque arm could fall off. Set this to one
side along with the nuts and washers
arranged in the order of removal
somewhere clean for safekeeping.
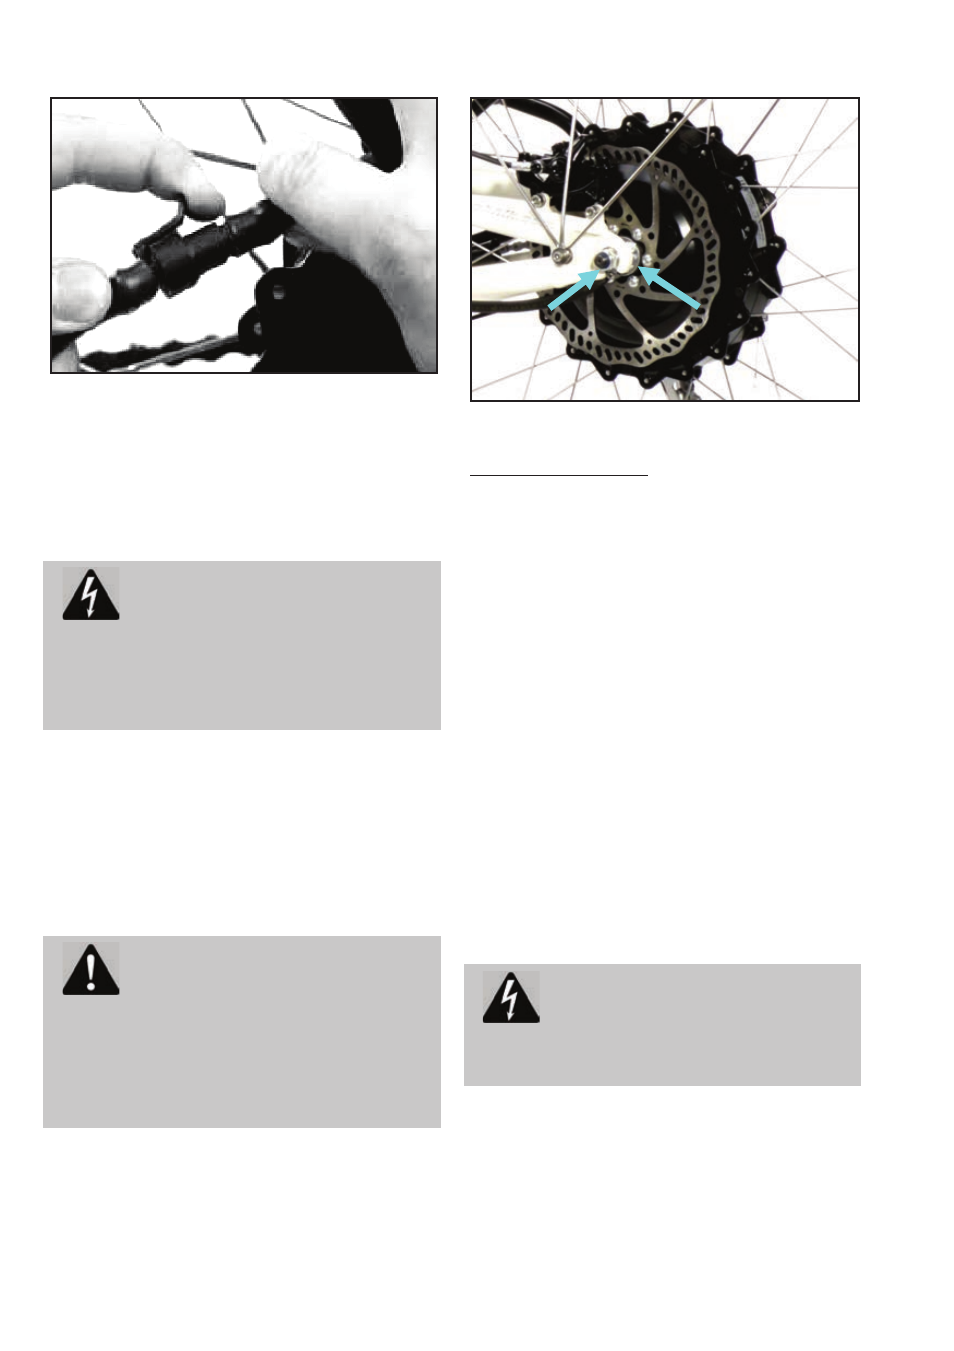
Picture 23: Axle bolt (1), torque arm (2)
Fitting the rear wheel
1. If the torque arm is not seated on the
motor axle, fit this to the designated anti-twist
part of the motor axle.
2. Shift into the highest gear so that the
derailleur is positioned as far out as possible.
You can now insert the rear wheel into the
dropouts of your pedelec/e-bike or s-pedelec.
Make sure that the cable exit of the motor is
located behind the axle when fitted and that
the torque arm is turned to a position in
which it can be secured to the frame.
You can now fit the bolt to locate the torque
arm and tighten the nut slightly. The correct
sequence of parts must be observed.
3. Now tighten the M10 axle nuts uniformly.
Note the washers fitted between the frame
and respective axle nuts. These must bear flat.
Danger! The axle nuts must be
tightened to a torque of 45 Nm with the
use of a torque wrench.
1 2