MacroSystem ElasticDreams User Manual
Page 12
12
13
automatically.
Now all you have to do is click on “Create” and
you are finished!
Of course, you can also use the usual preview
button in the edit menu or the single-image
function (not available with Casablanca Avio
without Pro Package). But the preview function
in ElasticDreams will probably be enough for
you to be able to judge the result. After the
calculation is finished you can play the finished
ElasticDreams project in the Image Processing
Effects menu.
It is recommended to construct a scene from
successful effects. Additional finished projects
can be saved in this way since ElasticDreams
can manage up to 10 projects simultaneously.
To obtain experience, practice by alienating
other scenes. You can also alter objects, for
example, record your car and then distort and
bend it. The warp effect can be used in many
ways - use your imagination!
6.2 Practice example 2
Connect two scenes with the morphing effect
The morphing effect serves to fluidly transform
persons or objects into other persons or objects.
The main difference to the warp effect is that
you now work with two scenes (instead of
just one), because one scene is “morphed”
into another. Because of this you will find the
morphing effect in the transition effects menu.
In preparation select two appropriate scenes,
e.g. two faces. To make the effect as interesting
and astounding as possible your recordings
should consist of two different faces in similar
size and bearing. The scenes should be about
4 seconds long. For this purpose simply use a
tripod to record your own face and that of your
partner or a friend.
A static, single-color background is ideal (e.g. a
wall or a door).
Insert the scenes into the storyboard, call
up the transition effects menu, select the
“ElasticDreams Morph” effect and insert it.
First, specify the range - 2 seconds are best.
Then the effect is not too short, but instead
shows fluidity of movement.
Now press the “Start Program” button so that
the ElasticDreams window opens after a short
pause for initialization.
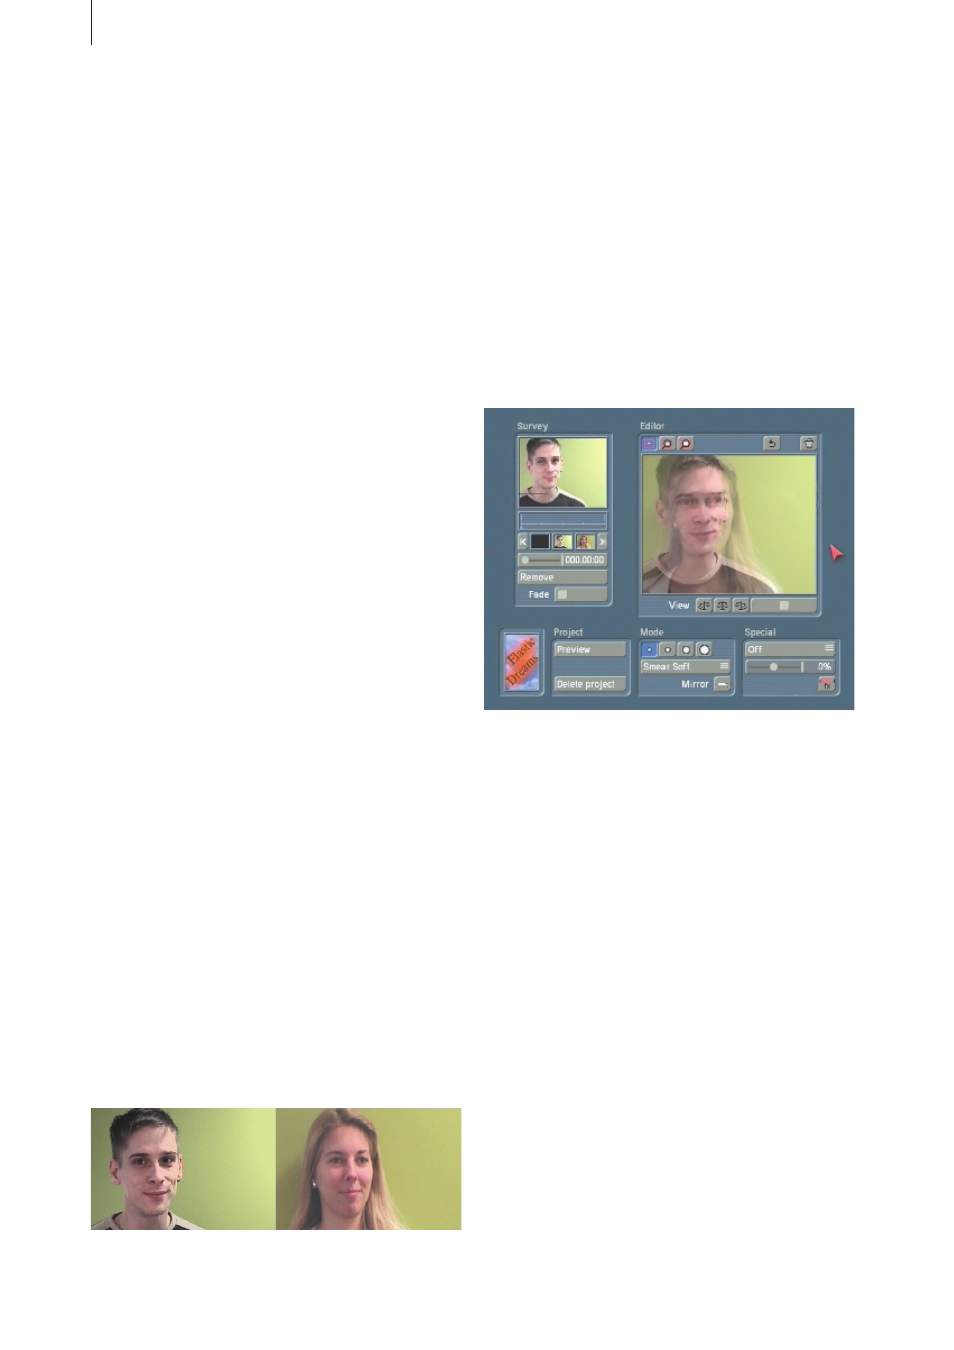
There you now see the first images of both
scenes that overlap each other. The overview
window displays the first image of the first
scene.
Now move the slider below the timeline
(overview window) all the way to the right. You
will see that the timeline now corresponds to
the 2 seconds (000.01:24) that you have already
specified for the transition effect.
The last image of the two-second transition
phase is reached and the small, blue arrow
below the timeline now points to the end of the
timeline. (In the overview window you see the
overlapped final images of both video scenes.)
Now move the slider next to the newly visible
“Fade” button all the way to the right so that
you see the last image of your second video
scene in the overview window. You will morph
into this scene.
The last image of the transition should appear
just like this, only the new face will be seen in
the video image.
You must see both images at the same time in
order to be able to equate prominent features in
both faces with each other.
Slide the fade slider back again to the center, i.e.