MacroSystem ElasticDreams User Manual
Page 14
14
15
a transition time of 2 seconds for the effect and
click on “Start Program”.
After initialization you can start with the
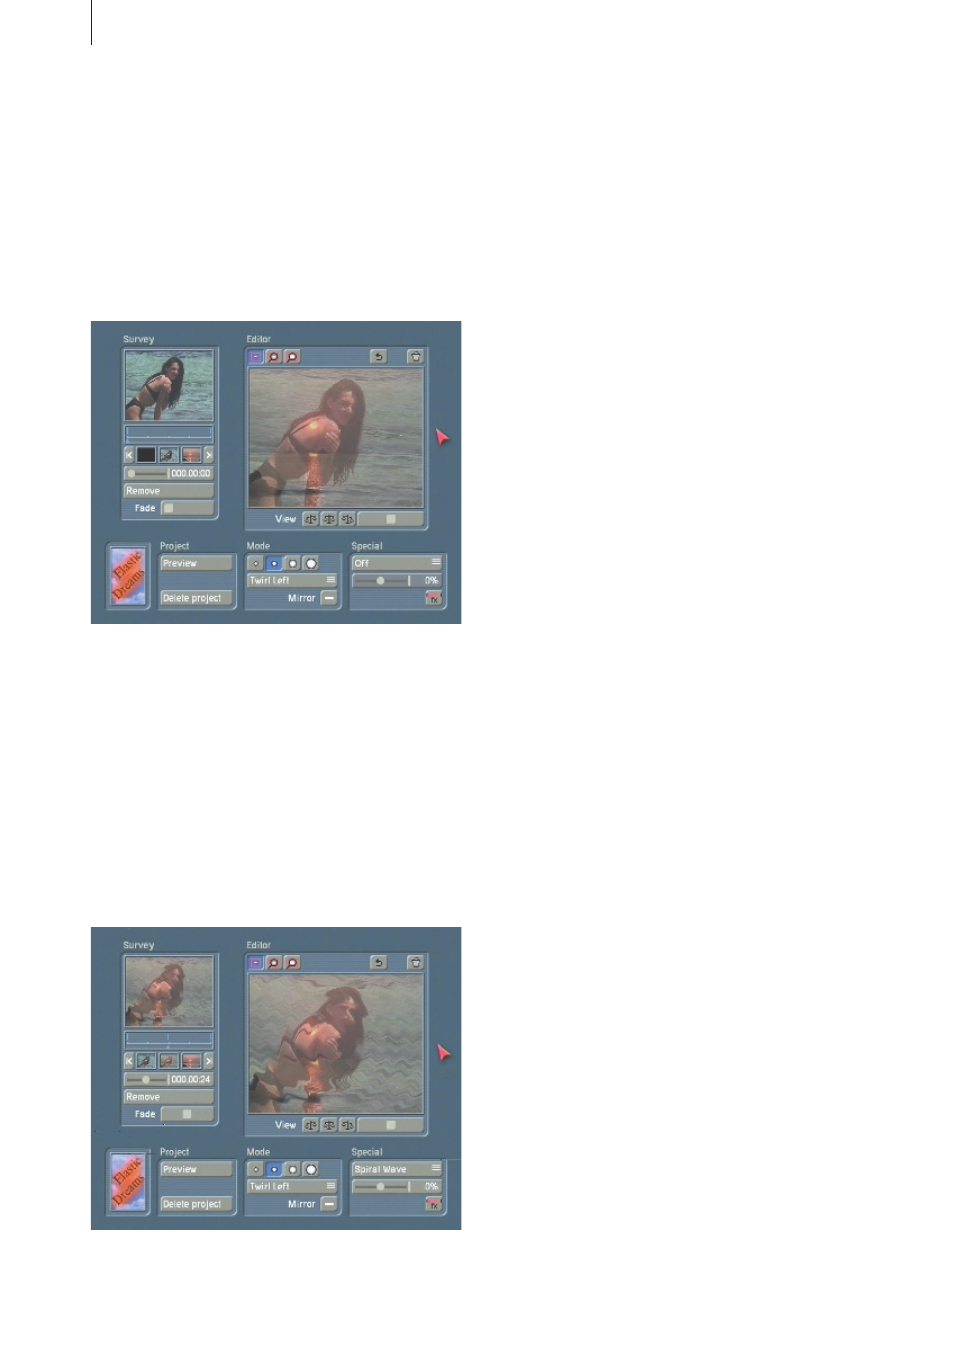
timeline. In the overview window you see
displayed the first of the two scenes. Move the
slider under the timeline to the exact center of
the two seconds for your effect (to 000.00:24).
The “Fade” slider control is automatically set to
half-transparency.
Then you can make settings in the special
window (below right), which was not considered
in the previous examples. Click on the selection
button (which displays “Off”) so that a window
is called up displaying several effect possibilities
you have.
Select the desired effect, e.g. “Spiral Wave”.
After selecting and confirming this effect you
at first do not see any change in the windows.
Now you specify the effect intensity by moving
the slider in the special window. The change is
shown immediately in the edit window.
The reference point is set after you have made a
selection.
Afterward you can check the result by clicking
on “Preview”.
If you are satisfied, then exit the ElasticDreams
window and calculate the effect in the transition
effects menu.
The effect ElasticDreams FX can be used in
many ways. For example, try to put together a
transition with several reference points. Use the
other ElasticDreams tools and modes. There are
no limits to your imagination ...
6.4 Practice example 4
Puppet player effect with ElasticDreams Draw
For the last practice example we use the
“talking” dog already mentioned in the
introduction. The effect “ElasticDreams
Draw” is different in two ways from the
other ElasticDreams transition effects. The
transparency slider and the scales symbols have
no direct influence on the effect itself, and the
second transition scene serves only as a control.
This means that the first scene, contained in the
storyboard, is processed, and the second scene
is used as a movement template.
Imagine again the talking dog already
mentioned in the manual. A video scene is
recorded with lip movements in order to let
the dog speak as realistically as possible. It is
best to make a close-up recording of your own
lip movements. In this way you can not only
exactly pronounce each phrase to be spoken by
your dog, but also precisely study the individual
phases of your lip movements. The individual
lip movements serve as template for working
with the dog’s mouth. When you open your
mouth, use the tool points of the ElasticDreams
program to open the dog’s mouth. When you
close your mouth, change to the video image of
the dog and close the dog’s mouth with the help
of the tool points. In the end the original audio
of the “mouth” scene is moved to the “dog”
scene - the dog talks!
For this example you need two scenes. The
first scene should be a close-up of your dog (of
course, you can take any animal, doll or teddy)
and last about 4 seconds.
For the second scene select a camcorder close-
up of your mouth. Speak, for example, the