MacroSystem Photo-Studio 2 User Manual
Page 15
14
15
and Edit menus.
At the top edge of the menu you will again see
the Open/Close, Special and Size buttons. At the
bottom edge you see the Information button.
Additionally, this menu contains the following
buttons:
- Description: If you click on the long line, the
on-screen keyboard appears and you can enter
the name that you want to give the photo or
directory.
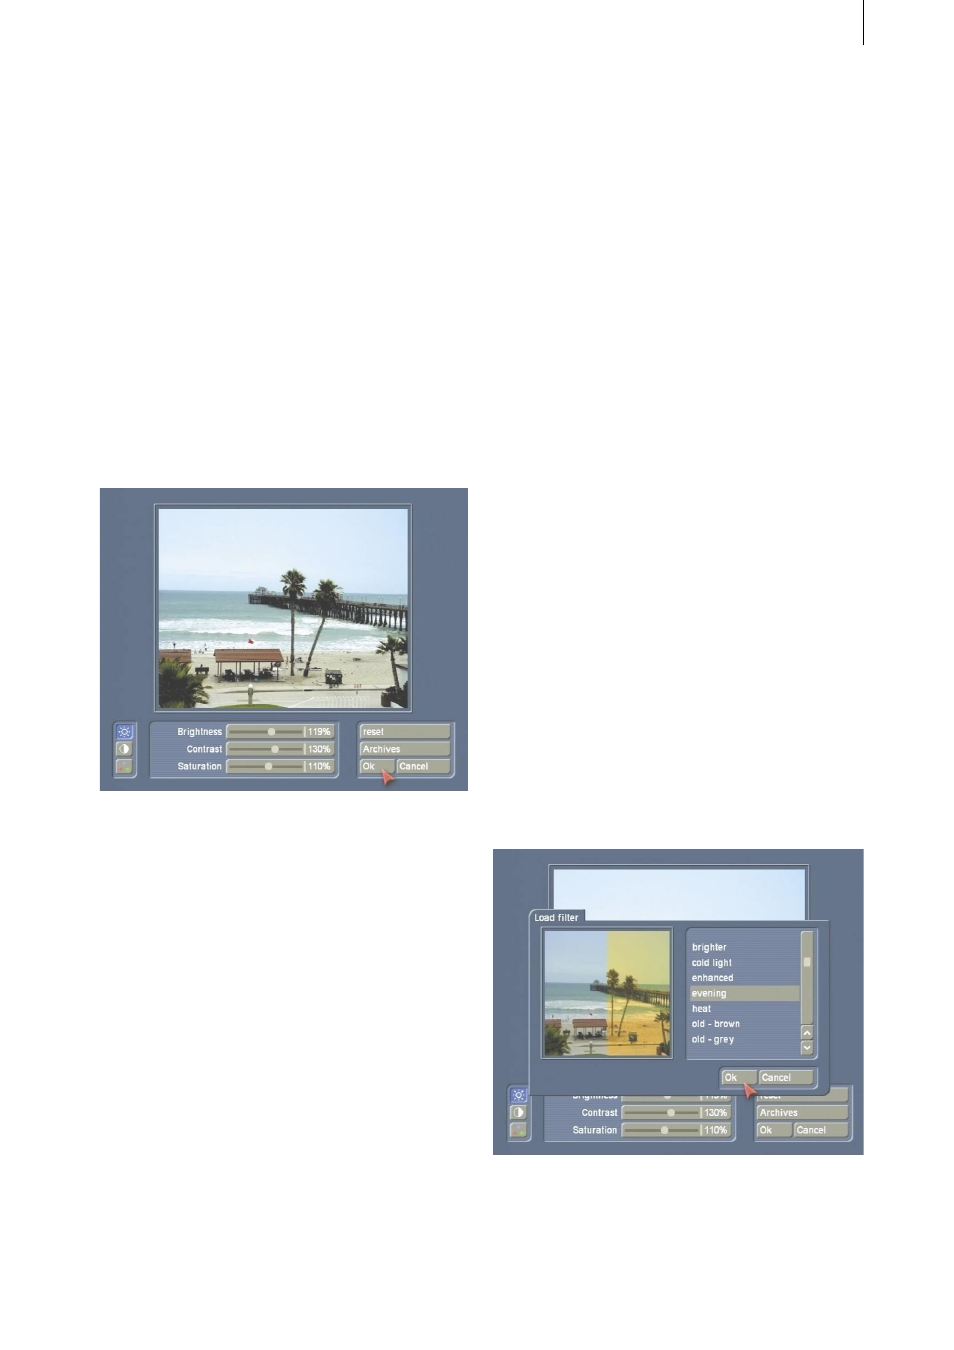
- Control photo: If you click on this button, a
menu opens in which you can make image
corrections and color corrections to the active
photo.
The marked photo is displayed in the top part
of the menu. You will see three icons at the
left edge that you can use to switch between
various modes. If you activate the top icon, you
can adjust the brightness, contrast and color
saturation in percent. The middle icon allows
you to modify the gamma value in percent, and
the lower icon lets you define the red, green
and blue color values in percent. (The gamma
correction lets you adjust the brightness while
maintaining the full contrast range.)
If you have used these components to create a
filter and you would like to use this filter again
some other time, you can save it. To do so, first
press the Archive button. In the window that
subsequently opens, click on the Save button
and use the on-screen keyboard to enter the
name that you want to give the filter on the long
brown-colored line.
The Reset button allows you to restore the initial
condition of the photo. (This will only work if
you have not yet closed the Control photo menu
by pressing the Ok button).
The Cancel button allows you to leave the menu
without applying any changes. Clicking on the
Ok button, on the other hand, confirms your
changes.
Please note: This means that the picture stored
on the hard drive will be changed irreversibly!
If you want to keep the original picture, please
make sure you create a copy of it beforehand.
If you have defined one or more filters and
saved them in the archive, you can apply them
later to as many photos as you like.
This is useful if you have used a second
camera to take photos and they portray colors
differently. You can save your color correction
filter and then apply it to all the other photos
that you take with this camera.
First, mark the photo that you want, then click
on Control photo again and open the archive
in this menu. After you click on Load, a window
opens in which you see the photo to be edited in
the area on the left. You can then select the filter
that you want from the list of archived filters
displayed on the right. You will see that the filter
has been applied to the right side of your photo
as a preview to give you an idea of the final
result.
After you click on Ok, the selected filter is
applied to the previously marked photo. You will
see that the percent values have now changed
accordingly.