MacroSystem Photo-Studio 2 User Manual
Page 19
18
19
path. These markers do not have any other
properties that you can change. To add a marker,
simply click on the part of the path at which
you want the marker to appear. Then roll the
trackball to move the point to the position in
which you want it and confirm its position by
clicking on Ok. You can delete a marker by
placing the trackball pointer over it and then
clicking on the small right trackball button (four
button mode) or big right button (two button
mode).
You can now take a look at the toolbar that
is positioned in the foreground of the photo
but which was not visible while you were
positioning the little box.
The two buttons on the left allow you to
minimize the toolbar and position it at the
opposite edge of the screen.
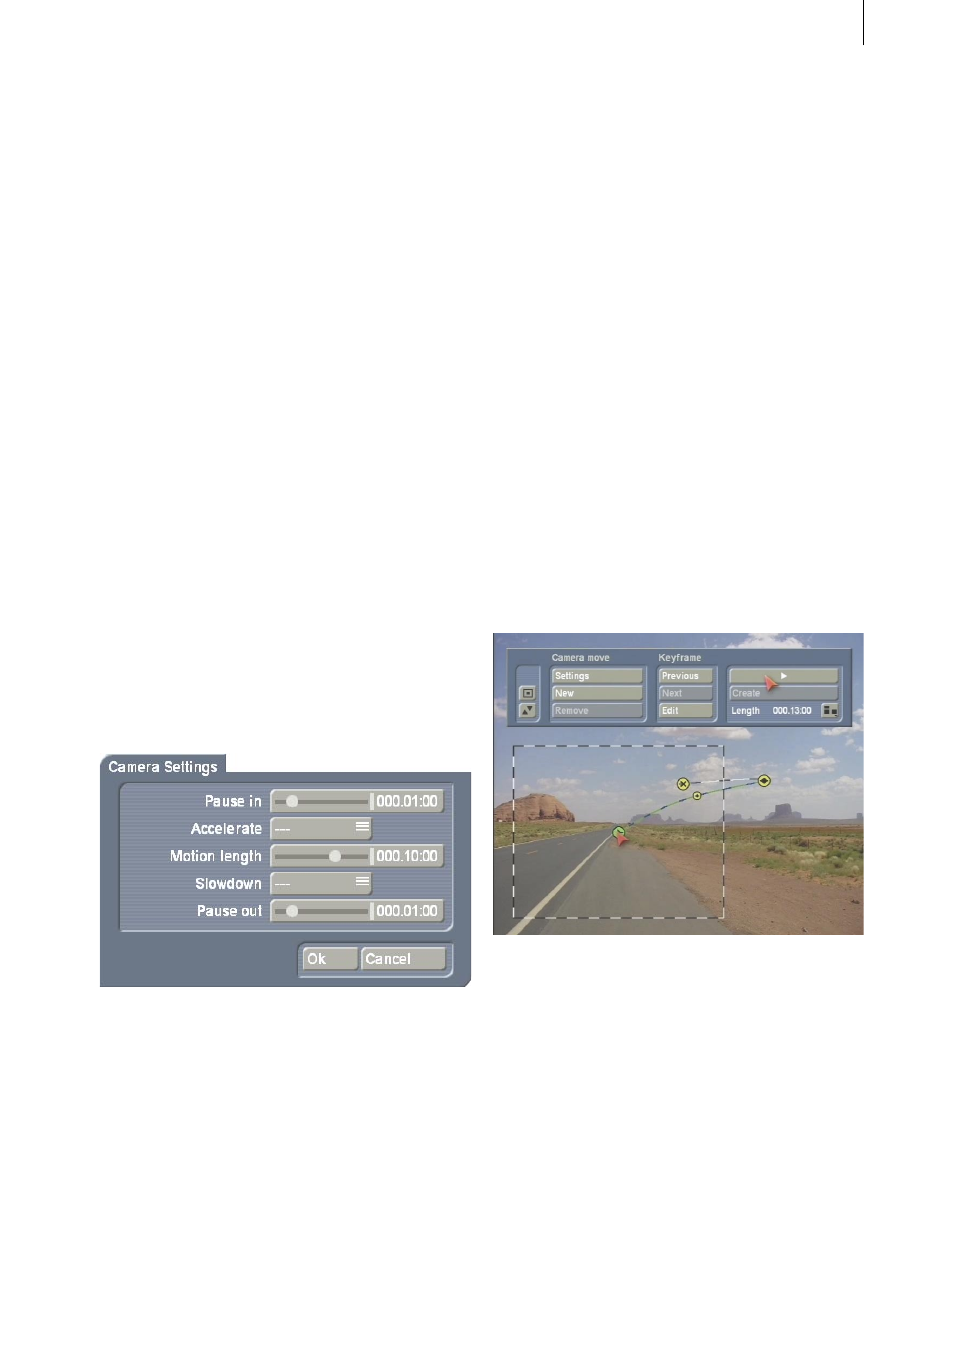
Next, you will also see the Animation section.
- Settings: If you click on this button, a window
opens in which you can make various settings
changes relating to the active (green) section of
the path.
The Pause in and Pause out buttons allow you
set how long the “camera” should remain
stationary over the area of the photo at the
beginning and at end of the active path section.
You can use the Accelerate function to set
how quickly the “camera” accelerates from
a stationary state to its moving state. The
Slowdown function is used to set how quickly
the “camera” decelerates from its moving
state to its stationary state. If you select the ---
function, no setting will be set.
The Motion length button sets how long the
“camera” takes to move along the active path
section from one point to the next.
- New: By clicking on this button, you can place
another waypoint after the path’s finishing point.
The newly added point will be colored green
and the previously active one will turn yellow.
Each additional new waypoint is always inserted
after the currently active waypoint. You will also
notice that the section of the path after the green
waypoint is a green dashed line.
You can keep adding as many waypoints as you
like which you can then reposition by clicking
and moving them.
You will notice that a little box surrounds each
new point whenever it is activated. You can of
course vary the size of the box (zoom factor)
from point to point.
If you have created several paths and you click
on a point, the section of the path starting from
that point will become activated.
- Delete: If you want to delete a point, activate
it and then simply click on this button. You can
also delete a point along the path, the position is
irrelevant. You cannot, however, delete markers
using this button; markers can only be deleted
using the small right or big right trackball
button.
The next section is entitled Keyframe and
comprises the following functions:
- Previous and Next: These two buttons allow
you to move from the currently active point to