89 4. important notices, Operating the program – MacroSystem Photo-Studio 2 User Manual
Page 8
8
9
4. Important notices
• The Photo-Studio 2 software has been
designed for editing images produced by digital
cameras. Limitations might apply if you edit
images from a PC (e.g. the image information or
the file names might not be retained)!
• The system only exports photographs that
comply with the DCF standard.
5. Operating the program
The following gives you a short summary on the
general operation of Photo-Studio 2.
- Mark Photo: To mark a photo, simply click on
it with the big left trackball button. The marked
photo appears inside a white border and all the
other photos in the same directory now appear
with a gray border. Unmarked photos have a
black border.
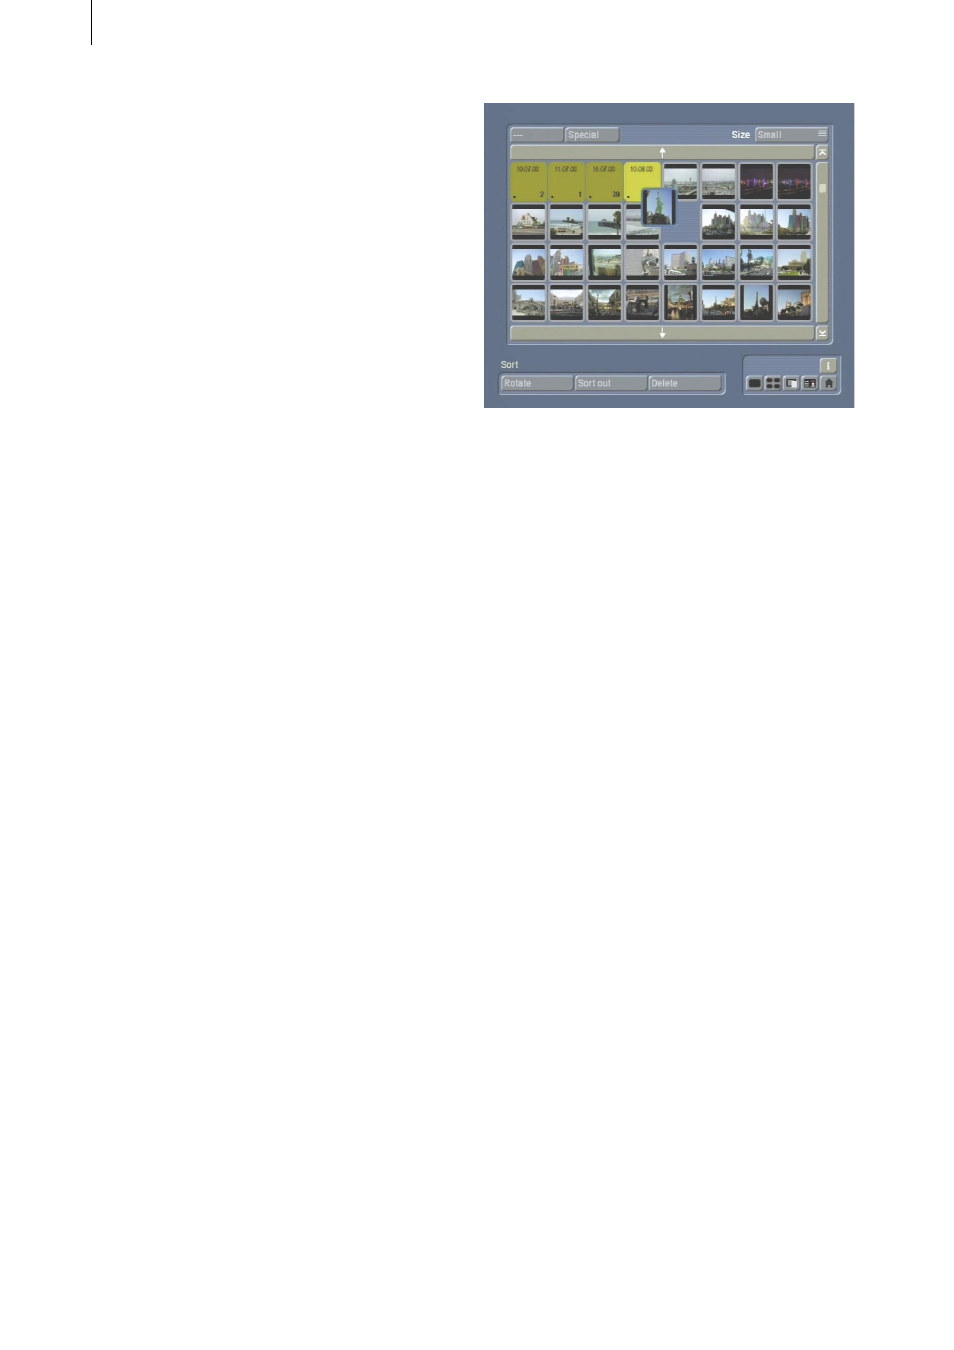
- Sort Photos: This function is available in all
menus containing the photo list. You can also
sort the images in the Import photos menu,
though it only really makes sense to use this
function from the Sort menu onwards.
If you click on an already active photo (white
border) again with the big left trackball button,
you can move it. You can also directly grab non-
activated photos (gray border) using the small
left button, if your traackball is provided with
four buttons. You will then see that it has already
partially left its position in the list and now has a
blue border.
You can now keep rolling the trackball until the
photo has reached the desired position.
If the section of the list that you are looking for is
above or below the displayed list, you can click
on the appropriate arrow to continue scrolling
through the list.
To move the photo into a directory, simply place
it over the desired directory.
Afterwards, click on the big left trackball button
(or small left trackball button) again to insert the
photo at the desired position.
To move a directory, proceed in the same way.
This procedure is similar to the “drag & drop”
method that you might already be familiar with
from using a computer – though with the Photo-
Studio 2, you do not need to hold the button
down while moving the picture.
You can cancel the operation using the big right
trackball button.
- Quit menu: In order to prevent you
inadvertently canceling an operation without
first saving, the system does not allow you to
quit certain submenus using the right trackball
button (e.g. Edit in the Animation and Collage
menus). You must exit these menus using the
menu icons.
5.1 Memory card / CD
Under Memory card / CD, you will see the
Import photos button – clicking on it will cause a
new menu to open.
After you have inserted a CD or memory card
containing photos into the relevant drive, the