MacroSystem Photo-Studio 2 User Manual
Page 28
28
29
6. Special functions
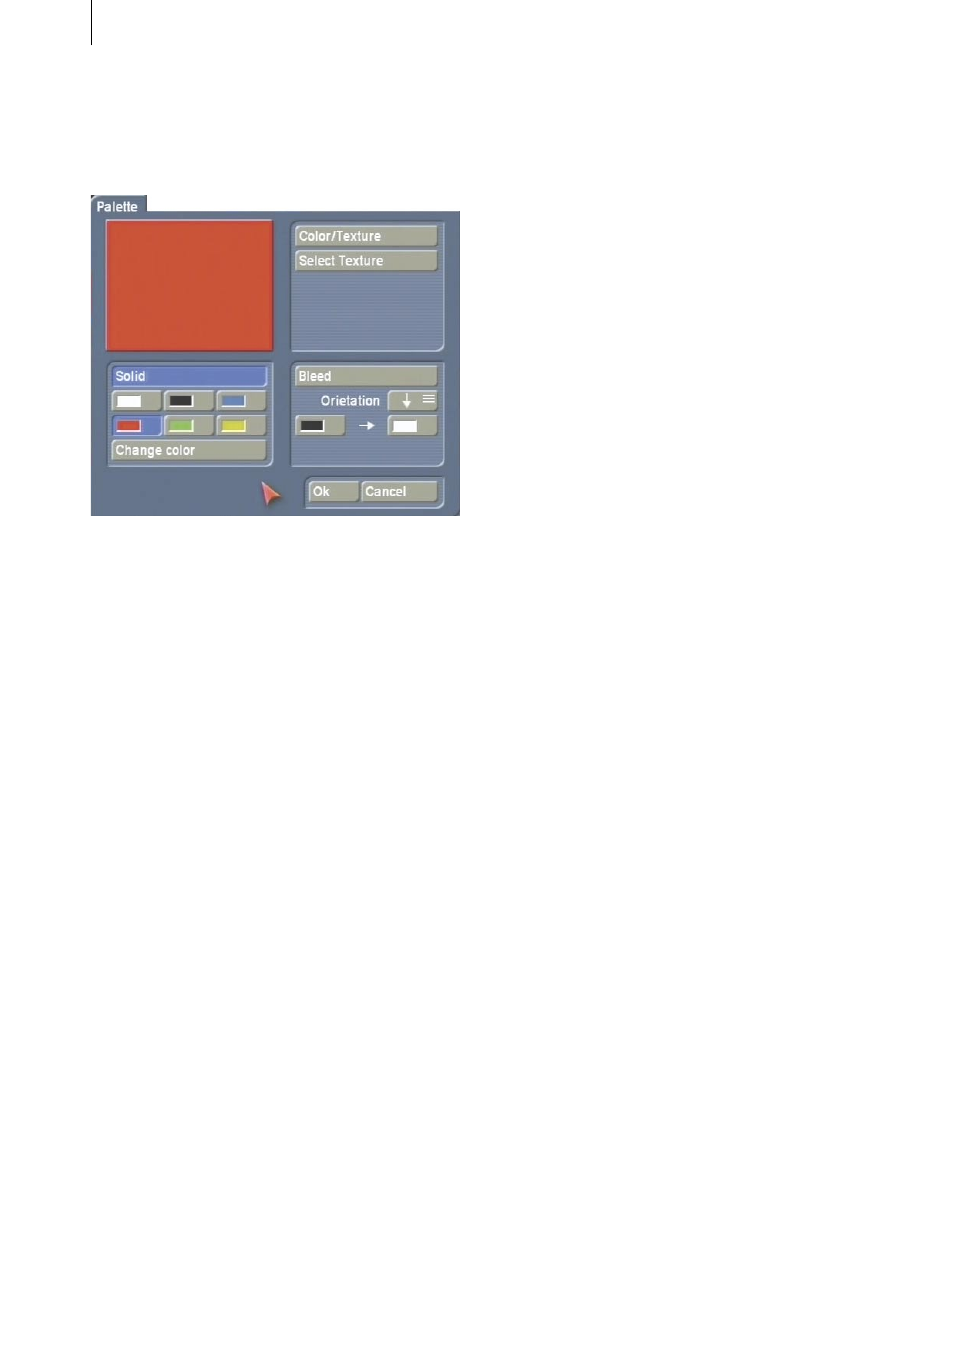
6.1 The Palette window
You see the three areas: Solid, Color/Texture
and Bleed.
You can switch between these functions using
the correspondingly named button in the top
area; the button that is currently activated is
shown blue. Switching between the functions
is also done automatically if a corresponding
button has been selected. The top left preview
window shows the currently selected result.
Under Solid, you can select one of the six
predefined “Color palettes” so that a quick
change between frequently used colors is
possible. With the Change color button, you
can open the color palette (see Red eyes from
the Filter menu) and define a new color. If you
click on Ok in the color palette, the color of the
current color basket is replaced with the one just
defined.
In the Color/Texture area, you can press the
Select Texture button to open the image pool so
that you can select a pattern from it.
Please refer to Chapter 3.2 in the SMART EDIT
manual or chapter 5.3 in the Louvre manual on
how to use the image pool.
Note: If you are running Photo-Studio 2 for the
first time, no pattern has been selected yet.
Therefore, if you click on the Color/Texture
button for the first time in the Palette window
this will directly open the image pool from
where you can select a color or a pattern. Once
you have made this first-time selection, the
Color/Texture button will thereafter open the
Preview window when you press it and not the
image pool. In the Preview window you can then
open the image pool using the Select Texture
button.
Under Bleed you can set a color gradient in a
similar way to selecting a gradient in the image
pool. In addition, you can specify a gradient
direction by clicking on Orientation.
You are free to choose the starting color and end
color as well as the Alpha transparency.
After you have selected a color or a pattern,
close the window by clicking Ok.