MacroSystem Photo-Studio 2 User Manual
Page 21
20
21
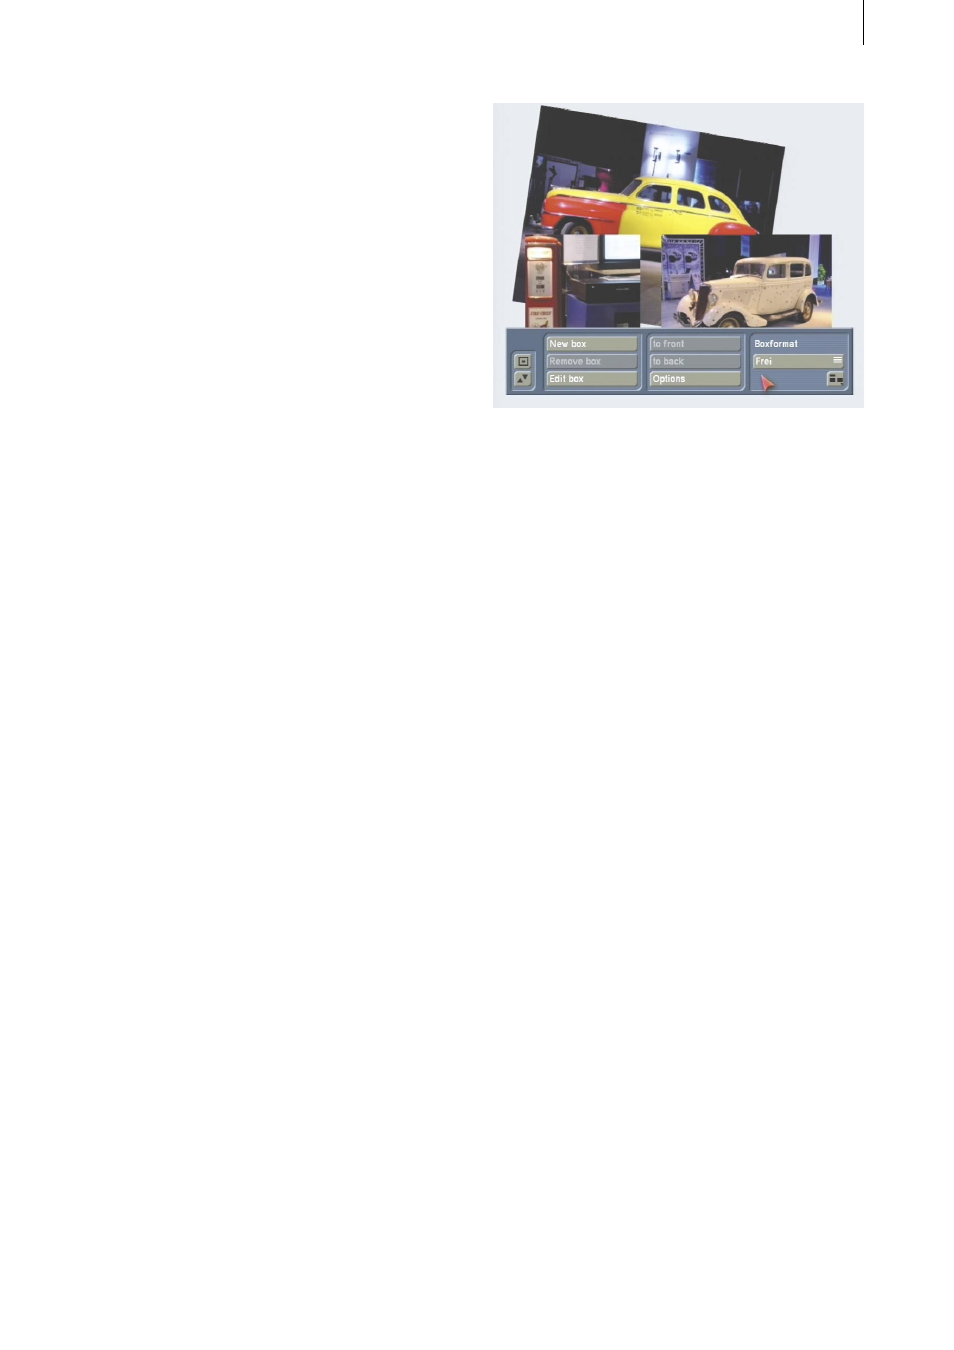
5.3.2 Collage
You can create a collage from several of your
photos using this menu function. If you click on
this button, a new menu opens.
In the top area, you will see the list again and
the Open/Close, Special and Size buttons.
The following buttons are in the lower area:
- New: Clicking on this button opens a new
toolbar; in the background you see an empty
white surface in which you are going to create
the collage. The outside border of the surface
represents the boundary – everything placed
beyond this will not be visible later.
The toolbar buttons are described below. When
we refer to “box” we mean the individual areas
in which the photos or parts thereof can be seen.
- New Box: Click on this button first to open a
window in which you can select a photo from
your list. After confirming with Ok, a cross with
a small box is displayed. Roll the trackball until
the cross (which represents the top left corner of
the image) has reached the desired position and
confirm the selection by clicking the left button.
Now roll the trackball again in order to specify
the size of the box and thus the position of
the bottom right corner, and then confirm this
position. You will now see that the box you have
just drawn is filled with the photo you selected
earlier. If the dimensions of the photo do not
match those of the box, the image is partially
trimmed in order for it to completely fill the box.
You can prevent this from happening using the
Box Format function. Position the photos that
you want to add to the collage in the same way
one at a time.
You can, of course, also reposition the boxes
directly. To do so, activate a box and as soon as
the cursor has changed into a hand, click once
on the left trackball button. Now a cross appears
and you can roll the trackball until the box has
reached the desired position which you confirm
by clicking the left trackball button.
You can, of course, also modify a box afterwards
by clicking directly on the sides or corners.
- Remove box: You can delete photos that you
have already inserted. To do so, click on this
button – the active photo and its associated box
are deleted.
- Edit box: Clicking this function opens a new
toolbar. After you click on Change Photo, the
photo list is displayed from which you can
select the image that you want to appear in the
selected box instead of the previous image.
You can rotate the active image by clicking
on Rotate Box. If you roll the trackball to the
right, the image is rotated clockwise; if you roll
the trackball to the left, the image is rotated
anticlockwise. The angle is displayed at the edge
of the screen.
The size of a box that has already been rotated
cannot be changed. In order to change the size,
you must reset the box to 0
0
.
If you click on Border, a toolbar opens in which
you can adjust the settings for the border. The
Palette window opens when you click on the
framed color palette. This window contains a