Installing the switch in a 19-inch rack, Installation methods – H3C Technologies H3C S5800 Series Switches User Manual
Page 44
34
Installing the switch in a 19-inch rack
Installation methods
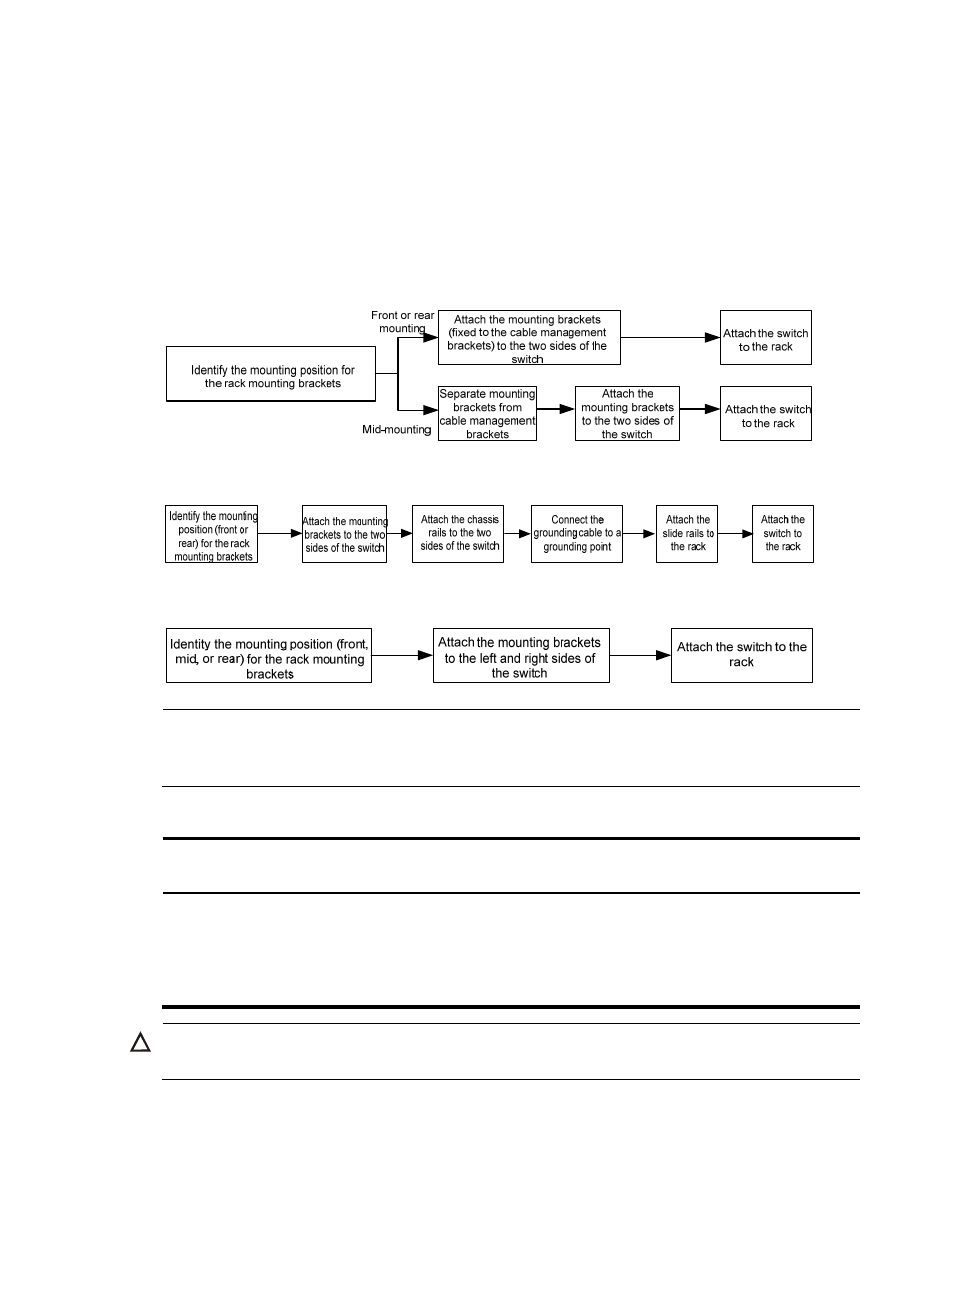
You can install the H3C S5800 Switch Series in a 19-inch rack by using load-bearing mounting brackets,
,
.
Figure 22 Install an S5800-60C-PWR switch in a 19-inch rack
Figure 23 Install an S5800-54S switch in a 19-inch rack
Figure 24 Install other models of the H3C S5800 Switch Series in a 19-inch rack
NOTE:
If a rack shelf is available, you can put the switch on the rack shelf, slide the switch to an appropriate
location, and fix the switch to the rack with mounting brackets.
Table 30 Install an S5800-54S switch in the rack
Mounting bracket position Installing the
mounting brackets
Installing the chassis rails
and slide rails
Installing the
switch
•
Rear mounting (near the
power modules)
•
Front mounting (near the
network ports)
and chassis rails to
the switch chassis
Required.
See "
brackets and chassis rails to the
" and
See "
."
CAUTION:
The depth of the rack for the S5800-54S switch must be 1000 mm (39.37 in).