Removing a fan tray, Installing/removing a power module, Figure 45 – H3C Technologies H3C S5800 Series Switches User Manual
Page 60: Figure 46
50
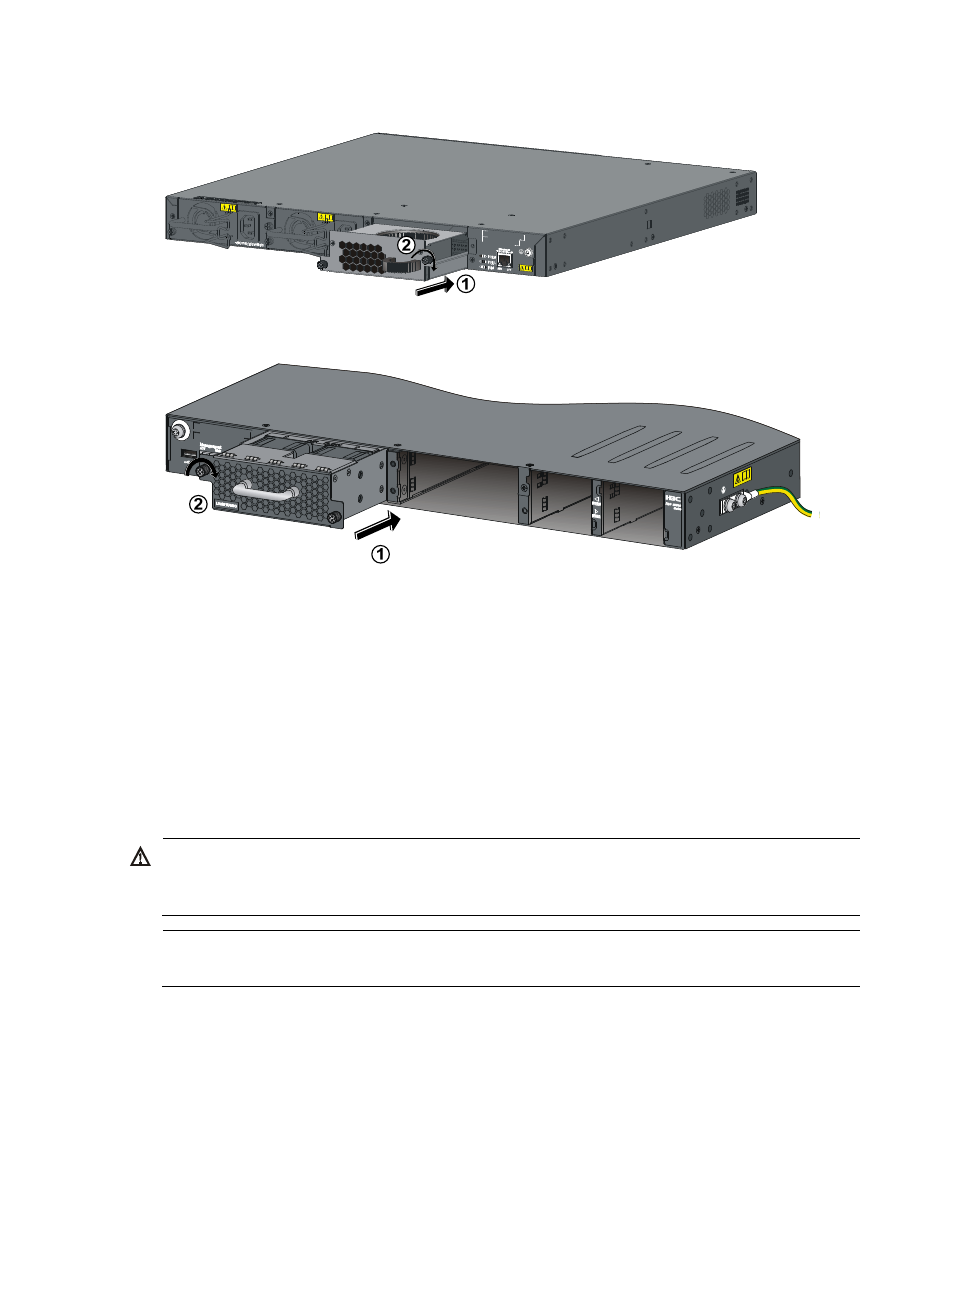
Figure 45 Install an LSW1BFAN fan tray
Figure 46 Install an LSWM1FANSC or LSWM1FANSCB fan tray
Removing a fan tray
1.
Wear an ESD-preventive wrist strap and make sure it makes good skin contact and is well
grounded.
2.
Loosen the captive screw of the fan tray with a Philips screwdriver until it is fully disengaged from
the switch chassis.
3.
Grasp the handle of the fan tray with one hand and pull the fan tray part way out the slot. Support
the fan tray bottom with the other hand, and pull the fan tray slowly along the guide rails out of the
slot.
WARNING!
Take out the fan tray after the fans completely stop rotating. Do not touch the fans even if the fans stop
rotating to avoid affecting fan balance, which might cause loud fan operating noise.
NOTE:
Put the removed fan tray in an antistatic bag.
Installing/Removing a power module
The S5800-60C-PWR and S5800-32F switches come with power module slot 1 empty and power
module slot 2 covered by a filler panel. The S5800-54S switch comes with both power module slots
empty and the power filler modules as accessories. You can install one or two power modules for these
switches as needed. For more information about the power modules available for the switches, see "