Installing an interface card – H3C Technologies H3C S5800 Series Switches User Manual
Page 77
67
Installing an interface card
1.
Wear an ESD-preventive wrist strap, ensure a good skin contact and make sure that the
ESD-preventive wrist strap is correctly grounded.
2.
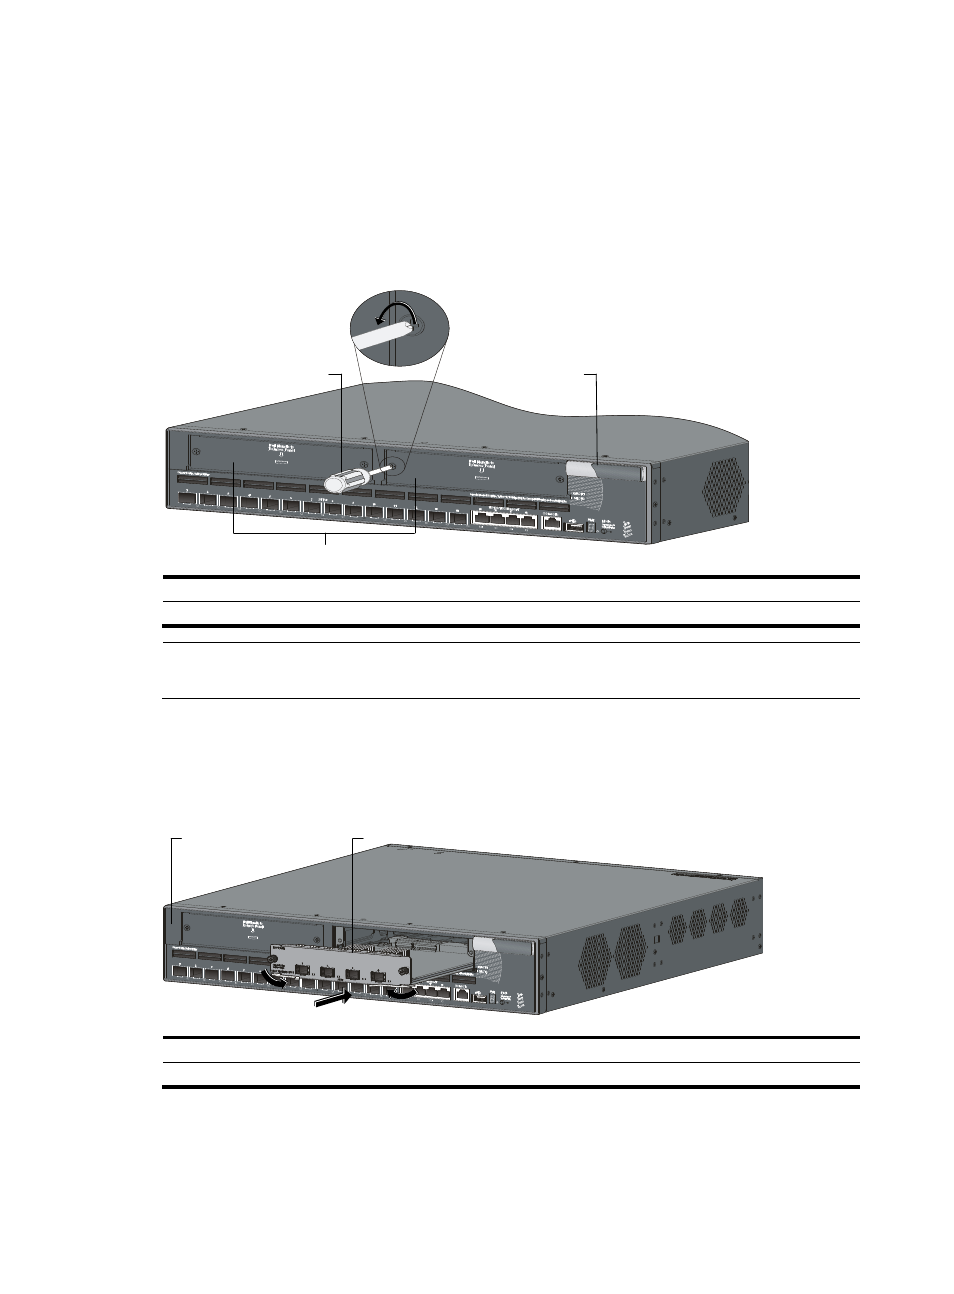
Loosen the mounting screws on the filler panel over the interface card slot at the front panel with a
Phillips screwdriver and remove the filler panel.
Figure 75 Remove the filler panel over an interface card slot
(1) Phillips screwdriver
(2) Chassis front panel
(3) Filler panel
NOTE:
Put away the removed filler panel for future use.
3.
Unpack the interface card. Make sure that the ejector levers are perpendicular to the card panel,
gently push the interface card in along the slot guide rails until the interface card is in close contact
with the switch chassis, and push the ejector levers inward.
Figure 76 Install an interface card
(1) Chassis front panel
(2) Interface card
(3) Push the interface card
(4) Push the ejector levers inward
4.
Tighten the captive screws with a Phillips screwdriver to fix the interface card.
(2)
(1)
(3)
(1)
(2)
(3)
(4)