Attaching the, Mounting brackets to the, Switch chassis (for all s5800 switches except – H3C Technologies H3C S5800 Series Switches User Manual
Page 49: The s5800-54s)
39
Attaching the mounting brackets to the switch chassis (for all
S5800 switches except the S5800-54S)
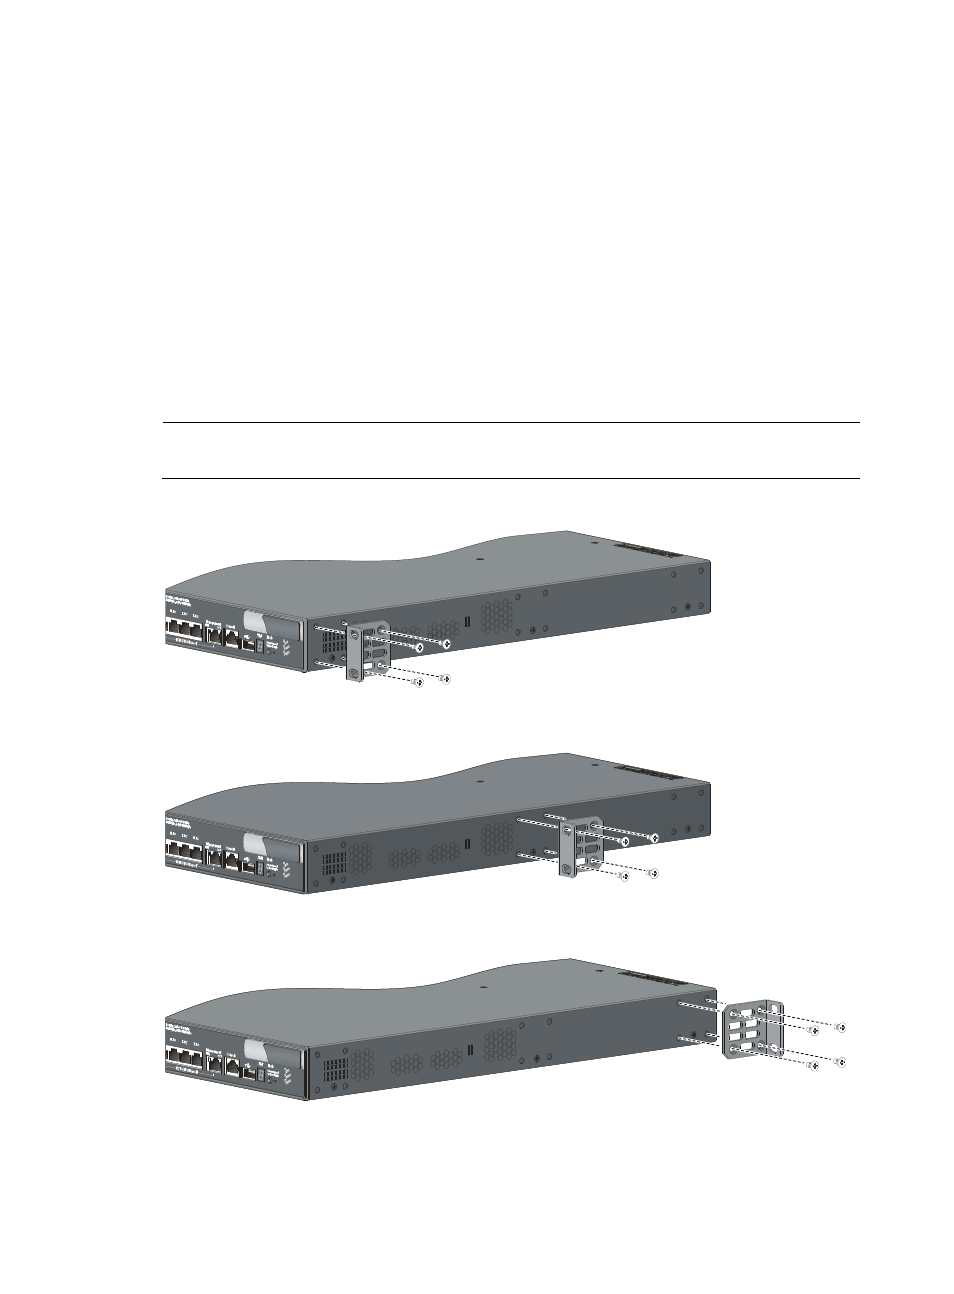
All S5800 switches except the S5800-54S switch provide three mounting positions: one front mounting
position (near the network ports), one mid-mounting position, and one rear mounting position (near the
power modules).
To attach the mounting brackets in one of these positions:
1.
Align the mounting brackets with the screw holes in the front-mounting position (
mid-mounting position (
), or the rear-mounting position (
). These figures show
how to attach a 1U bracket to a 1U switch chassis. For how to install a 2U bracket to a 2U switch
chassis, see
2.
Use M4 screws (supplied with the switch) to fix the mounting brackets to the chassis.
NOTE:
You secure the mounting brackets to both sides of the chassis in the same way.
Figure 31 Attach a 1U mounting bracket in the front mounting position
Figure 32 Attach a 1U mounting bracket in the mid-mounting position
Figure 33 Attach a 1U mounting bracket in the rear mounting position