Using the audio mixer tool, Adjusting audio levels on the timeline, Viewing audio levels on the timeline – Grass Valley Aurora Edit LD v.6.3 User Manual
Page 78
78
Aurora Edit LD User Guide
September 14, 2007
Chapter 8 Audio
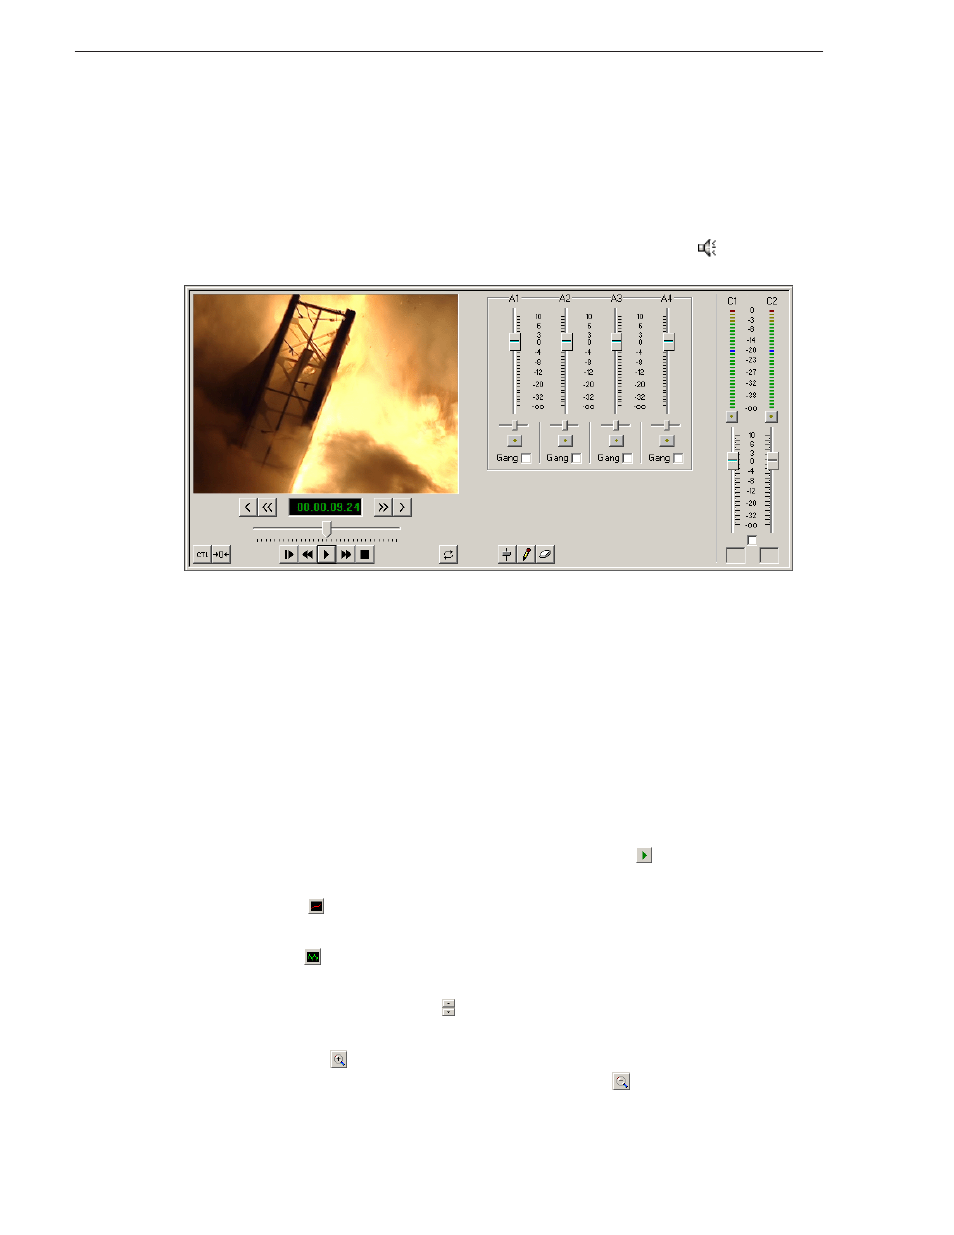
Using the Audio Mixer Tool
Aurora Edit LD allows you to adjust many aspects of the audio tracks in your
sequence. The Audio Mixer Tool adjusts levels and pan for individual edits in a
sequence, for entire clips, or for entire audio tracks.
To select the Audio Mixer Tool, press
6
on your keyboard or click the
Audio Mixer
button in the Timeline Toolbar.
Adjusting Audio Levels on the Timeline
You can adjust the audio levels within a clip by adding and manipulating fade control
points in the Timeline, which is known as rubber banding. You can also view the
audio waveform for a sequence, providing a visual indication of audio levels.
Viewing Audio Levels on the Timeline
You can view audio levels in Aurora Edit LD in different ways:
• In the Audio Mixer Tool, the fade control line is always visible, whether the audio
track is expanded or not.
• In all of the Aurora Edit LD tools:
• You can view audio levels at any time by clicking the
Expand Track
button
next to the audio track you want to view.
• Click
Show Audio Fade Control Points
to show the points anytime the audio
track is expanded.
• Click
Show Audio Waveform
to show the waveform for the sequence in the
expanded track.
• Click the up arrow on the
Change Track Height
button to shrink the track
height or click the down arrow to expand the height of the track.
• Click the
Zoom In Waveform Vertically
button to increase the waveform
amplitude as shown on the audio track or click the
Zoom Out Waveform
Vertically
button to decrease the waveform amplitude.