Before you connect the servo drive to your system, 13 bluac5 s/q hardware manual – Applied Motion BLuAC5-Q User Manual
Page 13
13
BLuAC5 S/Q Hardware manual
920-0049 Rev. C
12/8/2014
You can also connect the drive to the Host computer using only a 2-wire interface. In this case
you must first connect the TX+ to the RX+ and the TX- to the RX- on the servo drives before
connecting to the Host adaptor. Usually RS-485 2-wire interfaces are labeled “A” & “B”.
Getting and Connecting a RS485 2-wire adaptor to your PC
orks well. It comes with every-
thing you need. Connect as follows:
adaptor drive
B
TX+/RX+
A
TX-/RX-
Before you connect the servo drive to your system
With the RS-232 cable connected between your PC and the Servo drive, on your PC, start
the SCL Setup Utility software. Select the proper comm port (1,2,3 or 4) then apply power to
the drive. Press the Caps Lock key. The drives only accept commands in uppercase. Type
RV then press ENTER. If the drive has power and is properly wired, it will respond with
“RV=x”. Where x is the firmware version of your drive. If the drive responds, you’re home
free: the RS485 network is functioning.
Next, you must choose an address for this drive. Any of the “low ASCII” characters (many of
which appear above the number keys on a PC keyboard) is acceptable: ! “ # $ % & ‘ ( ) * + , -
. / 0 1 2 3 4 5 6 7 8 9 : ; < > ? @
To find out what address is in the drive now, type DA then press enter. The drive will respond
with DA=x, where x is the address that was last stored. (For example, the response might
be DA=@ or DA=!). To change the address, type DAy, where y is the new address character,
then press ENTER.
To test the new address, type yRV, then press ENTER. For example, if you set the address to
% and want to test that, type %RV. The drive should respond just as it does to RV, the global
revision level request.
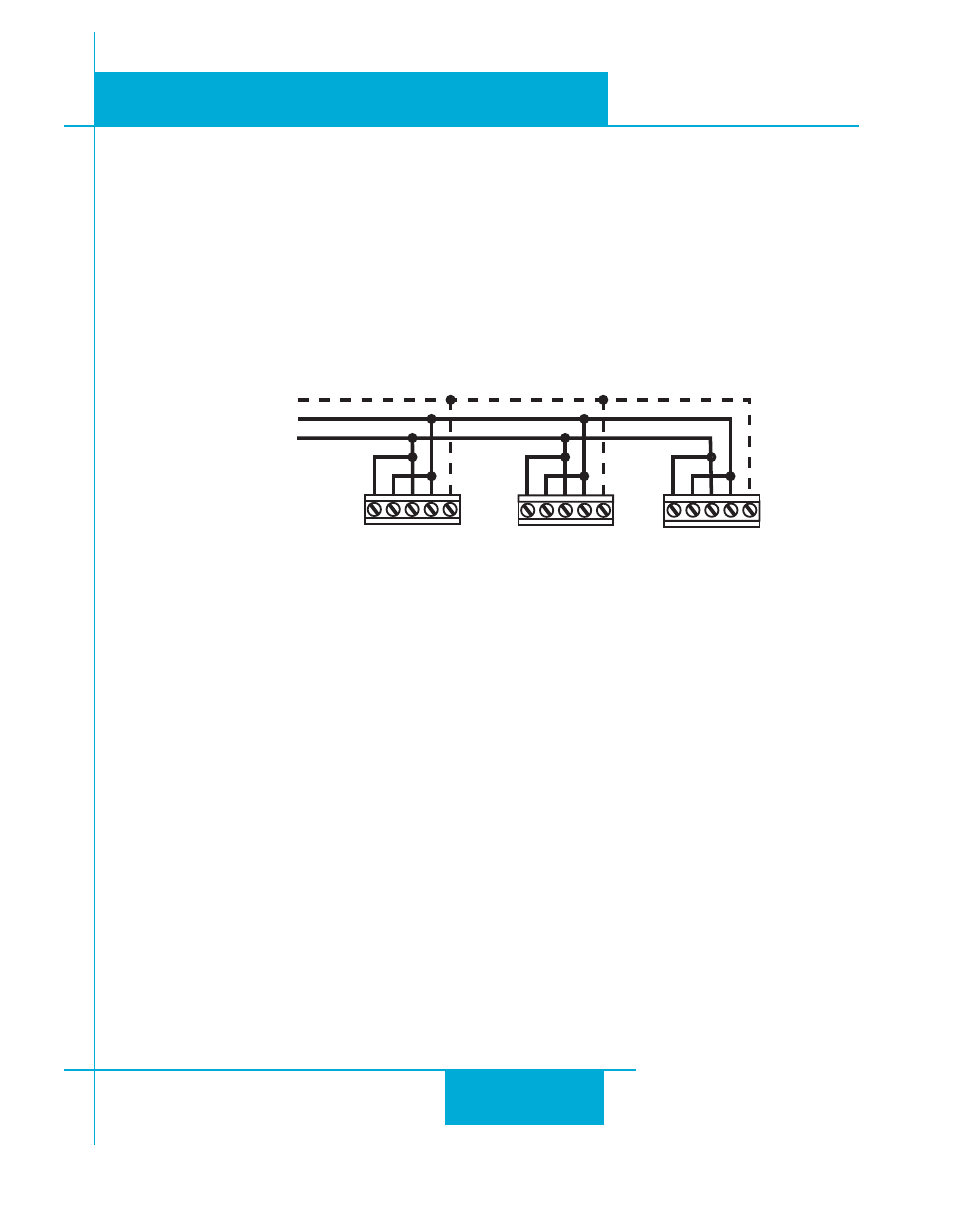
Once all the drives have been assigned unique addresses, you can proceed to wire the whole
system together.
+RX- +TX- GND
+RX- +TX- GND
+RX- +TX- GND
to PC TX+/RX+ or A
to PC TX-/RX- or B
to PC GND
Drive #1
Drive #2
Drive #3