Xtramus NuStreams-P9M V2.1 User Manual
Page 27
27
Task
Get Task
This function allows NuStreams-P9M utility software to access all test settings (Run)
from NuStreams-P9M and show those settings in both Info/Run Select List and
Main Display Window.
Add Task
As mentioned in sections above, each Run can hold up to 4 different Tasks. You can
add new Tasks to each Run with this function. To add a new Task, click the Run you
would like to add the new Task to from Info/Run Select List, then click Task →
Add Task on the Menu Bar.
Delete Task
You can delete an existing Task with this function. To delete an existing task, click
the Task you would like to delete from Info/Run Select List, then click Task →
Delete Task on the Menu Bar.
Apply All
Apply and save all changes you’ve made to NuStreams-P9M.
*
Please note that the connection (of mini-USB cable) between PC and NuStreams- P9M must be connected at
all time while getting/setting tasks.
Log
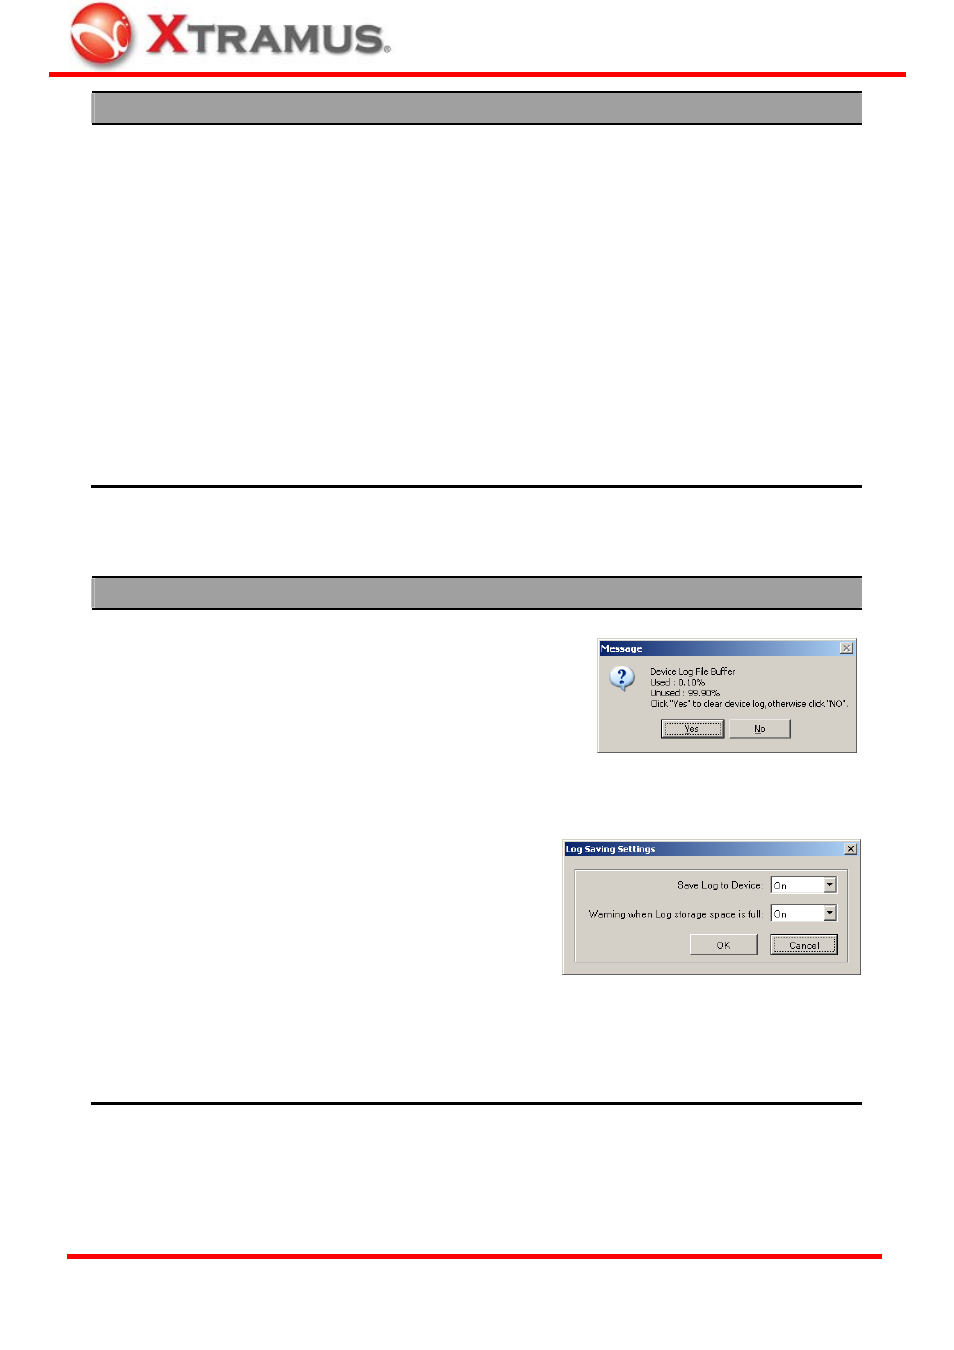
Get Device Log
Accessing test logs from NuStreams-P9M
memory and save these logs to a specific folder
on your PC. After retrieving test logs from
NuStreams-P9M, the log folder will pop up. Also,
a message window contains detail information
about system log file memory buffer will pop up.
Click YES if you want to clear all logs stored in
NuStreams -P9M or click NO to cancel.
Clear Device Log Clear all test logs stored in NuStreams-P9M’s memory.
Log Saving
Settings
Log saving settings can be configured here:
• Save Log to Device: If this function is
ON, NuStreams-P9M will save all test
logs in its log file memory buffer.
• Warning when Log storage space is
full: System will issue a warning if the
log file memory buffer is about to full.
Show Log Folder Show the file folder where test logs are stored.
Set Log Folder
Change where you would like to save test logs retrieved from NuStreams-P9M. You can
create new folders for log-saving as well.
XTRAMUS TECHNOLOGIES
®
E-mail: [email protected]
Website: www.Xtramus.com