Xtramus NuStreams-P9M V2.1 User Manual
Page 30
30
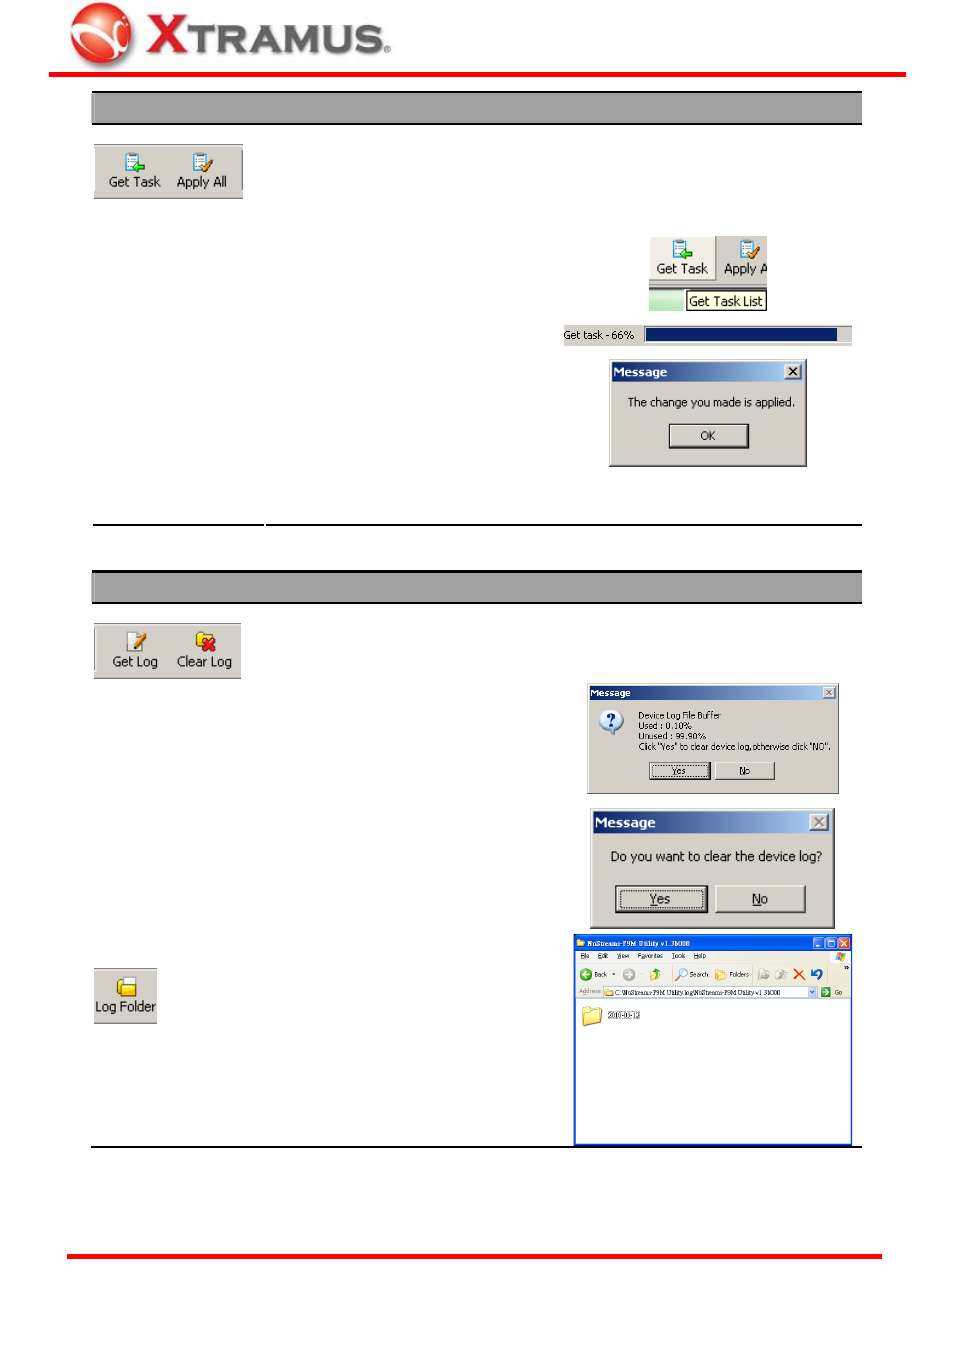
Get Task/Apply All
By clicking Get Task button, you can load test settings from NuStreams-P9M,
display all settings in Info/Run Select List and Main Display Window.
On the other hand, Apply All button allows you to apply all the changes you’ve
made to all Runs and save these settings to your NuStreams-P9M.
To load test settings from NuStreams-
P9M, click “Get Task” button. Settings
will be displayed in Info/Run Select
List and Main Display Window.
To apply all the changes you’ve made
with the utility software and save these
settings to NuStreams-P9M, click
“Apply All”.
Get Task/Apply All
Please note that the connection (of mini-USB cable) between PC and NuStreams-
P9M must be connected at all time while getting/setting tasks.
Get Log/Clear Log/Log Folder
Get Log and Clear Log buttons allow you to obtain test logs from NuStreams-P9M
or clear all test logs stored in NuStreams-P9M, just like the “Get Device Log” and
“Clear Device Log” on the Menu Bar.
To get all test logs from NuStreams- P9M,
click “Get Log” button. A window with
NuStreams-P9M log memory space and
log folder screen will pop up. Click Yes to
clear all test logs in NuStreams-P9M, or
click No to leave these test logs be.
Get Log/Clear Log
To clear all test logs stored in NuStreams
-P9M’s log memory, click “Clear Log”
button, and click Yes.
Log Folder
Click “Log Folder” button to open the
folder where all test logs are stored on
your PC. All log folders are named with
the test date, and all logs are named with
the test date and time.
XTRAMUS TECHNOLOGIES
®
E-mail: [email protected]
Website: www.Xtramus.com