Creating fill/stamp stitch pattern 2 – Baby Lock Palette 10 (ECS10) Instruction Manual User Manual
Page 263
262
Pr
o
g
ra
mmab
le
S
tit
ch
C
rea
to
r
Creating Fill/Stamp Stitch Pattern
2
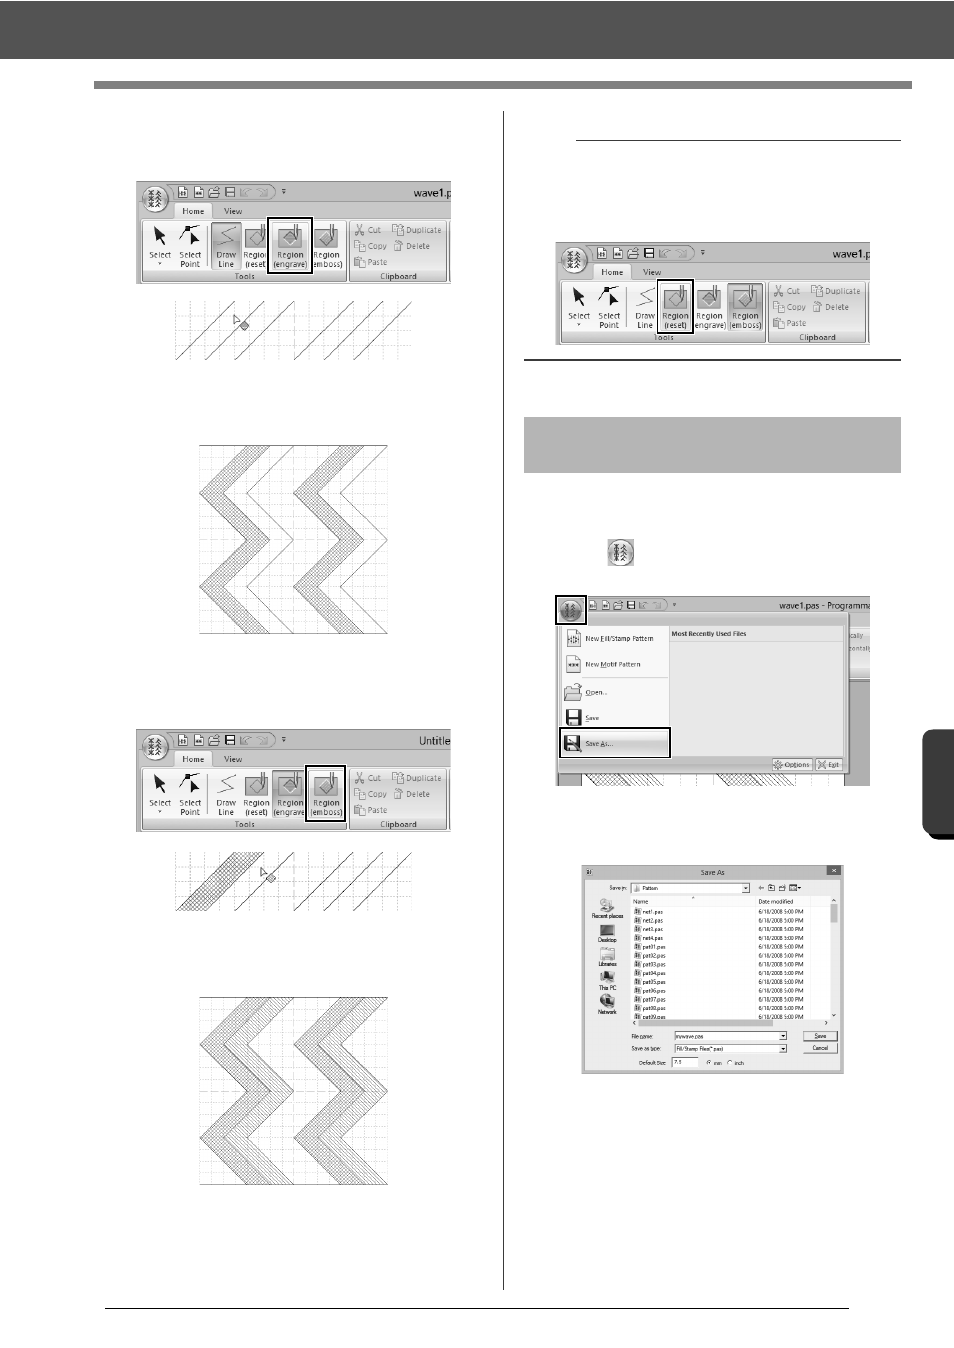
Click [Region (engrave)] in the [Tools]
group, and then click the first and fourth wave
regions.
These regions appear in red and will be
sewn with short stitches to give the effect of
engraving.
3
Click [Region (emboss)] in the [Tools]
group, and then click the second and fifth
wave regions.
This region appears in blue and will be
sewn with no dropped stitches to give the
effect of embossing.
Fill/stamp stitch patterns are saved in the .pas
format.
1
Click
, and then select [Save As] from the
command list.
2
Select the drive and the folder, and then type
in the file name.
When saving a fill/stamp pattern, specify the
size beside [Default Size]. Click [mm] or
[inch] to select the measurement units.
3
Click [Save].
b
To remove the embossing/engraving effect, use
the [Region (reset)] tool. Click [Region (reset)] in
the [Tools] group, and then click a region with an
effect applied.
Step 4
Saving the edited fill/
stamp stitch pattern