Installation of arrangement db, Installation of hinged weatherhood, Install curb – Greenheck IGK (472084) User Manual
Page 4: Apply sealant, Install unit, Install ductwork
4
Model IGK Make-Up Air
®
Installation of Arrangement DB
1. Install Curb
Position curb on the roof (reference the CAPS
submittal for placement of curb
in relation to the unit).
Attach curb to
roof and flash into
place.
3. Apply Sealant
Apply an appropriate sealant around the perimeter of
the curb and duct adapter(s) to isolate fan vibration
and prevent water penetration. Use screws to fasten
the unit to the curb/equipment support(s).
4. Install Unit
Use a crane and a set of
spreader bars
hooked to the
factory lifting lugs
to lift and center
the unit on the
curb/equipment
support(s).
Use self-tapping
sheet metal
screws to fasten
the unit to the
curb/equipment
support(s).
2. Install Ductwork
Good duct practices should be followed for all
ductwork. All ductwork should be installed in
accordance with
SMACNA and
AMCA guidelines,
NFPA 96 and
all local codes.
Reference the
CAPS submittal
for ductwork sizes.
Supply Air Ductwork
(Arrangement DB only)
Ductwork
NOTE
The use of a duct adapter is recommended on a
downblast (DB) arrangement to align the ductwork
with the supply unit. The duct adapter is a guide and
is not intended to support for the ductwork.
NOTE
The use of all lifting lugs and a set of spreader bars
is mandatory when lifting the unit.
Setting Unit
Metal Cover
Equipment
Support
Roof Curb
Roof Curb
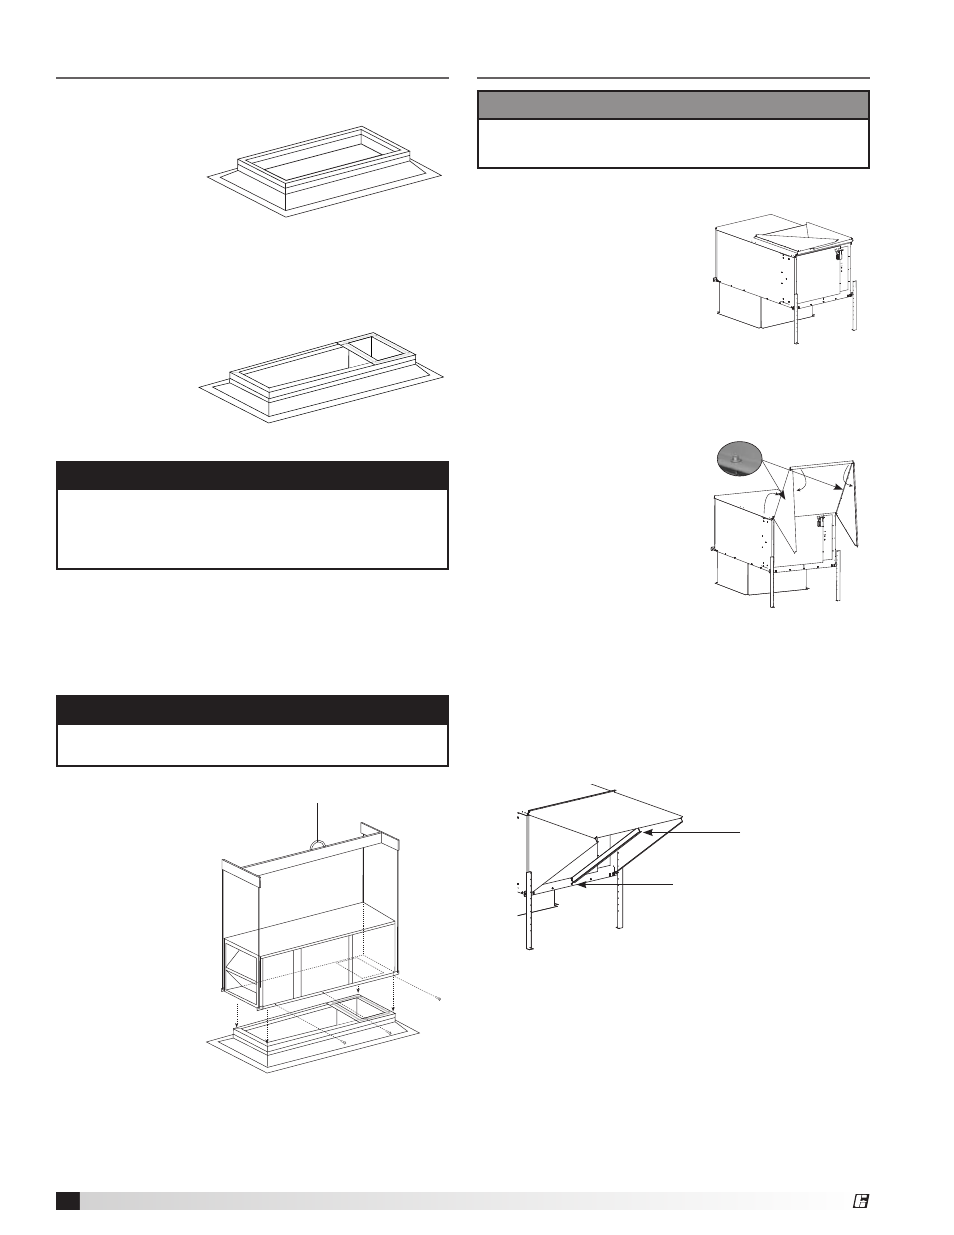
Installation of Hinged Weatherhood
TOOLS REQUIRED
• 5/16-inch nut runner
• Caulk gun with weatherproof sealant
The IGK weatherhood is folded-up and shipped on top
of the unit:
To install:
1. Remove the center filter
tracks (2 pieces) attached
to the weatherhood.
2. Rotate one side up on
weatherhood.
a. Run sheet metal screw where shown to hold
side in rotated position. Pilot holes are provided.
b. Rotate opposite side up on weatherhood and
repeat step 2A.
3. Rotate assembly forward.
4. Screw the sides of the
weatherhood to the unit.
Pilot holes are provided.
5. Caulk all seams with an
appropriate weatherproof
sealant.
6. Install the two center filter
tracks which were shipped
inside the unit, attached to
the weatherhood.
a. Slide the tabbed end of each track into the slot
at the bottom of the intake opening on the unit
housing.
b. Rotate the tracks up to the top outer edge of the
weatherhood such that the weatherhood edge
slides into the slot in the tracks.
7. Insert the factory provided aluminum mesh intake
filter(s) into the track located in the face of the
weatherhood. Filters slide in from the top. Be
sure the filters are properly orientated (an airflow
direction arrow is located on the side of the filters).
Insert the retaining screws on the sides of the
weatherhood, two (2) per side, to keep the filters in
place.
Rotate sides up, install screws.
Rotate Assembly forward.
Refer to Step 4.
Center filter track.
(2 pieces)
Slot in unit.