Step five – merge & save – Honestech VHS to DVD 4.0 Deluxe User Manual
Page 38
38. honestech
™
Step Five
– Merge & Save
When you are finished editing and customizing your video, you can select the first segment or
frame in the Storyboard panel and click „Play‟ in the Preview Panel to review the entire
contents of the Storyboard.
If you are satisfied with your movie, you can apply changes (editing), combine all clips and
transitions in the Storyboard, and save as one new video clip to the Clip Panel, by clicking the
Merge and Save button at the bottom of the Preview Panel.
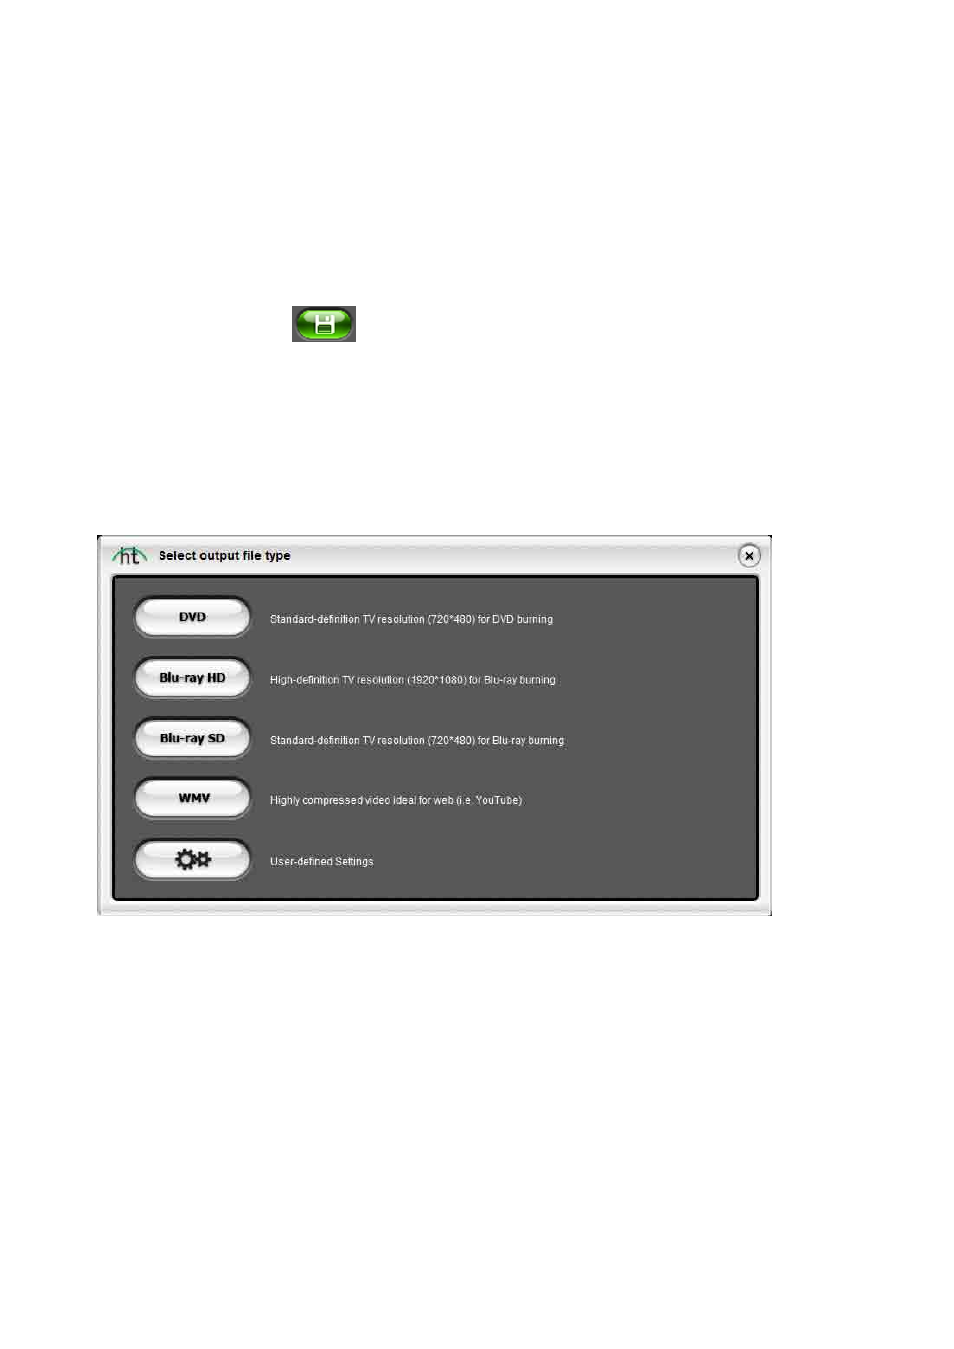
After clicking the Merge and Save button, you will be prompted to choose an output file type
that matches the disc type you will be burning to, or that meets the file requirements for
watching on your computer or uploading to the internet. *Typically you will want to remain with
the same disc format option you chose in the Capture screen prior to recording. For most, you
would select DVD or Blu-Ray HD/SD, however, for more advanced needs, you can select the
User-defined Settings option to customize your own output file.
When prompted, provide a descriptive project name that matches your movie and save to a
familiar location on your hard drive.
*Your project will be saved as a video file, compatible with the type of disc or file option you
selected.
The Storyboard contents will appear as one new video thumbnail in the Clip panel when the
program finishes merging and saving.