Step three – add clips, Step four – customize menu (optional) – Honestech VHS to DVD 4.0 Deluxe User Manual
Page 43
43.
VHS to DVD™ 4.0 Deluxe
Step Three
– Add Clips
Drag the video clips you want to burn from the Clip Panel and drop them in the Disc Menu
Screen. A sample disc menu will appear after adding a clip, providing a preview to your disc
menu. *Make sure the clips you add do not exceed the available disc space listed in the top
right corner of the Burning Status Display.
**To remove a clip from the Disc Menu Screen, click on the clip to highlight it, then right click
and select delete from the pop-up menu.
Tip: To turn off the disc menu, click the Settings button at the bottom of the Burn
screen and uncheck the ‘Create Menu’ option.
Step Four
– Customize Menu (optional)
Use the following features to create and customize menus for your discs. A disc menu
functions as a visual table of contents, providing the option for selective viewing.
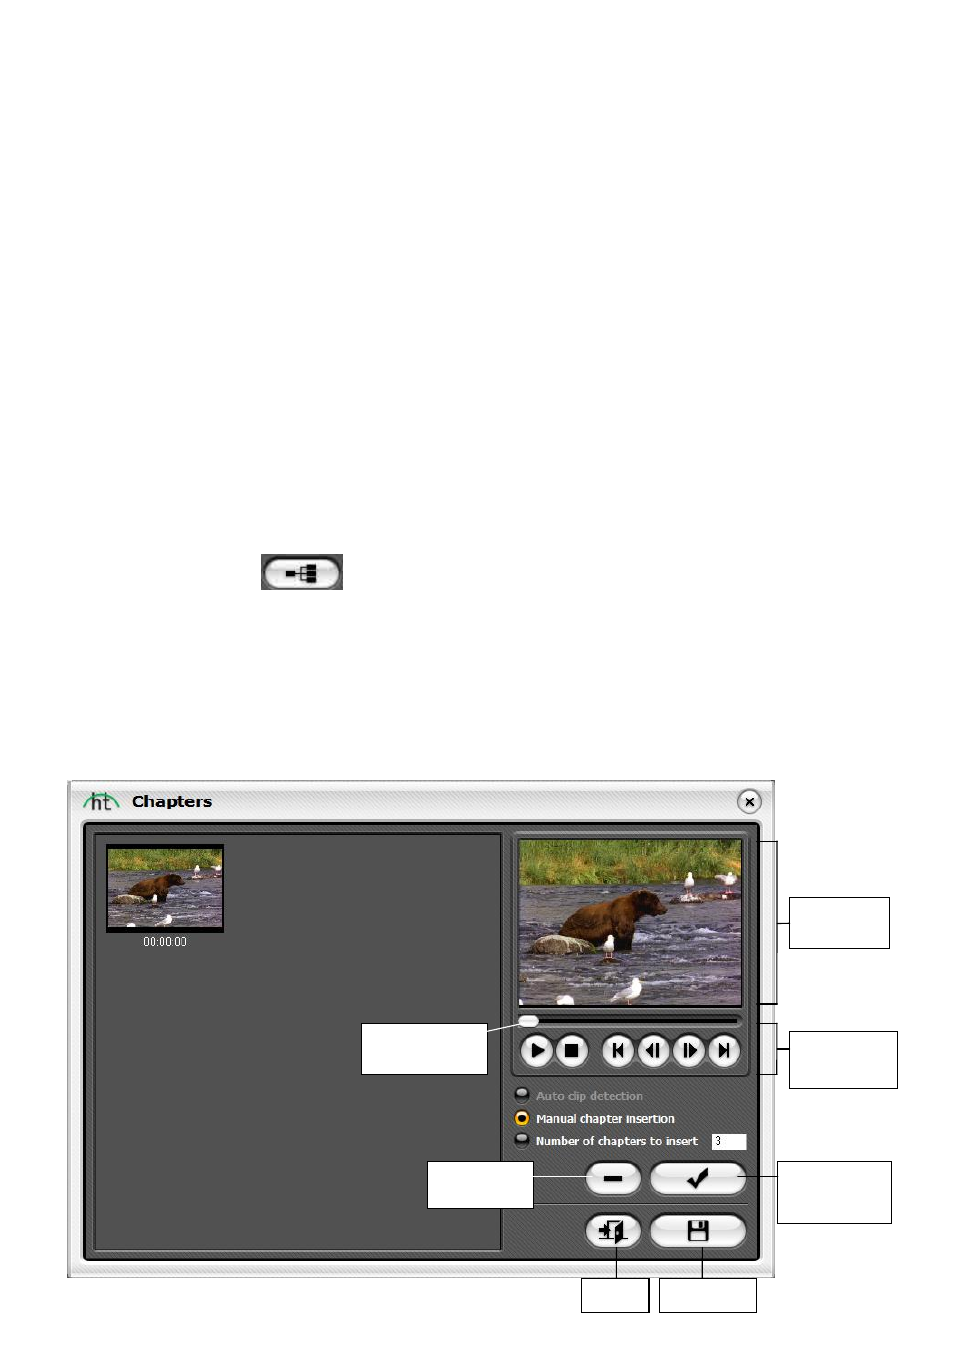
Chapters
– Use the Chapter button to add chapter points to clips in the Disc Menu
Screen. To add chapter points, first select a clip in the Disc Menu Screen and then click the
Chapter button. A chapter screen will open, allowing you to add chapter points for your clip
manually, or auto space them based on the number or chapters you require.
Tip: Chapter Points are invisible markers imbedded within the video that allow you
to skip forward or back using the skip or jump buttons on your DVD player. You can
make the chapter points visible for selection (like traditional DVD chapter menus),
by enabling the option for Chapter menu in the Settings section.
Transport
Controls
Preview
Panel
Remove
Chapter
Playhead
Marker
Add
Chapter
Exit
mov
e
Cha
Save