Removing the pressed object / finishing – Ivoclar Vivadent IPS Eris for E2 User Manual
Page 35
35
Subsequently, identify the reaction layer from the pressed object using the Invex liquid in the ultrasonic unit
for 10–30 minutes (place the object in a plastic cup). Next, thoroughly rinse the object with running
water and blow it dry. Carefully remove the (white) reaction layer with Special Jet Medium
(Al
2
O
3
= Type 100 microns) at 1 bar (15 psi) pressure.
Warnings:
– The Invex liquid contains < 1 % hydrofluoric acid.
– Invex liquid is harmful when inhaled, swallowed, and
when in contact with the skin. Furthermore, it is
corrosive.
– Keep the container tightly sealed and store it in a well-
ventilated place (acid cabinet).
– If the material comes into contact with the eyes,
immediately rinse with copious amounts of water and
see a physician immediately.
– If the material comes into contact with the skin,
immediately clear with soap and copious amounts of
water.
– Use suitable protective clothing, gloves, and goggles
when working.
– In case of an accident or physical discomfort, see a
physician immediately (bring the Invex label, if possible).
Always use glass beads (Ivoclar Vivadent) to divest
ceramic restorations (rough and fine divestment).
Removal of the reaction layer: Identify the reaction layer
with Invex liquid from the pressed IPS Empress 2 frame-
works. Immerse the object in Invex liquid for max. 30 min.
Thoroughly rinse the object with water and blast
it with Al
2
O
3
(Type 100 microns) at 1 bar (15 psi) pressure.
Make sure to remove the reaction layer completely from all
inner surfaces and all external surfaces (repeat this
procedure as necessary).
If the reaction layer is not completely removed, bubbles
may form, which subsequently may lead to bonding
problems and cracks in the layering ceramic.
Replace the Invex liquid after 20 applications or after
sedimentation of the liquid.
Excessive grinding results in local overheating of
the ceramic framework and may lead to microcrack
formation.
Therefore, keep grinding to a minimum.
Do not press the anatomical wax-up and subsequently redu-
ce by grinding.
Make sure that a material thickness of at least
0.8 mm is maintained throughout the object.
Never prepare any area that is less than 0.8 mm
thick.
Avoid excessive heat development during grinding to
prevent microcracks from occurring. Therefore, provide
ample water cooling during removal of the sprues (use a
sponge, as depicted above).
It is strongly advised that rotary instruments not be used to
clean the framework. Only blast with Al
2
O
3
(Type 100
microns), using light pressure (1 bar/15 psi). If, however,
grinding must be done, i.e. contact areas, margins, etc., only
fine diamonds at low speed with light pressure and water-
cooling should be used.
Do not 'post-separate' the framework with separating disks.
This may result in undesired predetermined breaking points,
which will subsequently compromise the stability of the all-
ceramic restoration.
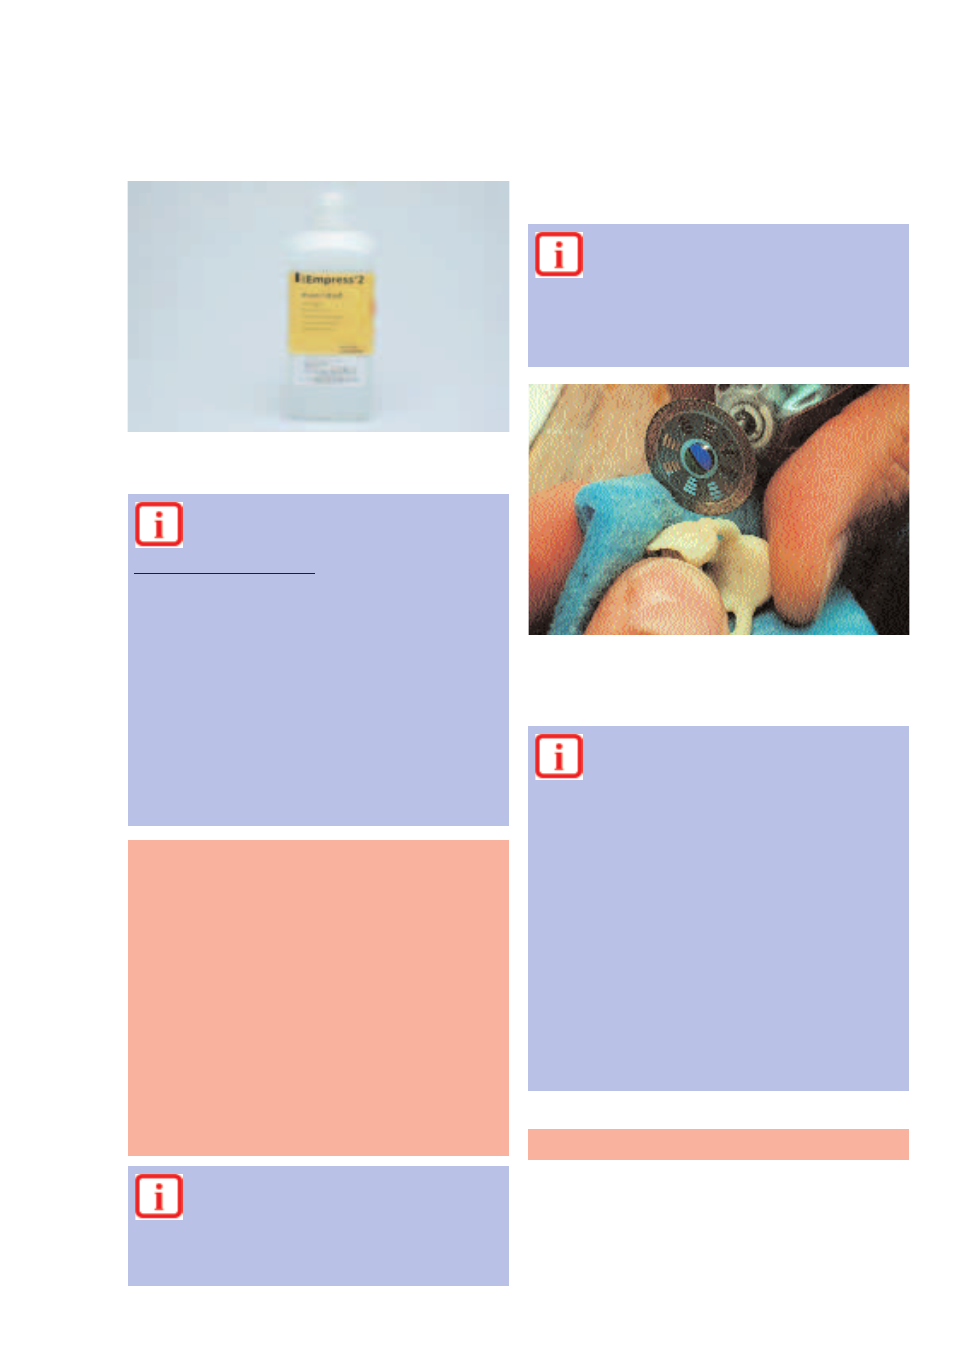
Use a fine diamond disk to cut the sprues. Guide the diamond disk through a wet sponge during cutting to
ensure permanent wetting of the area to be ground. In this way, overheating of the ceramic framework is
avoided. Use ceramic burs to process the attachment points of the sprues.
Avoid the inhalation of grinding dust.
Removing the pressed object / finishing
Disposal:
Carefully neutralize the diluted solution by adding
lime or baking soda (sodium carbonate, Na
2
CO
3
)
and letting it react for 5 minutes. After the reaction time,
pour the neutralized solution into the sink, flushing it with
running water.