LSC Lighting EKO User Manual
Page 28
Menus
EKO Dimmer
Operator Manual V2.3
Page 24
LSC Lighting Systems (Aust) Pty. Ltd
channels are under “DMXMEM Switch”
control. In the example above it is channels
11 through 14.
7.3.6.1 “DMX CONTROL” CONNECT
LOSS ACTION AND BACKUP MEMORY
In the event that the DMX input signal is lost, the
DMX controlled channels in the EKO can be
configured to respond in different ways.
The EKO can either HOLD the last valid DMX
levels indefinitely or, after a programmable
(hold) time, it can crossfade (Xfade) to a
“Backup Memory” stored in the EKO.
When DMX is restored, the EKO will
immediately crossfade (in the Xfade time) back
to the DMX signal.
Pressing [Hold Time] brings up a keypad screen
where you can enter a DMX hold time from 0 to
300 seconds (5 minutes) or you can select an
[Infinite] DMX hold time. After making your
selection press [Set].
If a “Hold Time” other than “Infinite” has been
set, pressing [Xfade Time] allows you to enter a
time from 0 to 300 seconds (5 minutes) in which
the DMX channels will crossfade to the “Backup
Memory” (and back to DMX when it is restored).
Pressing; [Backup Memory] instantly replaces
the current output of all dimmer channels with
the contents of the Backup Memory. This is
irrespective of the “Control Source” settings for
the dimmer channels. The “Backup Memory”
screen allows you to either create your own
memory using the controls on the screen or take
a “snap” (copy) of the current DMX input signal
by pressing [Snap DMX].
If you press [Snap DMX] you must then choose
to take a snapshot of either “All” DMX channels
or only “Selected” channels. See below for
details on how to select channels.
After taking a snap you can still use the controls
on the screen to edit the “snapped” channel
levels as described below.
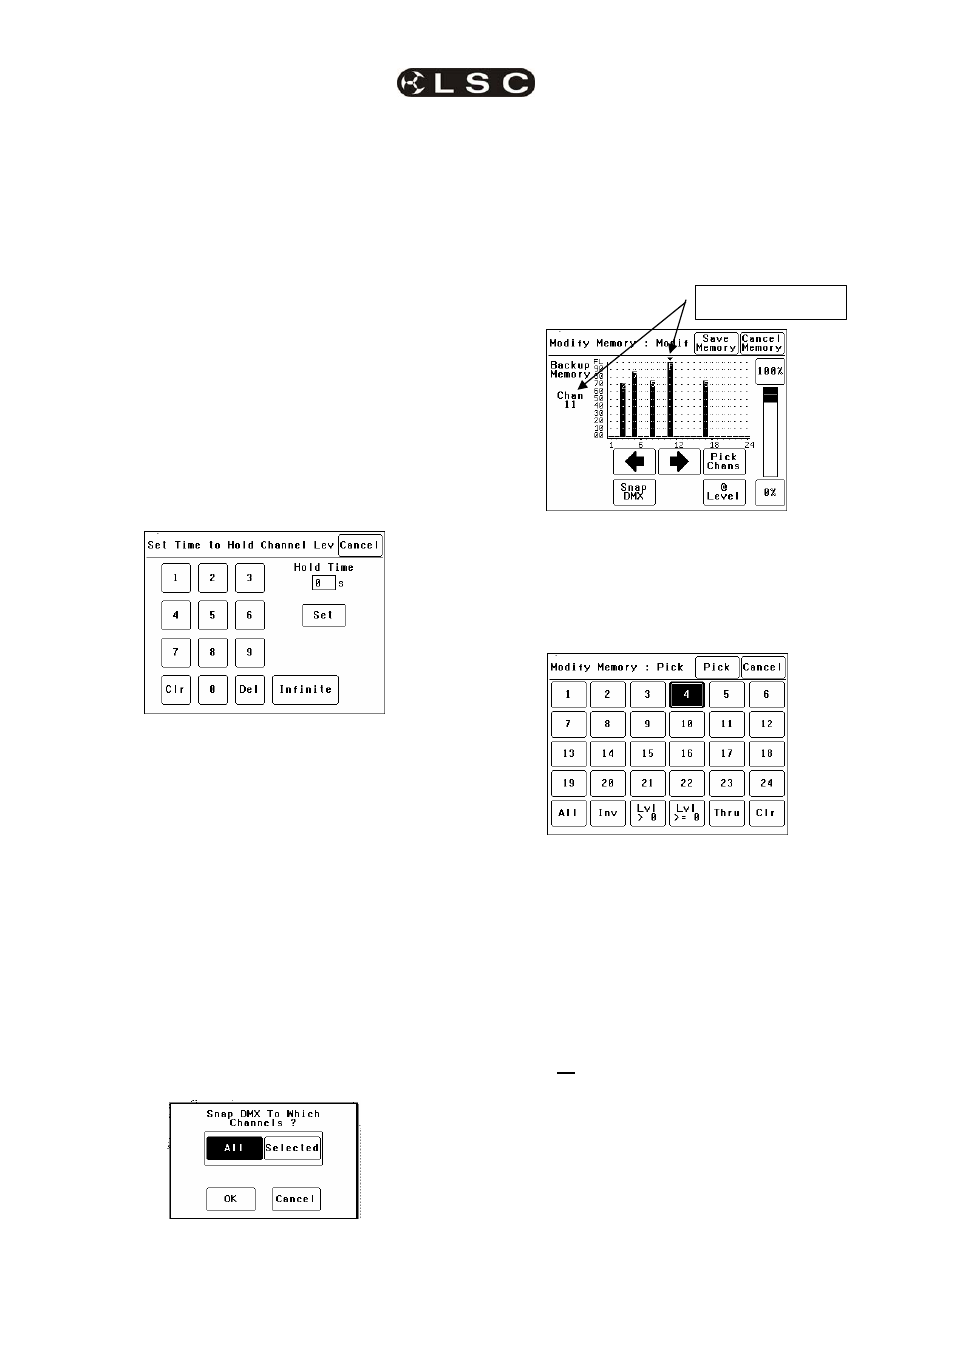
To set the level of a channel(s) it must be
selected. The selected channel(s) are indicated
by a small triangle (b) at the top of the screen
above the channel bargraph and are also listed
on the left of the screen. In the example below,
channel 11 is selected.
There are two ways to select channels:
• Press
[W] or [X] to step the small
triangle (b) through the channels.
• Press
[Pick Chans] to reveal the
channel pick screen.
To select a channel, press that channel number.
Selected channels have white text on a black
background.
You can add further channels to your selection
by pressing their channel numbers.
To deselect a channel, press it again.
To select a range of channels, press a channel,
then [Thru] then another channel.
To invert your selection(s) press [Inv]
To select all channels whose level is greater
than zero press [Lvl>0].
To clear all selections, press [Clr].
When the required selections have been made
press [Pick] and the screen returns to the
“Modify Memory” screen.
When a channel(s) is selected it can be faded
up or down by sliding your finger on the virtual
fader.
To instantly set the fader to 0% press the [0%]
button below the fader.
Selected Channel