Exhaust venting – outdoor units, Electrical installation – Nortec GS Series User Manual
Page 35
GS Series Installation | 32
Exhaust Venting – Outdoor Units
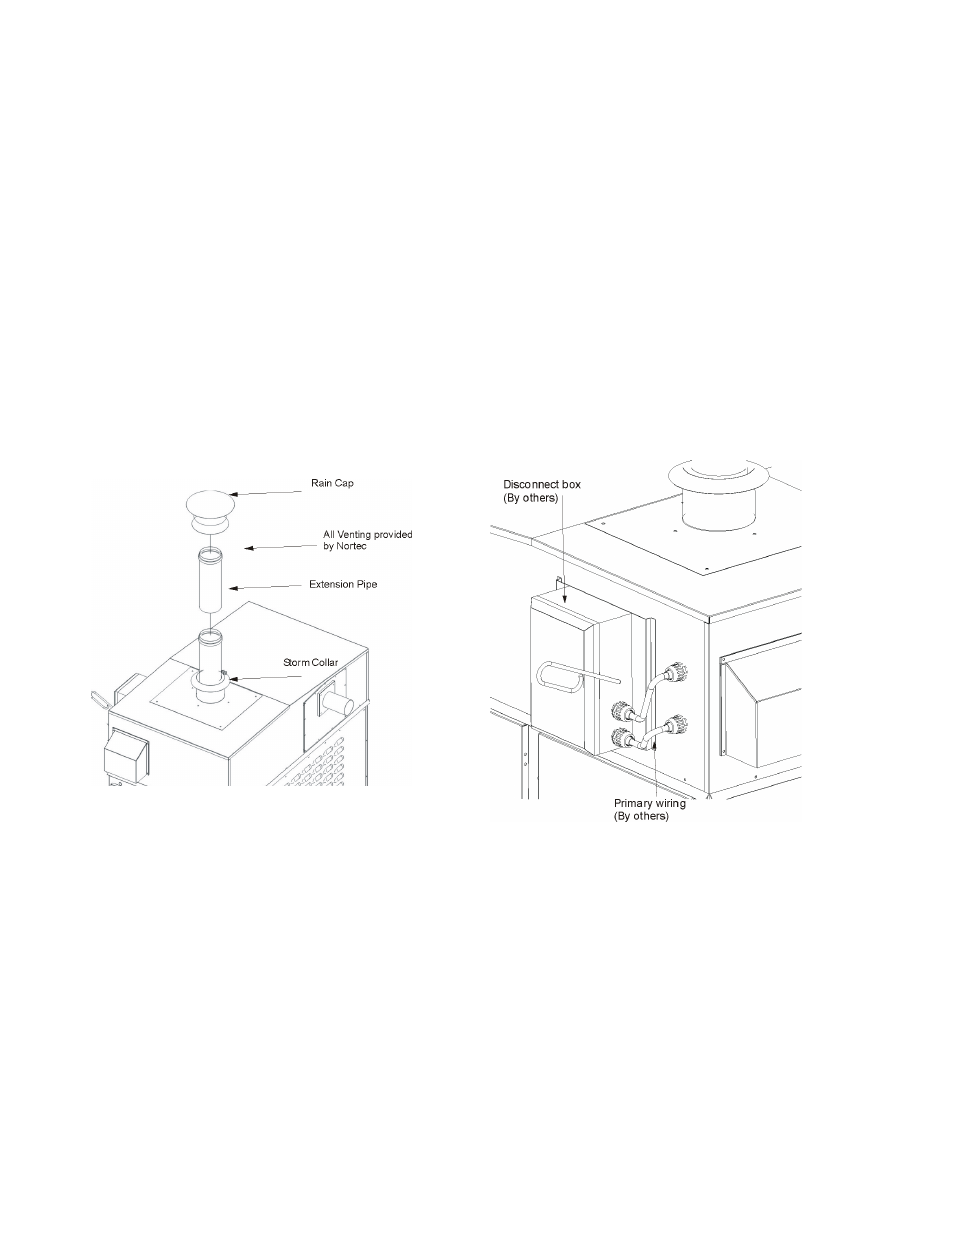
All required exhaust venting is provided with each GS Outdoor model, by Nortec, including rain cap and
storm collar. All venting components external to the unit are shipped with the unit and must be installed on
site. Refer to Figure 24 for venting components.
Each vent length and the rain cap have a built-in mechanical locking band and gasket. Simply push together
each component to the stop bead, which provides an air & water-tight seal. Then tighten the integrated
locking band on each component to complete the installation of the exhaust venting.
The rain cap must extend at least 2 feet above any ridge within 10 feet of the unit. The exhaust venting can
be extended using additional vent lengths purchased from Nortec.
Electrical Installation
Power and control wiring is to be routed into the humidifier through the pipe chase in the base pan of the
outdoor models located in the burner area.
Figure 24: Exhaust - Outdoor Units
Figure 25: Electrical Box
Installation details for primary and low voltage control wiring are the same as for indoor units.
A field supplied NEMA rated weatherproof disconnect switch must be mounted external to the GS Outdoor
unit to allow for power interruption during servicing and/or maintenance. A mounting plate, located on the
front of each outdoor model above the electrical access door, is available for mounting of the disconnect
switch. Two electrical conduits are provided for routing the primary wiring to the disconnect switch and then
back inside the enclosure to the main power terminal strip. See Figure 25 for details.