Overdubbing, Preparation for overdubbing, Overdub recording – Teac DR-1 User Manual
Page 23: 8–recording, 23 overdubbing
TASCAM DR-1
23
Overdubbing
Overdub recording
Preparation for overdubbing
8–Recording
By overdubbing, you can play an instrument or sing as
you play back a saved track and mix and record both
sounds in a new file.
Follow these procedures to prepare for overdubbing.
Set the file type to WAV
Only WAV files can be created by overdubbing.
1 Press the
MENU
key to open the Menu Screen.
2 Use the wheel to select
REC SETTING
(highlighted in inverse) and press the
¥/π
key.
3 Use the wheel to select
FORMAT
and press
the
¥/π
key.
4 Use the wheel to select
WAV 16-bit
or
WAV
24-bit
.
5 Press
STOP/HOME
to return to the Home Screen.
NOTE
The playback track can be either an MP3 or a
WAV file.
Turn
MONITOR
ON in the Input Setting Screen
1 Press the
SETTING
key to open the Input
Setting Screen.
2 Use the wheel to select the
MONITOR
item and
press the
¥/π
key.
3 Use the wheel to select
ON
.
This status allows you to always monitor the input
signal. In other words, you can monitor a mix of
the track being played back and the input signal.
4 Press
STOP/HOME
to return to the Home Screen.
TIP
By making the above settings, in addition to overdubbing,
you can use a recorded (or copied) audio track for vocal or
instrument practice, as well as karaoke.
Before beginning these procedures, in addition to
setting the file type to
WAV
and turning
MONITOR
ON, set the input and adjust the level if necessary.
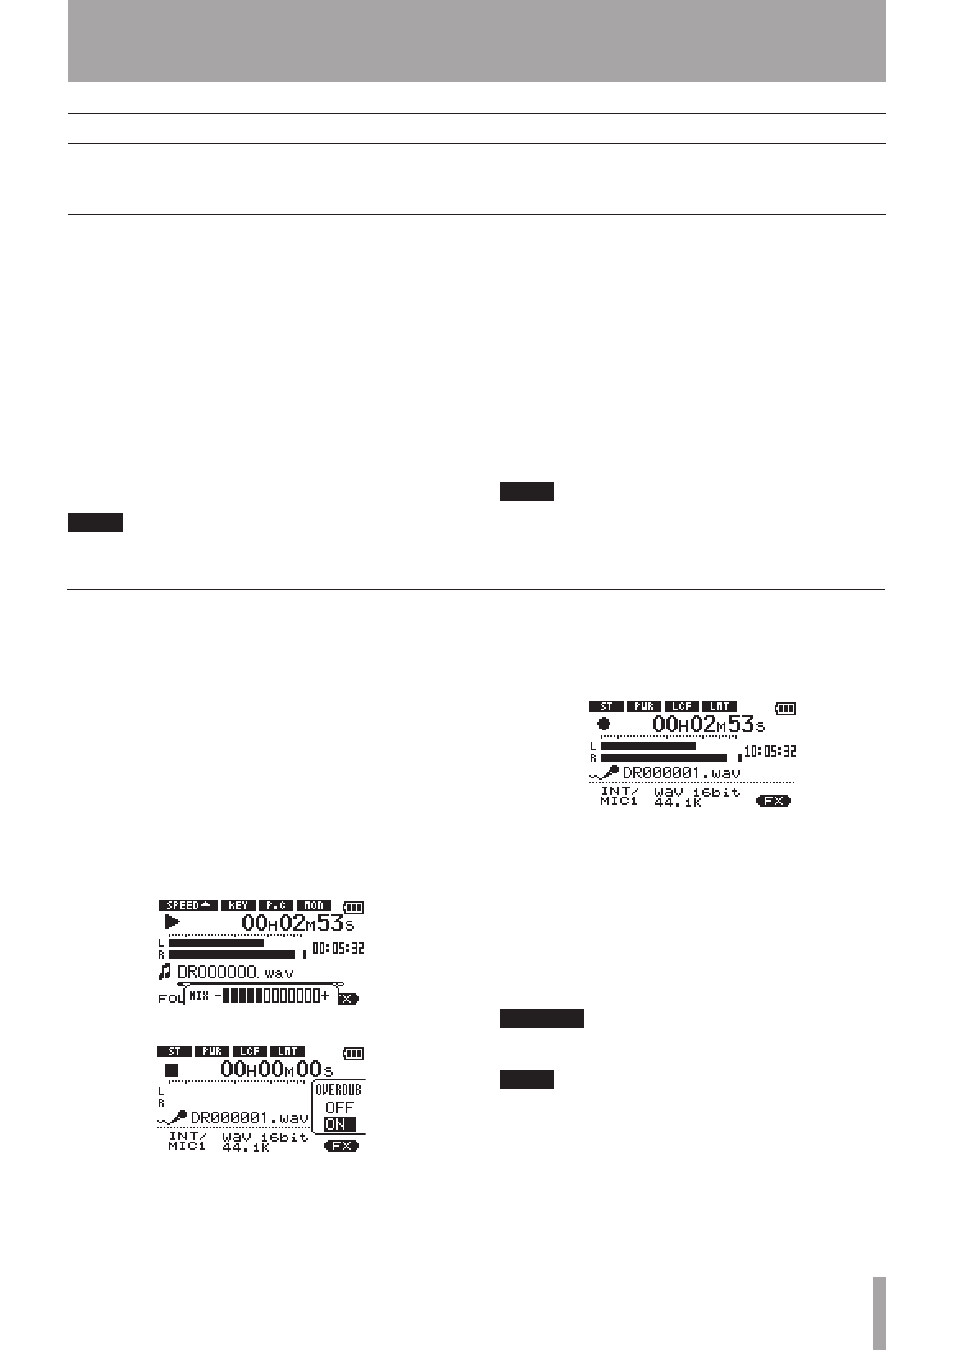
1 When the Home Screen is displayed, use the
µ
and
≤
keys to select the track for playback.
2 Press the
¥/π
key to start playback, and check
the volume balance between the playback and the
input sounds.
3 Use the
MIX BALANCE
keys as necessary to adjust
the balance by increasing or decreasing the
playback signal volume.
During adjustment using the keys, the playback
volume appears the lower part of the display.
4 Press
REC/PAUSE
to begin recording standby.
The screen overdubbing ON/OFF pop-up appears.
The recording file name, input source, recording
audio file type and sampling frequency also
appear so that you can confirm them before you
start recording.
5 Use the wheel to select
ON
from the overdubbing
ON/OFF pop-up.
6 Press the
REC/PAUSE
key to start overdubbing.
When recording starts, the
REC/PAUSE
key lights
and the display shows the elapsed and remaining
recording times.
The lower part of the screen shows the name of
the playing file that is being mixed in the overdub.
7 To stop recording, press the
STOP
key or directly
select a track for playback on the Browse Screen
(See “Browse Screen” on page 27).
CAUTION
You cannot pause when overdubbing (the
REC/PAUSE
key
is inoperative).
NOTE
Set the file type to WAV for overdubbing (see “Selecting
•
file type and sampling frequency” on page 19). If you try
to overdub when the file type is set to MP3 “
Format
is MP3
” appears and operation is prevented.
To play a track that is not in the currently selected
•
playback area, you can select the track directly on the
Browse Screen (See “Browse Screen” on page 27), or
you can change the selected playback area on the Play
Mode Screen before conducting the above operation.
(See “Setting the playback area” on page 24.)