Step 8: connect the cable(s), Installation guide – ACTi Outdoor Dome on Straight Wall with Accessory Sets of PMAX-0314 User Manual
Page 46
Installation Guide
Step 8: Connect the Cable(s)
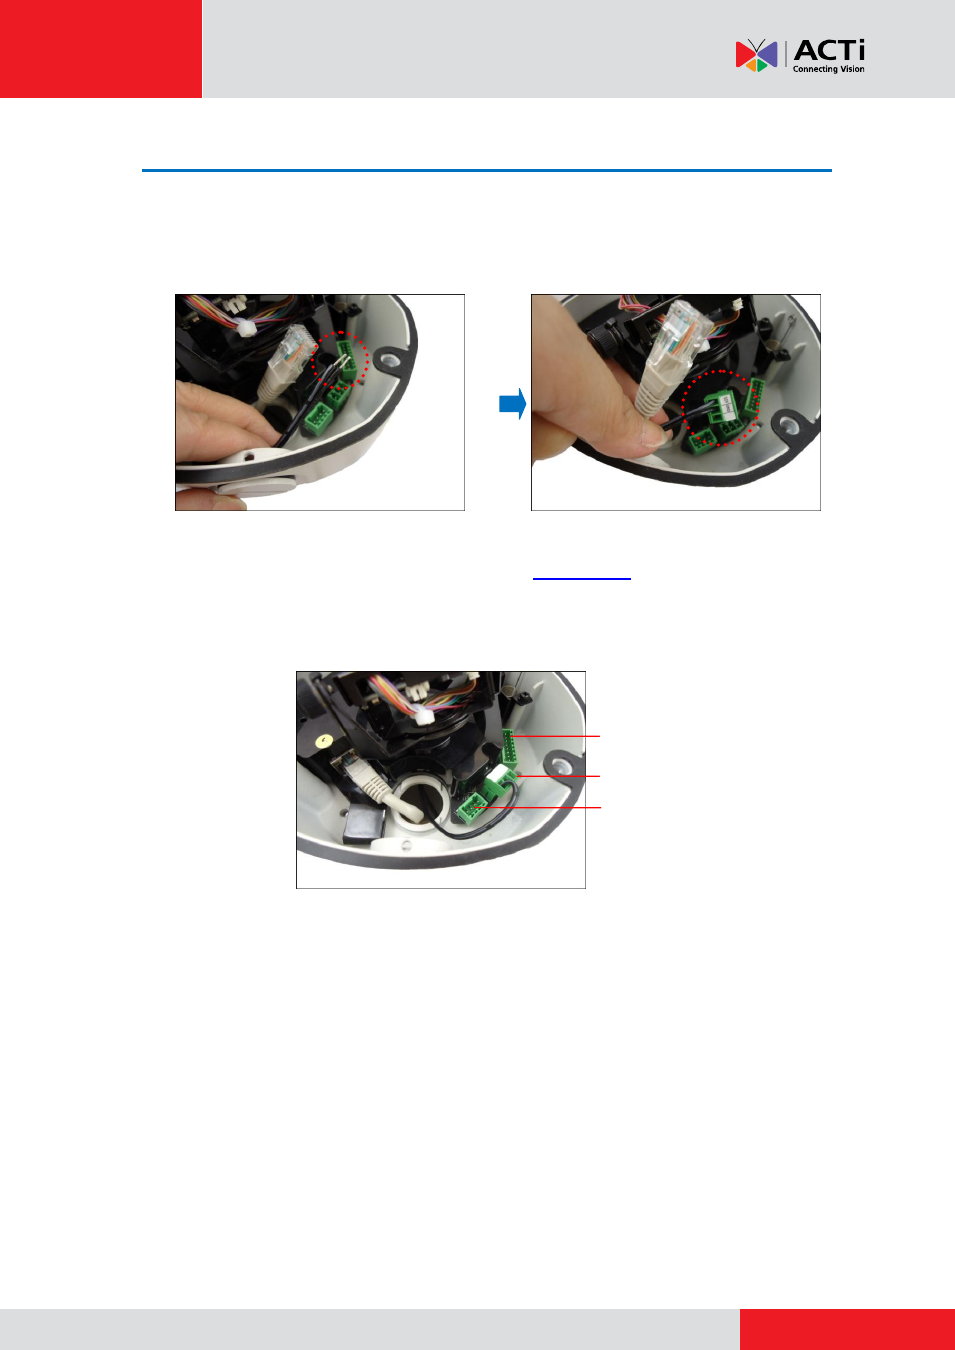
1.
For camera models that support external power adaptor, audio in/out, or digital input/output
(DI/DO) functions, attach the bundled connectors. Below is an example of connecting the
power adaptor terminal connector. Otherwise, skip to the next step.
NOTE:
For more information on connecting these cables, please refer to the camera model
hardware manual downloadable from the website (
www.acti.com
).
2.
Connect the network cable to the Ethernet port and the other cables (if any) to the
corresponding connectors on the camera.
NOTE:
The above image is for reference only. Available connectors and its placement vary
depending on model.
3.
Connect the other end of the network cable to a switch or injector. Then, connect the switch
or injector to a network or PC and a power source. See the following Power-over-Ethernet
example connection diagram.
Digital Input / Output
(DI/DO) Connector
12V Power Connector
Audio Input / Output
Connector