Whelen P36P1L User Manual
Page 5
Page 5
2
3
2
1
ITEM
PART NUMBER
DESCRIPTION
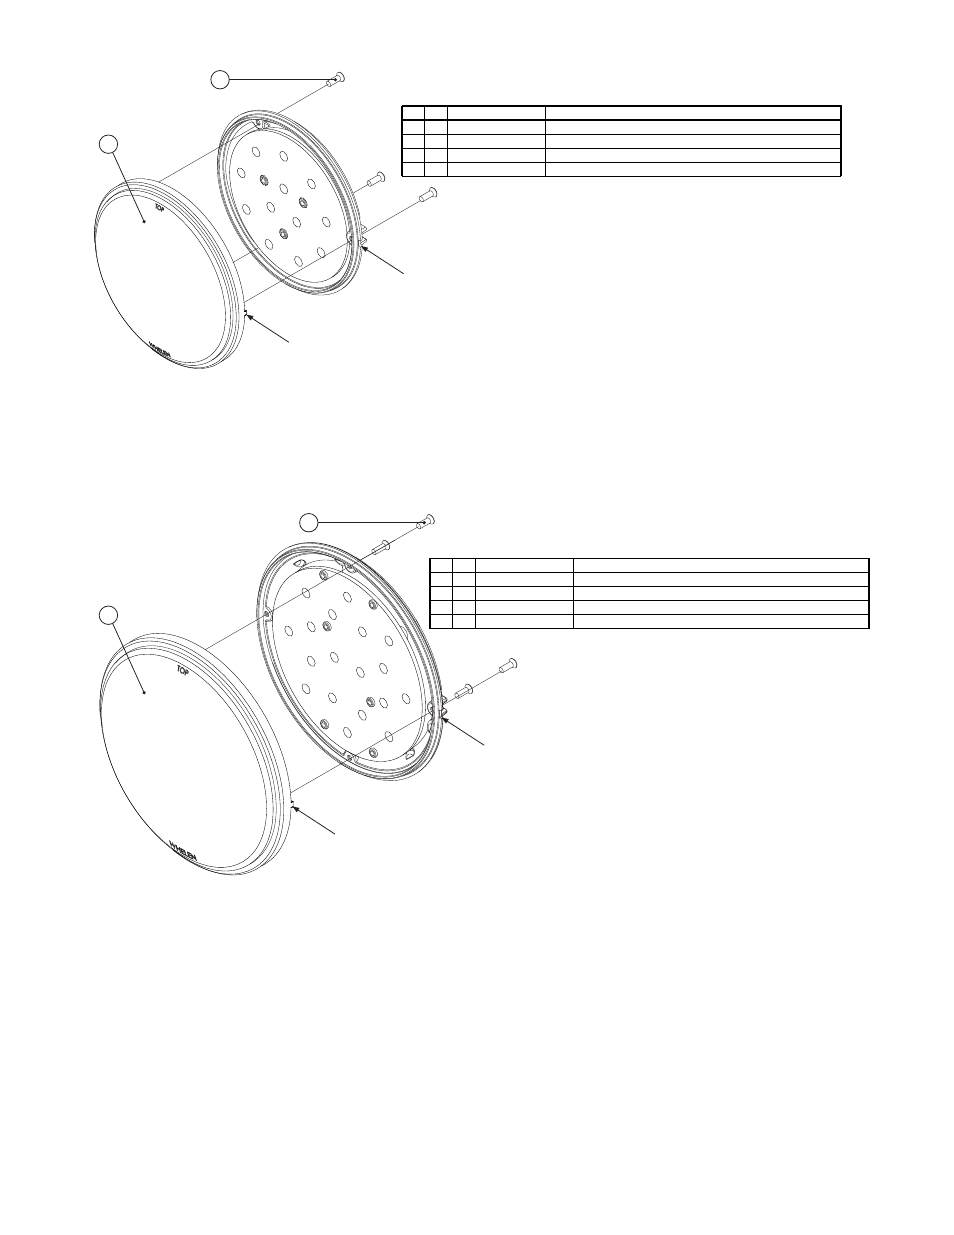
REPLACEMENT PARTS:
PAR36 (All Models)
LENS, CLEAR NON OPTIC PAR-36
SCREW, 4 X 3/8 PFH PLASTI-LOC SS W/NYSEAL
SCREW, 8-32 X 1/4 PH SLOT, BRASS, TERMINAL (NOT SHOWN)
GASKET, PAR36, BLK (NOT SHOWN)
6 8 - 3 9 7 1 4 8 6 A 3 0
1 5 - 0 4 5 2 1 6 - 0 6 8
1 4 - 0 8 2 2 0 2 - 0 4 1
3 8 - 0 2 4 0 1 9 7 - 0 0
QTY
4
3
1
1
2
3
2
1
ITEM
PART NUMBER
DESCRIPTION
REPLACEMENT PARTS:
PAR46 (All Models)
LENS, CLEAR NON OPTIC PAR-46 LED
SCREW, 4 X 3/8 PFH PLASTI-LOC SS W/NYSEAL
SCREW, 8-32 X 1/4 PH SLOT, BRASS
(NOT SHOWN)
, TERMINAL
GASKET, PAR46, BLK (NOT SHOWN)
6 8 - 3 9 7 1 5 7 7 A 3 0
1 5 - 0 4 5 2 1 6 - 0 6 8
1 4 - 0 8 2 2 0 2 - 0 4 1
3 8 - 0 2 4 0 0 6 3 - 0 0
QTY
4
4
1
1
1
1
Alignment Tab
Alignment Slot
2
2
Alignment Tab
Alignment Slot
Lens Replacement Procedure:
Note: The procedure outlined herein is common to the PAR36 and PAR46 models.
1.
Remove the PAR36/PAR46 light assembly from its installed location
2.
Remove the phillips-head screws (Item 2) used to secure the lens to the light assembly. Note that there
are 4 screws used for this in the PAR46 and 3 in the PAR36.
3.
Separate and remove the existing lens from the light assembly.
4.
Install the replacement lens (Item 1) onto the light assembly, making sure that the lens’ alignment tab
engages the assembly’s alignment slot.
5.
Secure the replacement lens to the light assembly using the existing hardware. Care should be taken
not to over-tighten these screws. Over-tightening may stress the lens.