PLANET BSP-300 User Manual
Page 20
User’s Manual of BSP-300
19
(1) Connect the negative electrode of the battery to the terminal for the negative electrode of the
battery on the BSP-300.
(2) Connect the positive electrode of the battery to the terminal for the positive electrode of the
battery on the BSP-300.
(3) After the battery is well connected to the BSP-300, the System LED will ON with slow blinking
for system ready and the Fault LED will slow blinking for PV not connected.
NOTE:
1. Be noted for the thickness of electric wire and please refer to the section -
Recommended Use of the Connection Wires of the user manual.
2. The BSP-300 accepts DC 24V battery system, please pay attention to the battery
characteristics and also refer to the section - Recommended Settings for
Different Batteries of the user manual.
3. Check the total power consumption of your connected network device before
installation. Improper battery capacity could shorten the battery life or make your
network device lack of power supply.
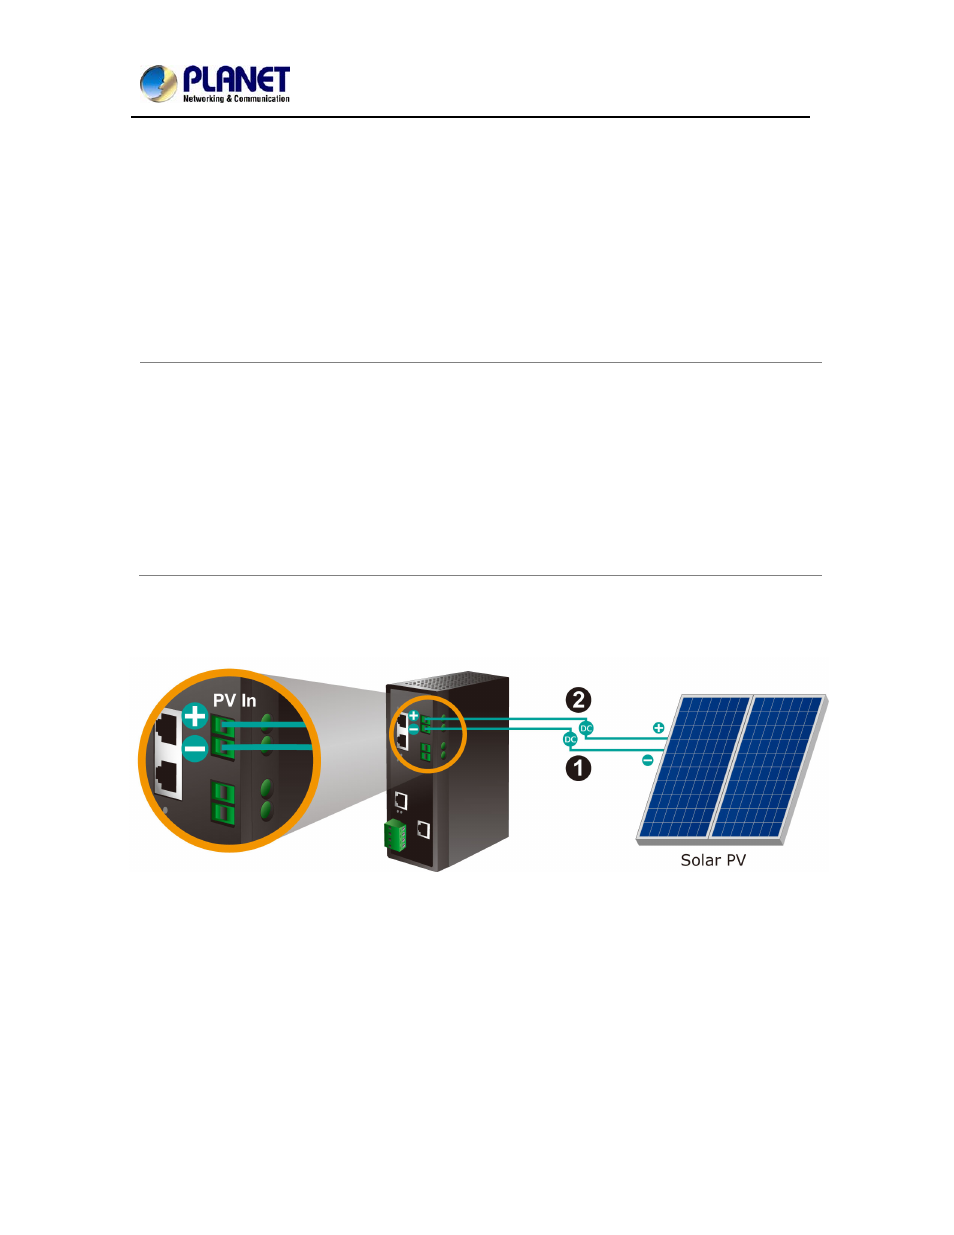
Step 3. Install PV panel
(1) Connect the negative electrode of the PV panel to the terminal for the negative electrode of the
PV panel on the BSP-300.
(2) Connect the positive electrode to the terminal for the positive electrode of the PV panel on the
BSP-300.
(3) After the PV is well connected to the BSP-300 and providing 24V or above voltage, the System
LED will fast blinking for battery charge if the battery is not full. And turn off the fault LED.