ConnectGear GP-10P User Manual
Page 44
User's Manual
6.
Change the Alias name if you want.
7.
Set the Primary File Server to be the file server where the
PrintSir’s queue will be located.
8.
Press Escape to exit the PrintSir Configuration screen, confirm
that the changes should be saved, and exit PSETUP.
At this point the PrintSir setup is complete, and you can begin
setting up the NetWare print server and print queue objects:
9.
Run the NetWare PCONSOLE program.
10.
Change the current file server, if necessary, using the Change
Current File Server menu selection.
11.
Choose the Print Queue Information menu selection.
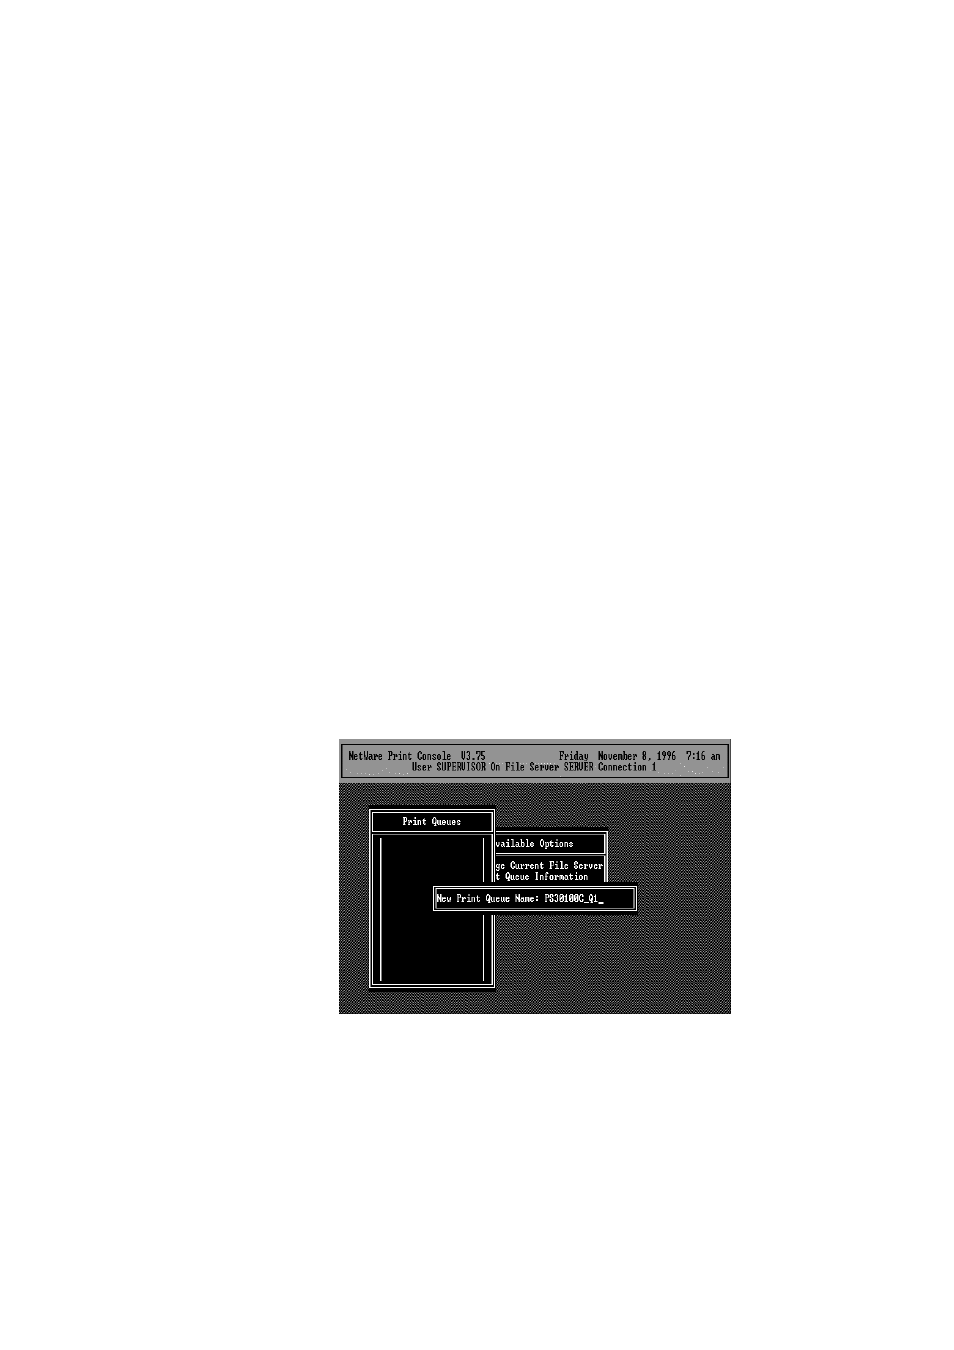
12.
Press the Insert key to add a new print queue.
13.
Type in a print queue name, such as “PQ” or “Q1”.
14.
You have now successfully created the print queue that your
PrintSir will serve. Press the Escape key until the Available
Options main menu is displayed.
15.
Select Print Server Information.
16.
Press the Insert key to add a new NetWare print server object.