Adding / changing a user – OpenEye OE3 E-Series User Manual
Page 34
34
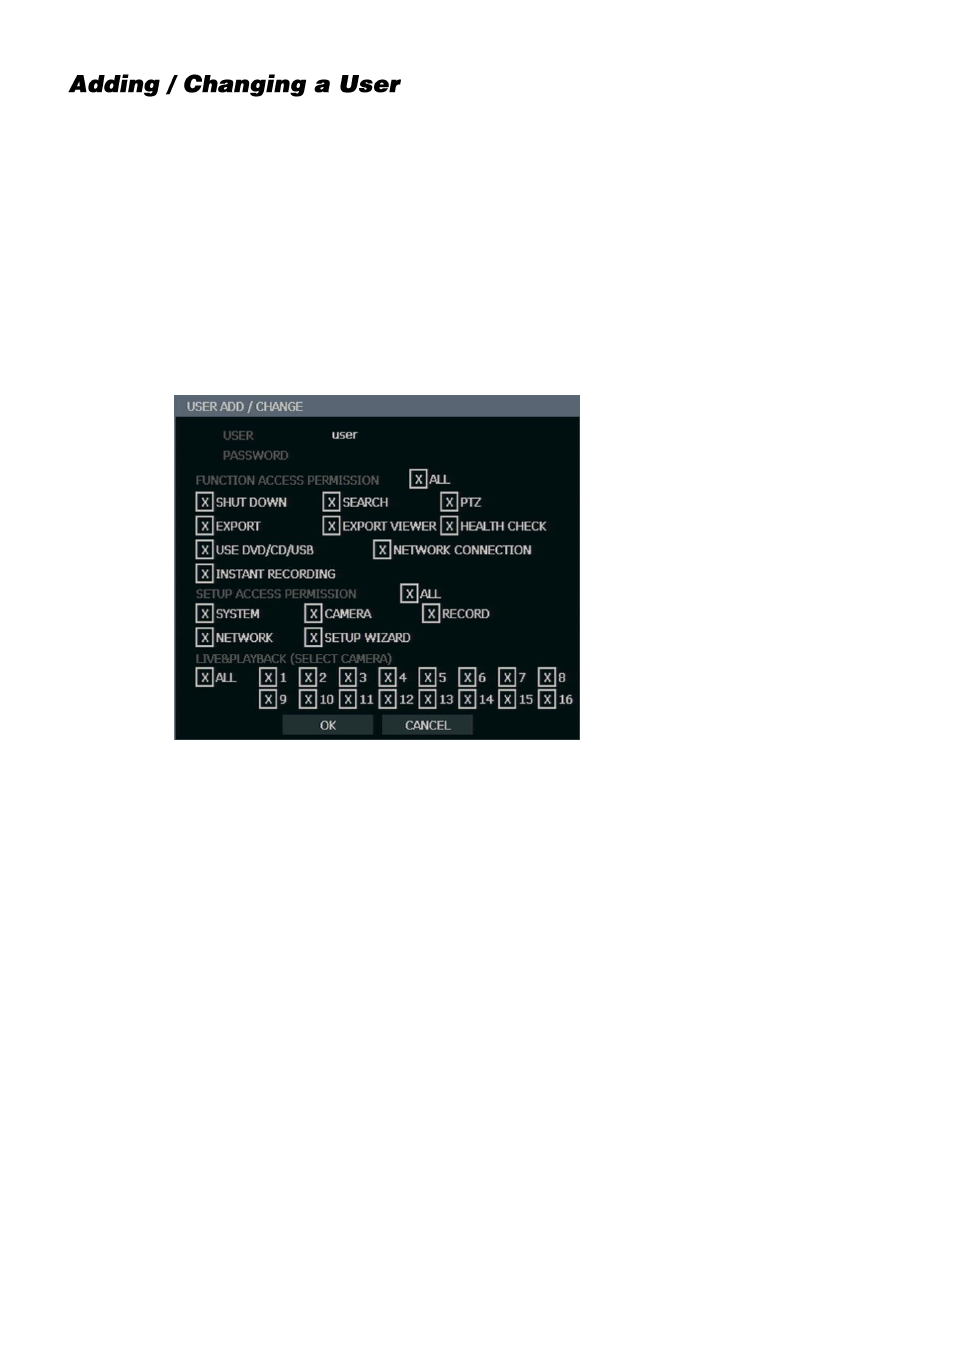
To add a new user:
1.
Press MENU on the front panel or remote control.
or
Click
MENU
on the Mouse-over menu and select
SETUP
.
2.
Select
SYSTEM > USER SETUP
.
3.
Click
ADD/CHANGE
.
4.
Enter a
USER
name.
5.
Enter a
PASSWORD
and
CONFIRM
for the new user.
6.
Select the
FUNCTION
and
SETUP ACCESS
options for the user.
7.
Select which cameras will be visible to the user in
LIVE
and
PLAYBACK
modes.
SHUT DOWN
– Allow the user to shut down or restart the recorder.
EXPORT
– Allow the user to perform an export or backup saved data.
USE CD/DVD/USB
- Allow the user to use the DVD Drive. This is a server-side feature only.
SEARCH
– Allow the user to use the search functions to locate video and access video from
the current day using the REPLAY key on the front panel.
EXPORT VIEWER
– Allow the user to include a copy of the Backup Viewer application when
a local backup is made. This is a server side feature only.
NETWORK CONNECTION
– Allow the user to log in using Web Viewer.
PTZ
– Allow the user control of any connected PTZ cameras.
HEALTH CHECK
– Allow the user to use the Health Check function of RADIUS to connect to
and monitor the recorder.
INSTANT RECORDING
– Allow the user to activate the Instant Recording feature.
SETUP ACCESS PERMISSION
– Allow the user to access the selected portion of the setup
menu.
LIVE & PLAYBACK
– Allow the user to view live and recorded data for only the selected
cameras.