Using the design environment toolbar – Super Systems Compact HMI User Manual
Page 40
Compact HMI and Compact HMI Editor Operations Manual
Super Systems Inc.
Page 40 of 60
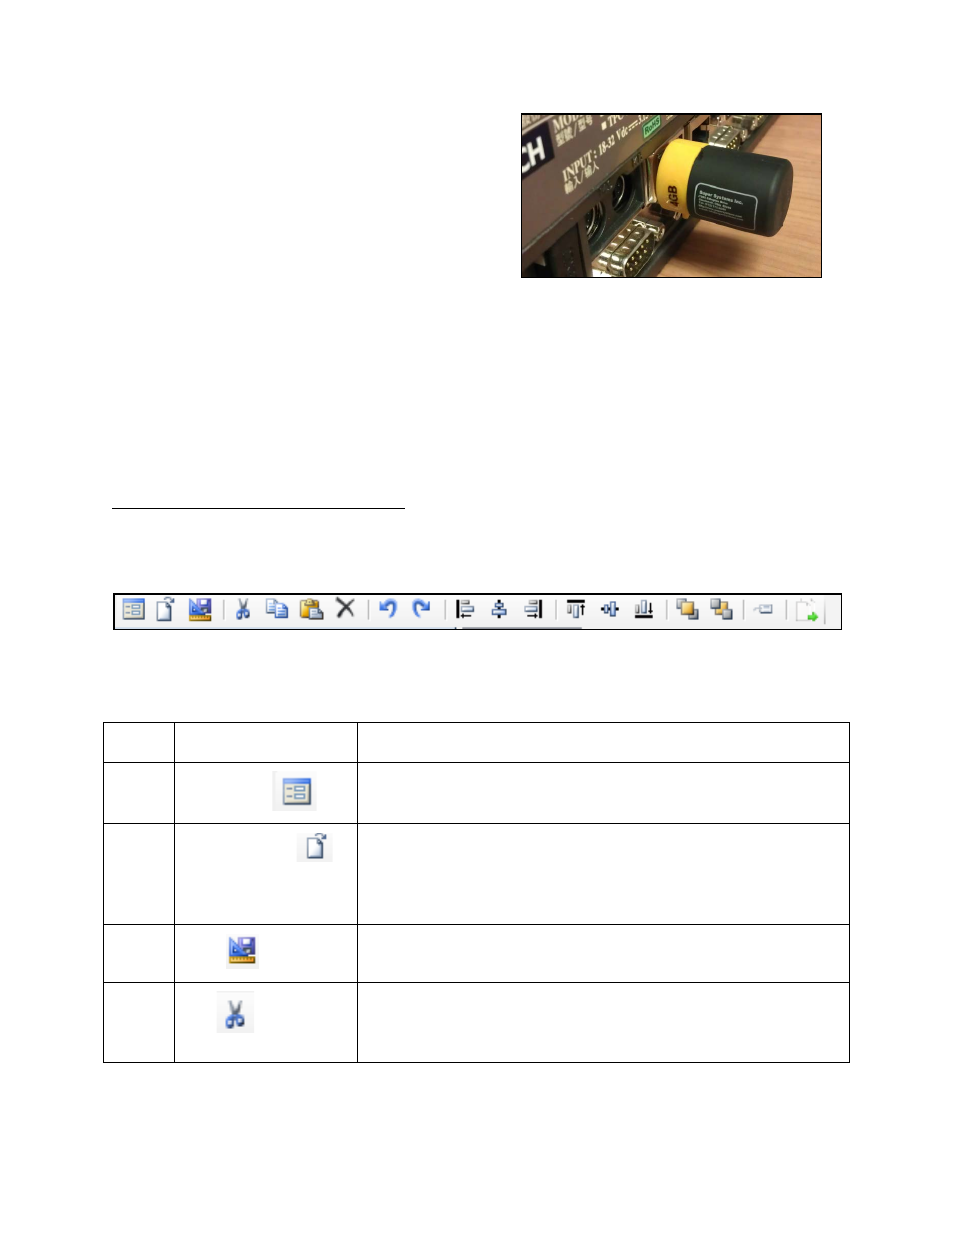
6. Insert the storage medium into an
available USB port on the touch screen.
Often, a port can be found on the back of
the touch screen, as shown in Figure 44.
Figure 44 - Inserting USB Drive into USB Port on
Touch Screen Device
7. Double-tap on “My Device” on the touch screen desktop. Then copy the touch screen
files from the USB drive to the Compact HMI (destination) folder. The destination folder
will be the \CompactRealtime folder on the destination drive.
NOTE: A message will likely appear asking if you want to overwrite existing files. Simply choose
“Yes.”
Using the Design Environment Toolbar
The Design Environment contains a horizontal toolbar with icons representing many of the
common options used in Compact HMI Editor. See Figure 45.
1
2
3
4
5
6
7
8
9
10 11 12
13 14 15
16
17
18
19
Figure 45 – Toolbar
The table describes the use of each tool in the toolbar.
Tool Name
Description
1
New Panel
Opens a new panel for the current Solution, displaying the
new panel in the Design Environment
2
Open Solution
Brings up a dialog box to open a saved Solution (a file saved by
Compact HMI Editor with the .cresln extension; described
3
Save
Saves the current Solution
4
Cut
Removes a block of text, a control object, or other editable
component of a Solution, and saves it to the Windows
Clipboard so that it can be pasted elsewhere