Installing the software for windows users – Epson PhotoPC 3100Z User Manual
Page 12
Installing and Setting up the Software
12
Installing the Software for Windows Users
Follow the steps below to install the software on the
included PhotoPC 3100Z Camera Software CD-ROM.
Note:
Do not connect your camera to your computer before you
install the software.
1.
Turn on the computer and insert the included
Camera Software CD into the CD-ROM drive.
If a dialog box prompts you to select a language,
click the appropriate language, then click
.
2.
The EPSON Installation Program dialog box
appears. Select Install Digital Camera Software,
then click
.
Note:
If the EPSON Installation Program dialog box does not
appear, double-click the My Computer icon. Click
the CD-ROM icon, then select Open from the File
menu. Then double-click Setup.exe.
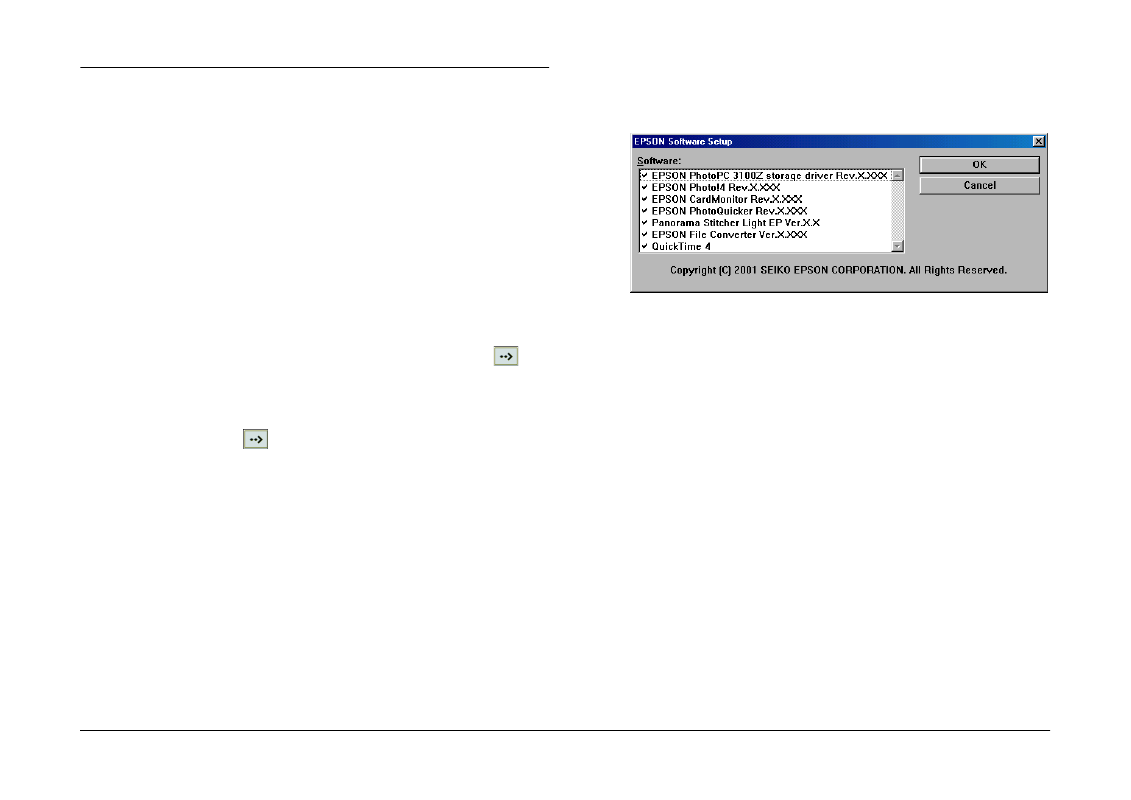
3.
The following dialog box containing a list of
software appears.
Software with a check mark next to it will be
installed on your PC in the order listed. Click a
software title in the list to remove or add a check
mark.
Note:
❏
Be sure to install all the software when installing
software for the first time.
❏
EPSON AutoDownloader and EPSON
CameraStarter are automatically installed when
you install EPSON Photo!4.
❏
For a short description of each software, see page
11.