Create related perspective planes – Adobe Photoshop CS4 User Manual
Page 244
237
USING PHOTOSHOP CS4
Retouching and transforming
Last updated 1/10/2010
Dragging an edge node to increase the size of a plane to accommodate your edits
The bounding box and grid of a perspective plane is normally blue. If there’s a problem with the placement of the
corner nodes, the plane is invalid, and the bounding box and grid turn either red or yellow. When your plane is invalid,
move the corner nodes until the bounding box and grid are blue.
If you have overlapping planes, Ctrl-click (Windows) or Command-click (Mac OS) to cycle through the overlapping
planes.
Overlapping planes
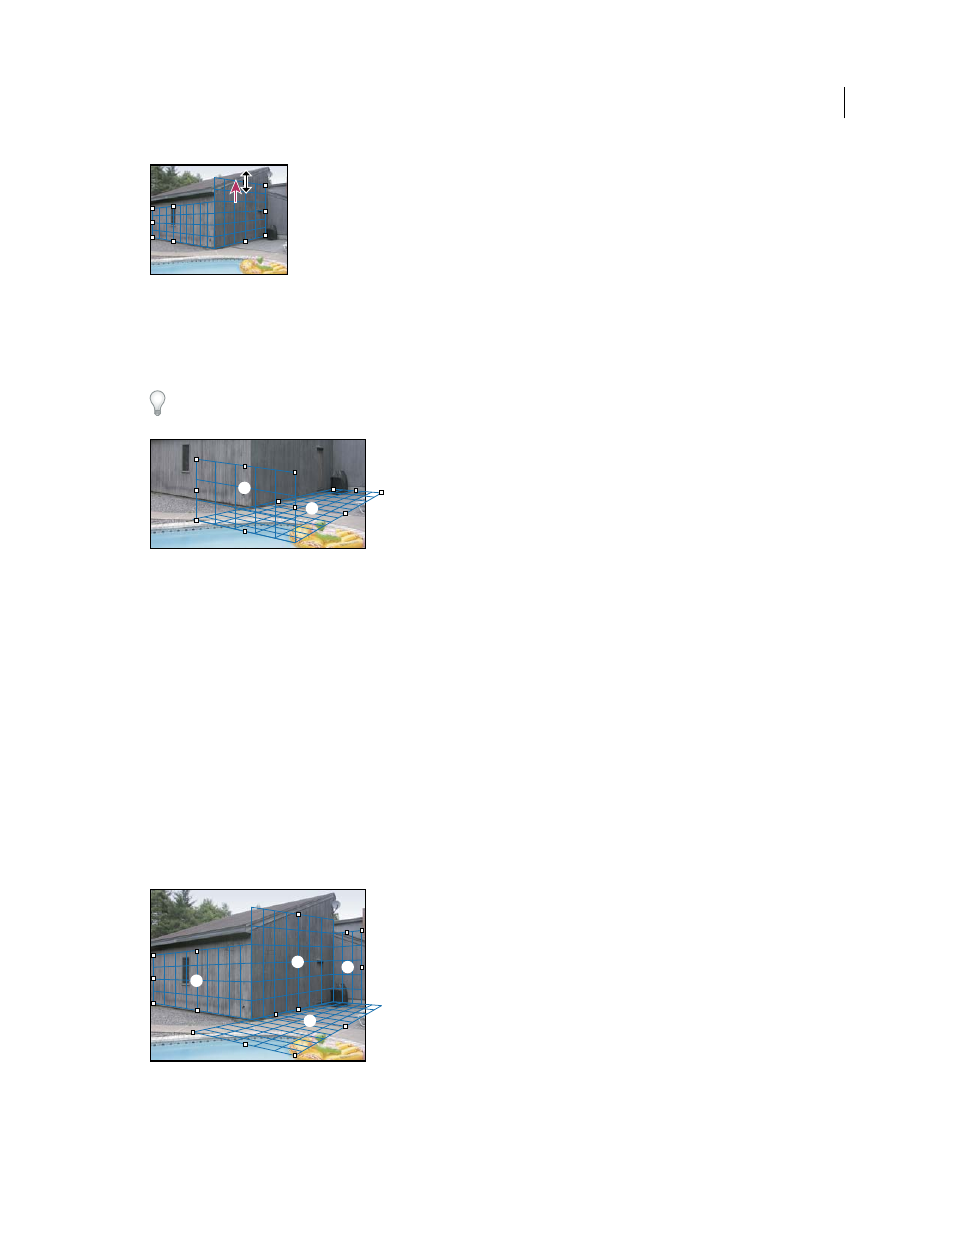
Create related perspective planes
After creating a plane in Vanishing Point, you can create (tear off) additional planes that share the same perspective.
Once a second plane is torn off from the initial perspective plane, you can tear off additional planes from the second
plane and so forth. You can tear off as many planes as you want. Although new planes tear off at 90° angles, you can
adjust them to any angle. This is useful for making seamless edits between surfaces, matching the geometry of a
complex scene. For example, corner cabinets in a kitchen can be part of a continuous surface. In addition to adjusting
the angles of a related perspective plane, you can always resize the plane using the Edit Plane tool.
1
Select the Create Plane tool or Edit Plane tool and Ctrl-drag (Windows) or Command-drag (Mac
OS) an edge node
of an existing plane’s bounding box (not a corner node).
The new plane is torn off at a 90° angle to the original plane.
Note: If a newly created plane does not properly line up with the image, select the Edit Plane tool and adjust a corner
node. When you adjust one plane, a connected plane is affected. (Corner nodes are unavailable if more than two planes
are connected.)
Tearing off multiple planes keeps the planes related to each other so your edits are scaled and oriented in the proper perspective.
1
2
1
2
3
4