Backsplash panel installation instructions – Greenheck Waterwash (458292) User Manual
Page 18
18
April 2005
®
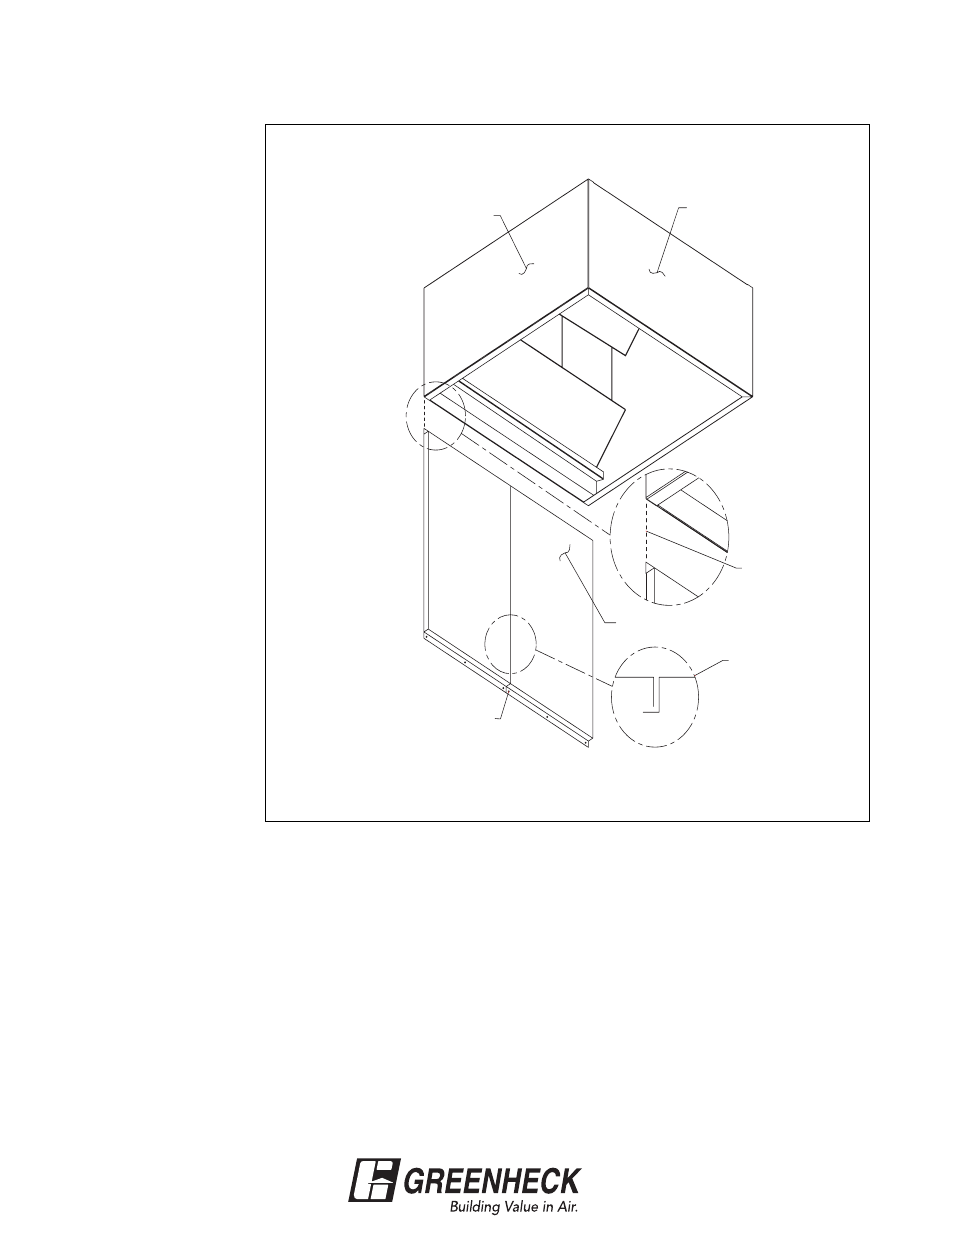
1.
After the hood is hung
in position, slide the
flat flange of the
backsplash panel
behind the back of the
hood.
Note: If the backsplash
panel length is greater
than 46 in., it will be
shipped in multiple
pieces.
2.
After the backsplash
panel has been
positioned, drill holes
in the panel and fasten
to the wall. (fasteners
provided by others)
Note: The holes should
be spaced to
adequately secure the
panel to the wall.
3.
Caulk the joints
between the hood and
the backsplash panel
with NSF approved
silicone caulk (GE
SCS-1009, or its
equivalent). The caulk
is not provided.
4.
Caulk the joint
between the
backsplash panels
when multiple panels
are required, with NSF
approved silicone
caulk (GE SCS-1009,
or its equivalent). The
caulk is not provided.
Return to page 9
BACKSPLASH PANEL INSTALLATION INSTRUCTIONS
HOLES SHOULD BE SPACED TO
ADEQUATELY SECURE THE PANEL
TO THE WALL STUDS (HOLE SPACING
AND FASTENERS PROVIDED BY OTHERS)
BACKSPLASH PANEL
HOOD END PANEL
HOOD FRONT PANEL
SLIDE FLANGE
BEHIND BACK
OF THE HOOD
SECTION VIEW
OF BACKSPLASH
PANEL OVERLAP
Fig. 19