Magnum Energy AC Load Diversion Controller (ACLD-40) User Manual
Page 18
Page 11
©
2015 Sensata Technologies
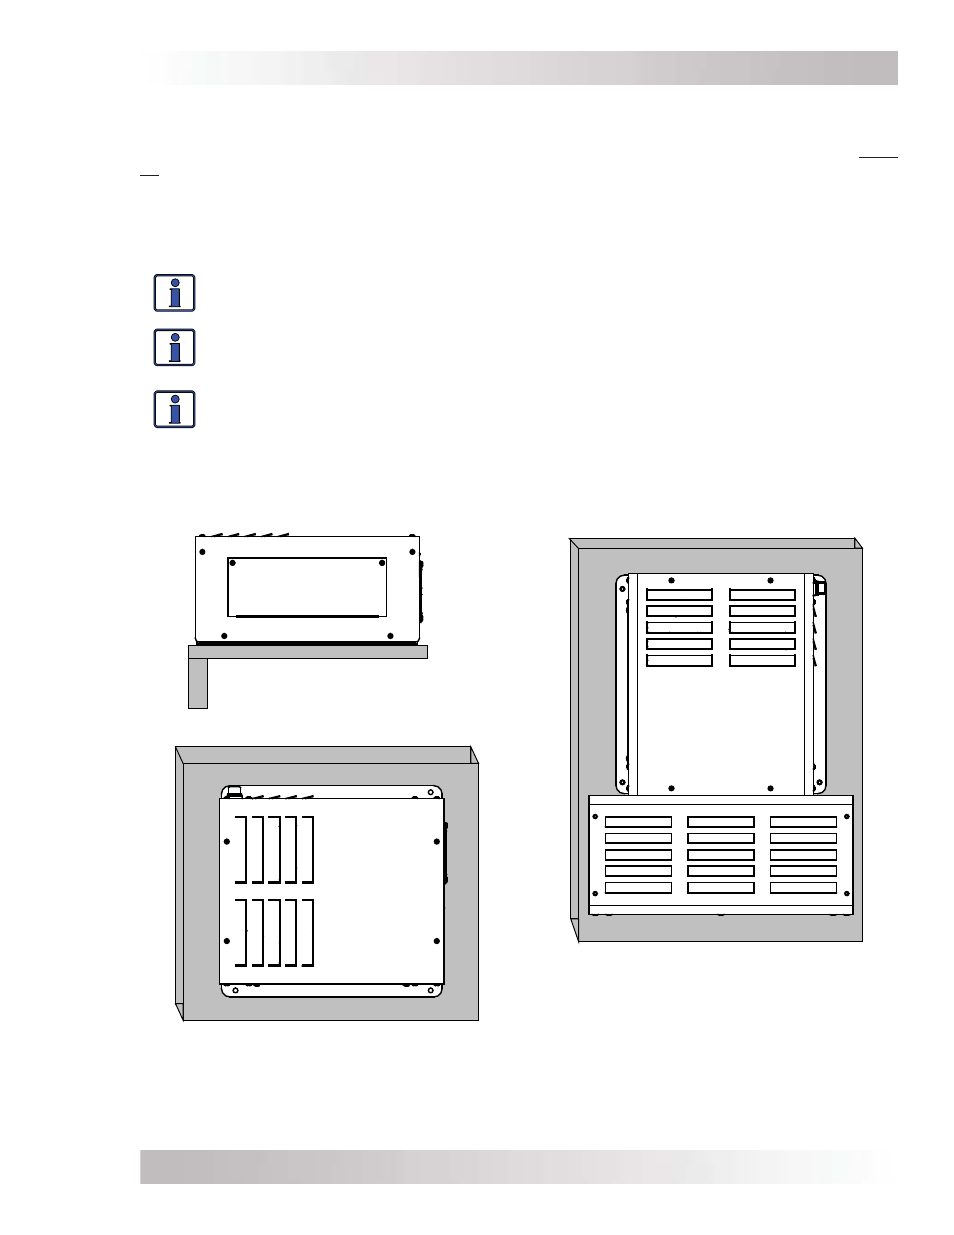
Installation
WALL MOUNTED
(Fan facing down and MPX-CB installed)
When the unit is mounted in this position,
either the MPX-CB (MPX conduit box) or
MMP Series Enclosure must be attached
below.
2.3 Mounting the ACLD Controller
When mounting the ACLD controller, the surface and the mounting hardware must be capable of
supporting at least twice the weight of the unit. To meet regulatory requirements, the ACLD must
be mounted in one of the following positions (as shown in Figure 2-3):
• above or under a horizontal surface (shelf or table),
• on a vertical surface (wall) with the intake cooling fan to the right,
• on a vertical surface (wall) with the intake cooling fan toward the bottom, and an optional
MPX-CB (conduit box) installed below the controller.
Info: The four mounting holes on the ACLD have a diameter of 0.280” (7.11 mm), good
for 1/4” bolts/screws (see Figure 2-4 for hole locations).
Info: The MPX-CB prevents material from falling out the bottom in the event of an
internal fi re, and also allows suffi cient ventilation to prevent the ACLD controller from
overheating under normal operating conditions.
Info: Sensata provides a backplate that can be used to mount the ACLD (and if required,
the MPX-CB). This backplate part number is BP-S (Back Plate - Single).
After determining the mounting position, refer to the physical dimensions as shown in Figure 2-4
or use the base of the ACLD as a template to mark your mounting screw locations. After marking
the mounting screw locations, mount the controller with appropriate mounting hardware.
Figure 2-3, Approved Mounting Positions
SHELF OR TABLE MOUNTED
(Fan facing away from wall)
WALL MOUNTED
(Fan to the right)