3 initial utility installation – PLANET ICA-W8100 User Manual
Page 16
Wireless Cube Fish-Eye IP Camera
ICA-W8100
16
Then proceed to start CloudLync registration and binding process as discussed in Chapter 3.
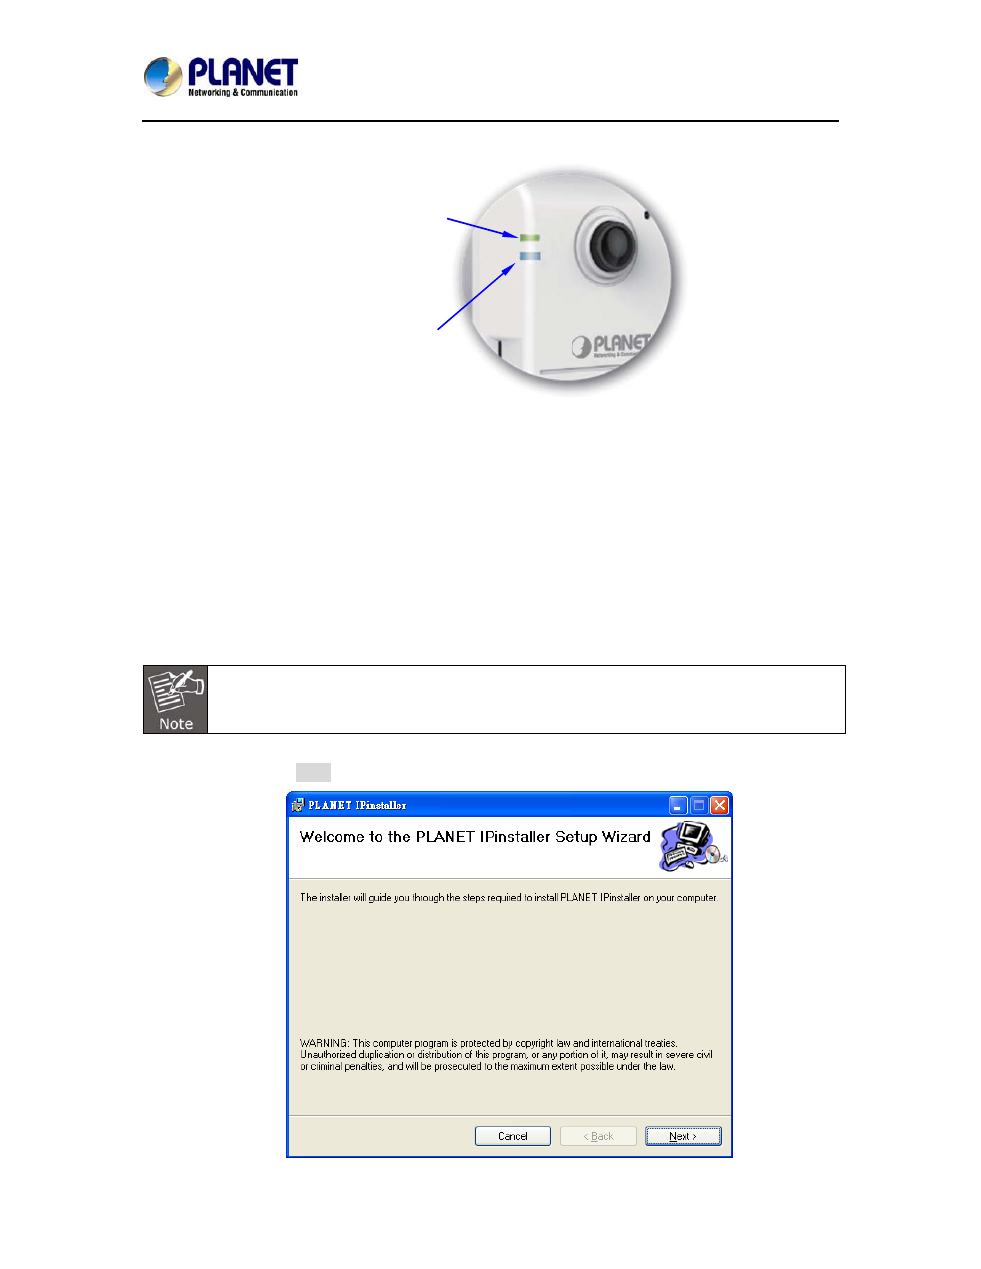
With wireless setup, the
Power/Network LED Indicator
should remain lit in green
When the camera is
successfully connected to
Wi-Fi, the Wireless LED
Indicator stops flashing &
lights up steadily in blue
If the LED does not turn steadily in blue, refer to the “Installation Guide Wizard” application
program in the CD which will further guide you in details on how to properly set up your camera for
Internet Wi-Fi connection.
2.3 Initial Utility Installation
This chapter shows how to quickly set up your H.264 camera. The camera is with the default
settings. However to help you find the networked camera quickly the windows utility PLANET
IPInstaller can search the cameras in the network that will help you to configure some basic setting
before you start advanced management and monitoring.
Step 1. Insert the bundled CD into the CD-ROM drive to launch the auto-run program. Once
completed, a welcome menu screen will appear.
Step 2. Click the “IPInstaller” hyperlink; you will see the dialog box as follows:
If the welcome screen does not appear, click “Start” at the taskbar. Then, select “Run”
and type “D:\Utility\IPInstaller \
Planet IPinstaller.msi”, assume D is your CD-ROM drive.
Step 3. The “Welcome to the Install Shield Wizard for PLANET IPInstaller” prompt will display on
the screen and click “Next” to continue.