2 binding camera into cloudlync by pc & notebook, 1 binding camera for the first time, Binding camera into cloudlync by pc & notebook – PLANET ICA-W8100 User Manual
Page 31
Wireless Cube Fish-Eye IP Camera
ICA-W8100
31
1. Google Account provides 5GB free space for recorded video storage.
2. With “Google Account” used to create the CloudLync account, you have to use
your Gmail address as email address and click the “Google Login” button
every time you need to log-in into CloudLync again.
Step 2. Click the Sign in button and you will be prompt with the process of binding the new
camera into CloudLync
3.2 Binding Camera into CloudLync by PC & Notebook
3.2.1 Binding Camera for the First Time
At this stage, you already have your personal account registered with CloudLync but with no
camera attached to your account. So the next step is to bind the camera that you have just set
up into your new CloudLync account in order to establish link with the network.
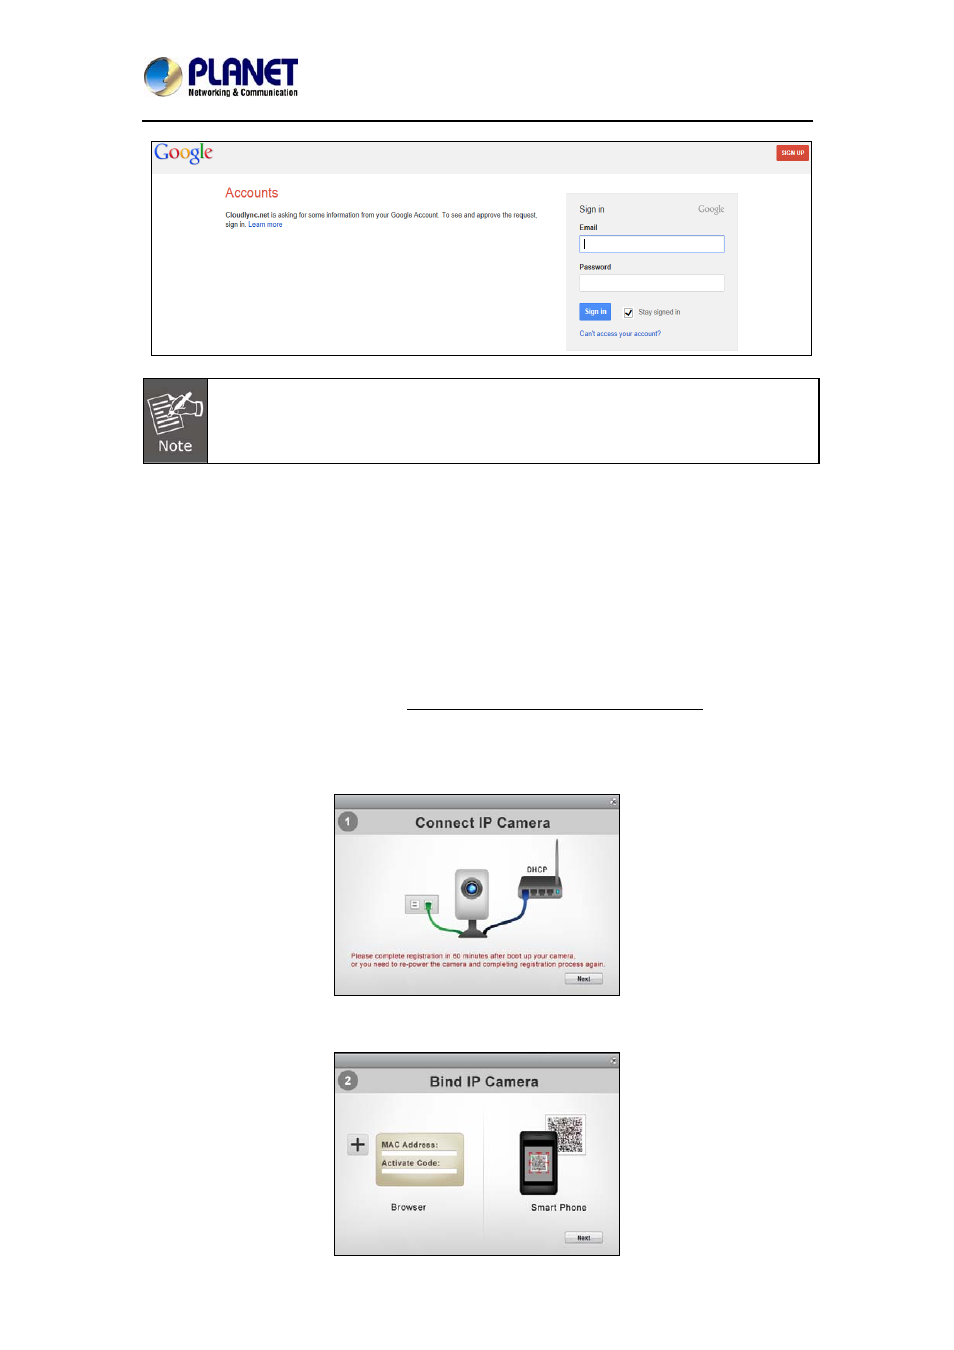
Step 1. After clicking the hypertext “Please click to verify your registration” under Create
Account, or clicking the Sign in button under Google Account, the “Connect IP camera”
window (shown at right) will pop-up after confirming your name and password. This is to
remind you again to properly connect the camera to power and router. If connection is okay,
click the Next button.
Step 2. The “Bind IP Camera” windows will pop-up to remind you to get ready with your
camera’s MAC Address and Activate Code. Then click the Next button.