Setting jumpers, Setting, Jumpers – ProSoft Technology MVI56-BSAPS User Manual
Page 12
MVI56-BSAPS ♦ ControlLogix Platform
Start Here
Bristol Babcock Serial Slave Module
Page 12 of 83
ProSoft Technology, Inc.
September 22, 2008
3
Click to open the Utilities folder. This folder contains all of the applications
and files you will need to set up and configure your module.
4
Double-click the ProSoft Configuration Builder Setup program and follow the
instructions on your screen to install the software on your PC.
Note: Many of the configuration and maintenance procedures use files and other utilities on the
CD-ROM. You may wish to copy the files from the Utilities folder on the CD-ROM to a convenient
location on your hard drive.
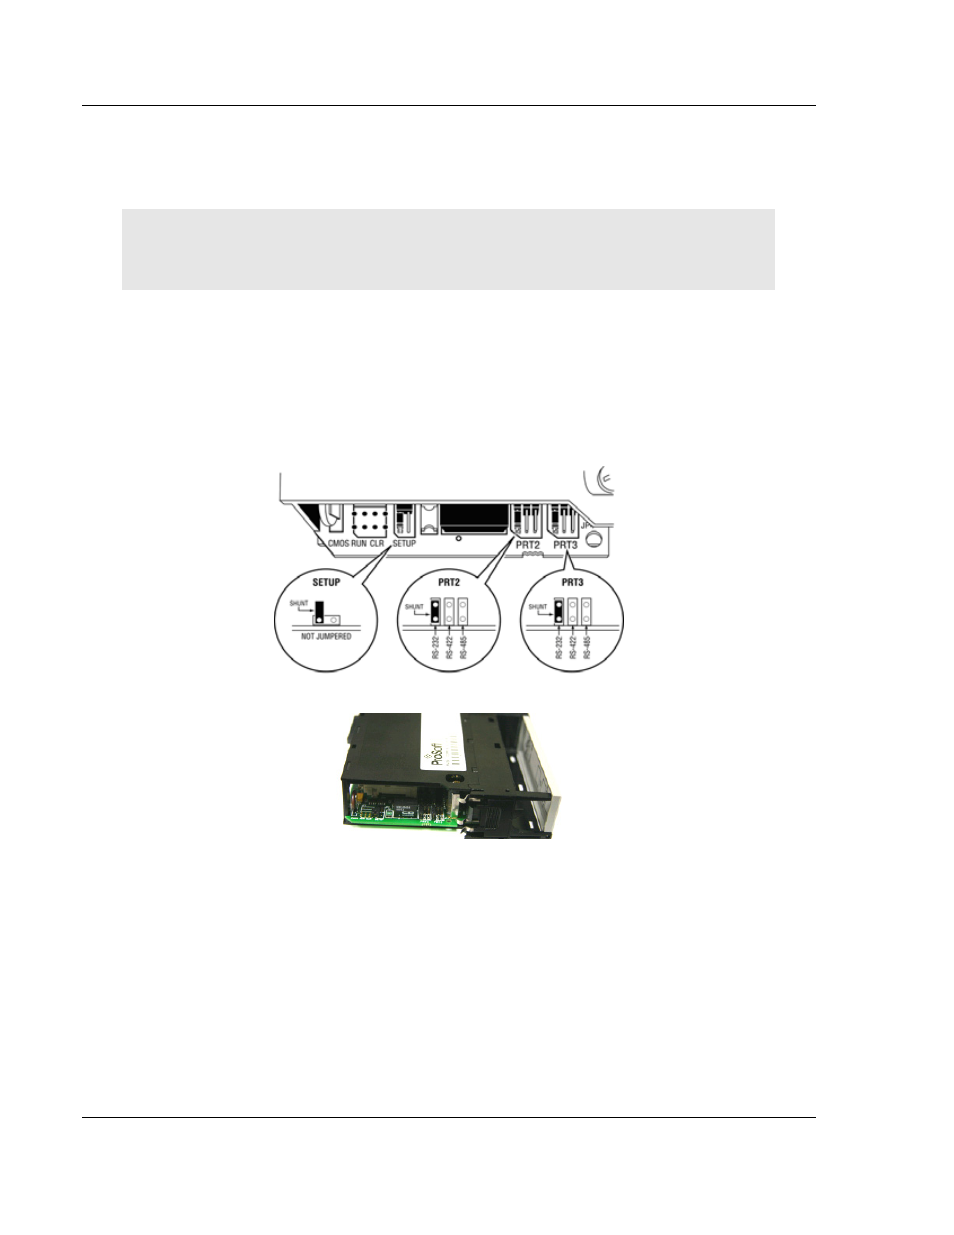
1.4 Setting
Jumpers
If you use an interface other than RS-232 (default), you must change the jumper
configuration to match the interface. There are three jumpers located at the
bottom of the module.
The following illustration shows the MVI56-BSAPS jumper configuration:
1
Set the PRT 2 (for application port 1) and PRT 3 (for application port 2)
jumpers for RS232, RS422 or RS485 to match the wiring needed for your
application. The default jumper setting for both application ports is RS-232.
2
The Setup Jumper acts as "write protection" for the module's flash memory.
In "write protected" mode, the Setup pins are not connected, and the
module's firmware cannot be overwritten. Do not jumper the Setup pins
together unless you are directed to do so by ProSoft Technical Support.