Viewing the mark list (mark), Dividing files (divide), Normalizing recordings (normalize) – Tascam Portacapture X6 32-Bit 6-Channel Multitrack Field Recorder User Manual
Page 44: 9 - 8 setting where recording files are saved, 9 - file operations
44
TASCAM Portacapture X6
9 - File operations
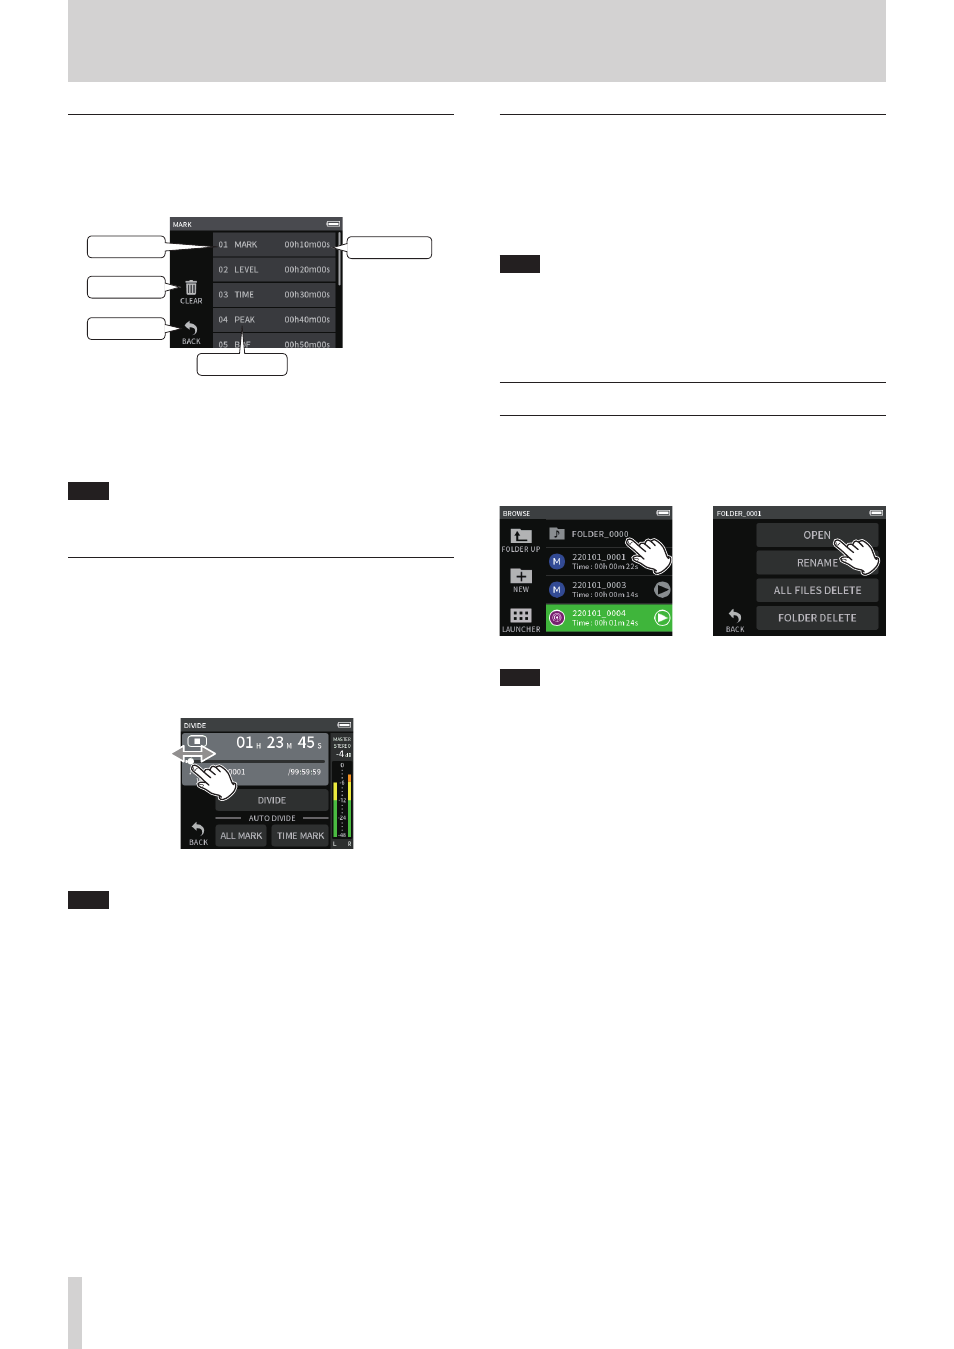
Viewing the mark list (MARK)
1.
Tap the name of the file to view on the BROWSE screen.
2.
Tap MARK.
A list of marks will be shown
Mark type
Number
Go back
Delete
Mark position
See “Mark functions” on page 45 for information about mark types.
Deleting marks
Tap the trashcan icon to delete all marks.
NOTE
See “Deleting marks” on page 45 for details about the deleting
individual marks.
Dividing files (DIVIDE)
1.
Tap the name of the project to divide on the BROWSE screen.
2.
Tap DIVIDE.
3.
Move the pointer on the playback bar to the division point and
pause playback.
Move the playback pointer by, for example, playing the file, search-
ing forward/backward, and sliding it along the playback bar.
4.
Tap DIVIDE.
NOTE
o
If the project has track files, the track files will also be divided.
o
Tap ALL MARK to divide the file at every mark position.
o
Tap TIME MARK to divide the file at every mark added by the auto-
matic mark function TIME option.
o
Only files in projects that have been recorded by this unit can be
divided.
o
MP3 files cannot be divided.
o
The DIVIDE function does not affect PEAK marks.
Normalizing recordings (NORMALIZE)
This function finds the loudest volume in a recorded file and raises the
volume of all the recording data so the loudest volume is at the maxi-
mum level.
1.
Tap the name of the file to normalize on the BROWSE screen.
2.
Tap NORMALIZE.
NOTE
o
Since the data of the selected project will be overwritten, it cannot
be restored.
o
Only files recorded by this unit can be normalized.
o
This function is applied to master files. It does not affect track files.
9 - 8 Setting where recording files are saved
Recording data is saved in the current folder.
Follow the procedures below to select a folder and make it the current
folder.
BROWSE screen
Folder menu screen
e
Tap the folder to make current.
Tap OPEN.
NOTE
When the current file is selected, its folder becomes the current fold-
er.