Rstp port setting – Signamax Model -065-7700 User Manual
Page 67
Hardened Managed PoE Ethernet Switch
User’s Manual 66
a decimal number between 4 and 30.
6.
STP Version: Click “STP Version” drop-down menu to choose “MSTP”,
“RSTP” or “STP compatible” from “STP Version” drop-down list.
7.
Update Setting: Click “Update Setting” button when you finished Global
Configuration.
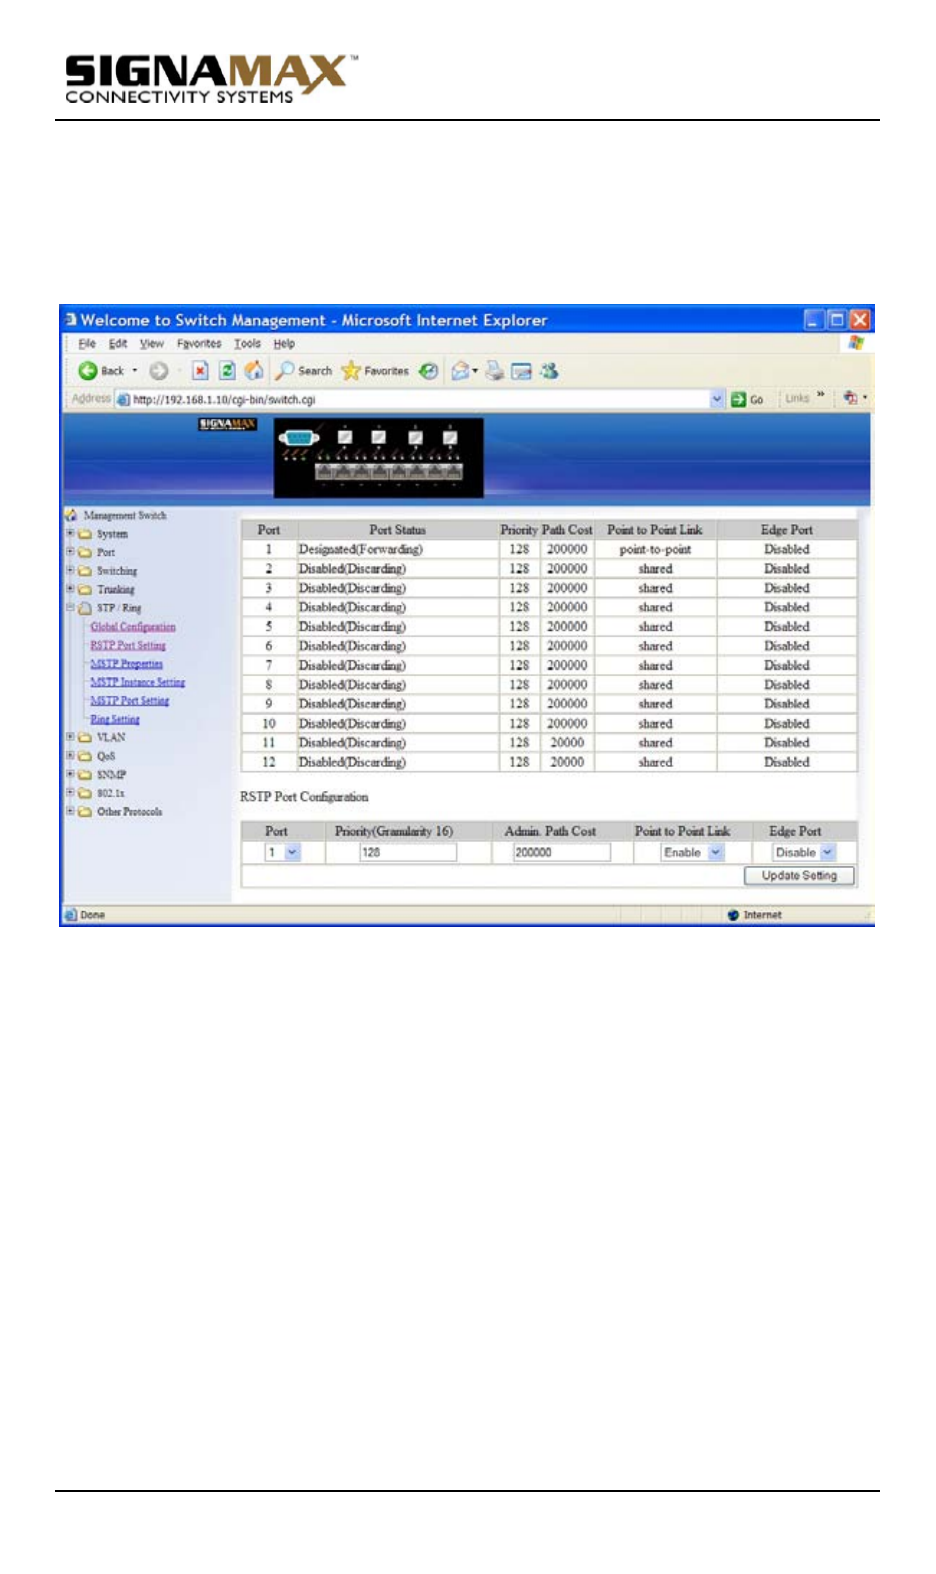
RSTP Port Setting
1.
STP Version: Click “STP Version” drop-down menu to choose “RSTP”
from “STP Version” drop-down list.
2.
Port: Click “Port” drop-down menu to choose Port 1 ~ Port 12 from “Port”
drop-down list.
3.
Priority(Granularity 16): Click in “Priority” text box and enter a value
between 0 and 240 to set the priority for the port. A higher priority will
designate the port to forward packets first. A lower number denotes a
higher priority. This entry must be divisible by 16. The default priority
setting is 128.
4.
Admin. Path Cost: Click in “Admin. Path Cost” text box and enter a value
between 0 and 2000000 to set the Admin. Path Cost for the port. 0 (auto)
- Setting 0 for the Admin. Path Cost will automatically set the speed for
forwarding packets to the port for optimal efficiency. Default port cost:
100Mbps port = 200000. Gigabit port = 20000.
5.
Point to Point Link: Click “Point to Point Link” drop-down menu to
Choose “Enable” or “Disable” from “Point to Point Link” drop-down list to
enable or disable Point to Point Link for the port.
6.
Edge Port: Click “Edge Port” drop-down menu to Choose “Enable”,