Working with layout blocks, Layout blocks: working with text and image areas, Adding layout blocks – equinux Mail Designer 1.3.4 User Manual
Page 9
Working with layout blocks
First, make sure you can see the layout by clicking
the “Layout” button in the toolbar. Click the Lay-
out button to show or hide the frames around the
stationery’s layout blocks.
You’ll notice a translucent tab attached to the left
side of each block. Those are the layout block
“handles”, each individual layout block has one. You
can rearrange a layout block by grabbing its handle
and dragging the layout block into another posi-
tion.
Layout blocks: working with text and image areas
Mail Designer offers layout blocks that have text areas, image areas or both.
A text area can only contain text, while an image area can contain images,
photos, placeholders and styled text.
Layout block “handles”
Layout block with text and image areas
A layout block with text, text with
background and image areas
Layout block with text area
Layout block with an image area
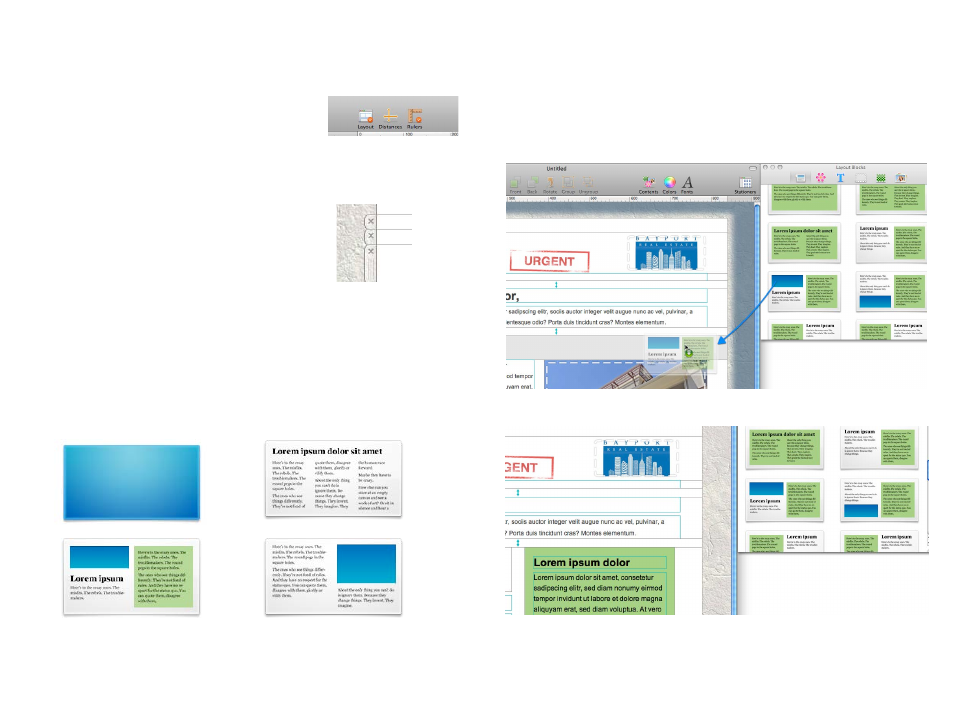
Adding layout blocks
Click the “Contents” button to open the Contents panel. This contains all the
design elements you can add to your Mail Design. Go to “Layout Blocks”,
choose one and drag it to your Mail Design. The other layout sections will
slide out of the way so you can drop in the new layout block.
Drag a layout block into your design.
The other blocks will slide out of the way and you can drop the new layout block into place.
9