MBM Corporation TRIUMPH 5550 EP (9 STEP MODULE) User Manual
Page 19
10
20.12.2001 1244D022.DOC
3.3
3.3
3.3
3.3 Schnittandeuter
Schnittandeuter
Schnittandeuter
Schnittandeuter 3.3
3.3
3.3
3.3 Optical cutting line indicator
Optical cutting line indicator
Optical cutting line indicator
Optical cutting line indicator
1
4
61-07
Optisch
Zum Schneiden nach Markierung wird der
optische Schnittandeuter verwendet. Der
Lichtstrahl zeigt die Schnittkante an.
Mechanisch
Zum Schneiden nach Markierung kann der
Preßbalken (4) als Schnittandeuter verwendet
werden
- Der Pressbalken kann mit dem Fußpedal (1)
in jede Stellung gebracht werden.
- Die Vorderkante des Pressbalkens entspricht
der Schnittkante.
Optical
For cutting according to marks, the optical
cutting line indicator is used.
The light beam indicates the cutting line.
Mechanical
For cutting according to marks, the
clamp (4) is used as cutting line indicator.
- The clamp may be moved via pedal (1) into
any position.
- The front edge of the clamp corresponds to
the cutting line.
3.4
3.4
3.4
3.4 Lufttisch
(Option)
Lufttisch (Option)
Lufttisch (Option)
Lufttisch (Option) 3.4
3.4
3.4
3.4 Air table (option)
Air table (option)
Air table (option)
Air table (option)
2
47-01
Bei eingeschaltetem Lufttisch lassen sich
größere Papierstapel leichter in
Schneidposition bringen.
Lufttisch einschalten ->
Schalter (2) auf "I"
Lufttisch ausschalten ->
Schalter (2) auf "O"
With switched on air table large paper stacks
may be easily moved into cutting position.
Switch on air table ->
switch (2) to "I".
Switch off air table ->
switch (2) to "O".
3.5
3.5
3.5
3.5 Abdeckblech
(Option)
Abdeckblech (Option)
Abdeckblech (Option)
Abdeckblech (Option) 3.5
3.5
3.5
3.5 False clamp plate (option)
False clamp plate (option)
False clamp plate (option)
False clamp plate (option)
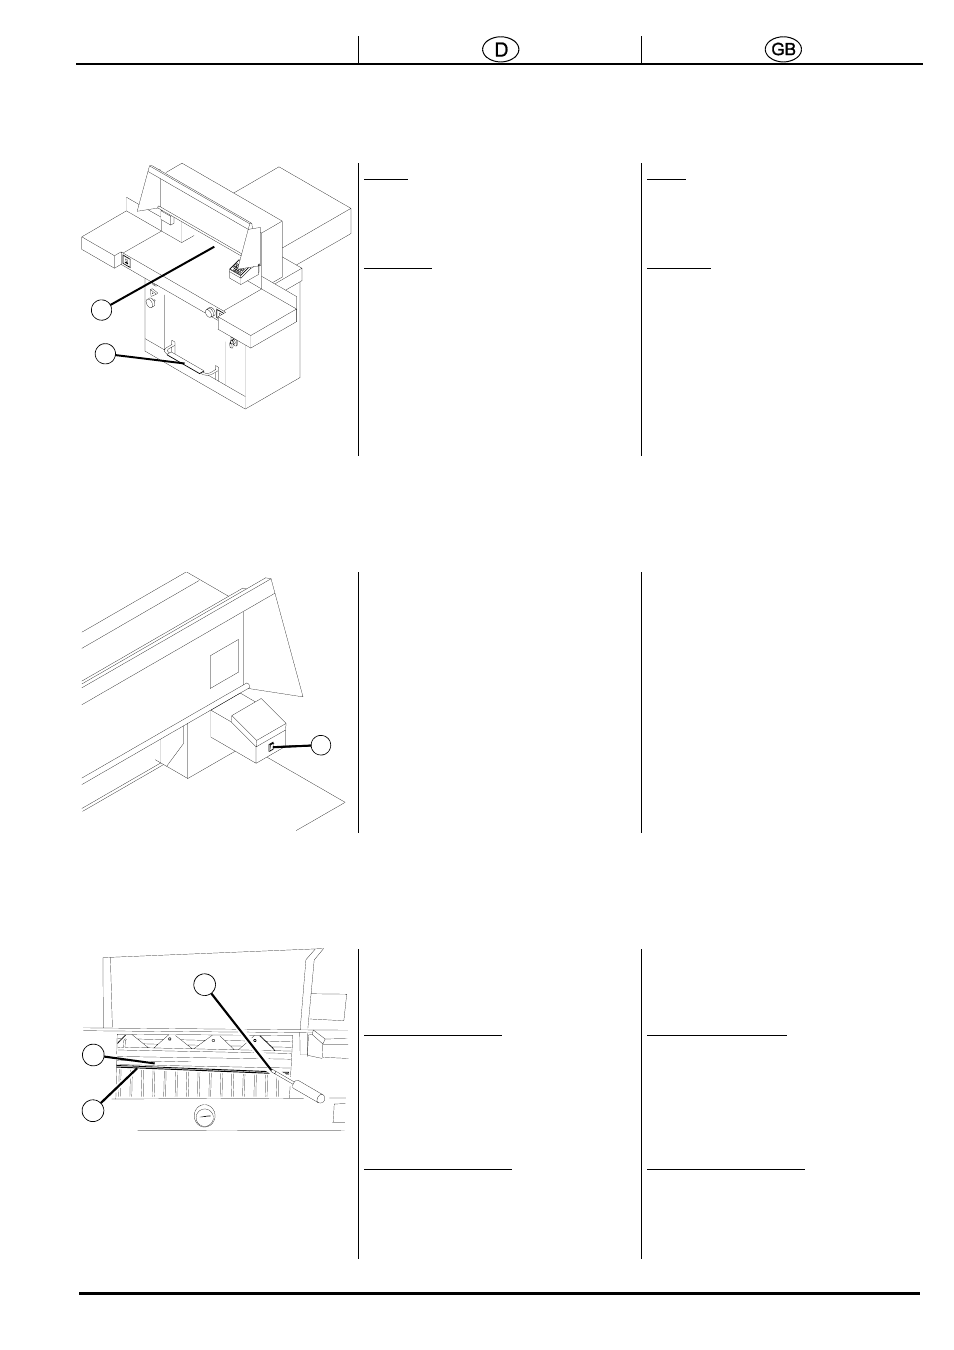
3
4
5
42-01
Um Druckstellen vom Pressbalken auf
empfindlichem Material zu vermeiden, kann ein
Abdeckblech (3) montiert werden.
Abdeckblech montieren:
Das Abdeckblech wird mit zwei Einrastbolzen
nach oben in den Pressbalken (4)
eingeschoben.
l
l
l
l Achtung!
Achtung!
Achtung!
Achtung!
Der Minimalschnitt beträgt 6 cm.
Abdeckblech demontieren
Mit einem Schraubendreher unter die links und
rechts angebrachten Schlitze (5) fahren.
To prevent pressure marks of the clamp on
sensitive material, the false clamp plate (3) may
be installed.
Mount false clamp plate
The false clamp plate is inserted to the top into
the clamp (4) with two bolts.
l
l
l
l Warning!
Warning!
Warning!
Warning!
The minimum cutting size may not be less
than 6 cm.
Dismount false clamp plate
Slide a screwdriver under the slits (5) at the left
and right side.