Chapter 2: basic operation – Microcom 470 User Manual
Page 15
))))))))))))))))))))))))))))))))))))))))))))
470 Operators Manual
7
CHAPTER 2: BASIC OPERATION
2.1
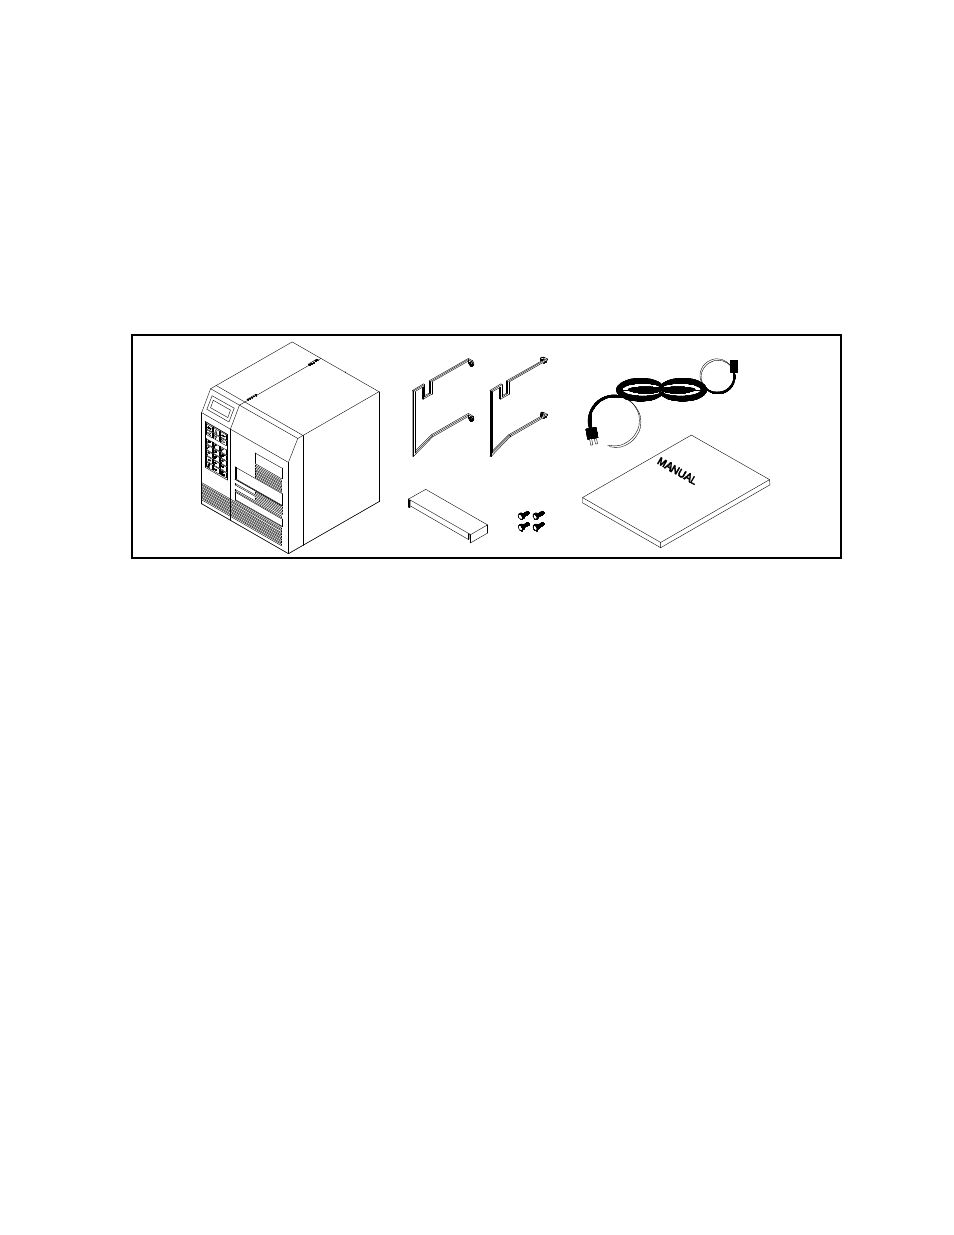
UNPACKING THE 470 PRINTER
While unpacking the printer, please check all packing materials closely to avoid misplacing any
necessary parts. After the printer is removed from the box, verify that all parts are present and
in good condition (see Figure 3). All packaging material should be kept and used if the printer
is to be shipped. The printer must be returned in the original container to insure proper
warranty coverage.
Printer Parts figure 3
2.2
MOUNTING THE LABEL SUPPLY RACKS
Position the printer so that the rear is assessable. Refer to Figure 2 and note the mounting
positions of each rack. Notice that the bent flanges point inward. Using the thumbscrews
provided, attach the racks to the printer.
2.3
INITIAL POWER UP
Before connecting the printer to a power source, verify that the voltage selector, located on the
rear of the printer, is set correctly. If not, open the selection door and rotate the cylinder until
the correct voltage is shown.
Plug the printer in and turn the power switch on. The back lighted LCD should illuminate and
temporarily display 'ASSUMING DIRECT THERMAL' or 'ASSUMING THERMAL TRANSFER'. If
this does not occur, check the power source and if necessary call your service organization.
2.4
FRONT PANEL KEYPAD AND STATUS DISPLAY
The front panel contains a 21-key, alphanumeric, keypad and a two-line, back lighted, LCD
display. Through the use of the keypad and display, many printer commands can be directly
entered or modified.