Installation – Montigo H36PVN User Manual
Page 27
H36PVN Power Vent Indoor Gas Fireplace
Page 27
XG0649 - 031511
Installation
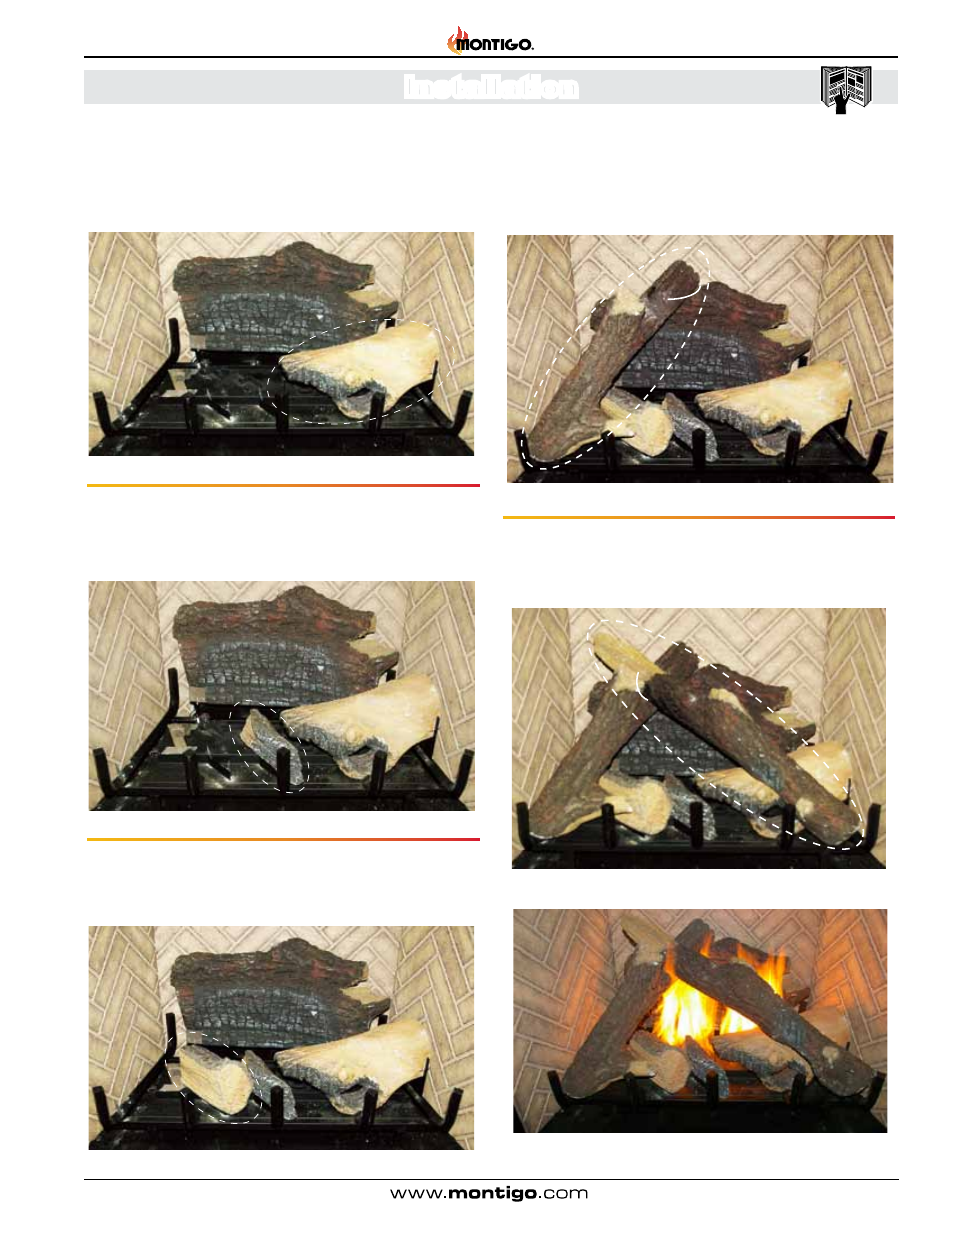
Figure 18k. Installation of Log 'E'.
Figure 18l. Installation of Log 'F'.
Figure 18j. Installation of Log 'D'.
Step 5. Position the Bottom Right Log 'B' and place Right end in the
sheet metal cradle (located at the far right of the Log Grate), Figure,
18h. and Log Rest in the center of the burners, Figure, 18a. Press
FIRMLY onto the spikes . Note location of hole feature in Log .
Figure 18h. Positioning of Log (B).
Step 6. Position Bottom Center Log 'C', with the flat edge down .
and place square end inside Log Rest, aligning the center of the Log
with the Spikes, Figure, 18a. Press FIRMLY, seating the Log onto
the sharp spikes, Figure 18i . Note the color variation in the Log .
Figure 18i. Installation of Log 'C'.
Step 7. Place Bottom Left Log 'D', with the flat edge down . and
place square end inside Log Rest, aligning the center of the Log with
the Spikes, Figure, 18a. Press FIRMLY, seating the Log onto the
sharp spikes, Figure 18j . Note the color variation in the Log .
Step 8. Place Front Left Log 'E', with the Knots pointing in the
directions shown, Figure, 18k . Place the Darker, narrow end on
top of Log 'A' as shown, (arced line). Press FIRMLY onto the sharp
spike at Lower end, Figure 18a .
Step 9. Position Front Right Log 'F', with the Knots pointing in the
directions shown, Figure, 18l . Place the Lighter, narrow end on
top of Log 'E' as shown, (arced line). Align for length and location,
Figure 18k .
Figure 18m. Completed Log Set Installation.
Log C
Log B
Log D
Log E
Knot
Knot
Log A
Log E
Log F
Knot
Knot
Knot