Add protocol windows, Communication rules window – OpenEye SW-RWTCP User Manual
Page 41
27314AI
41
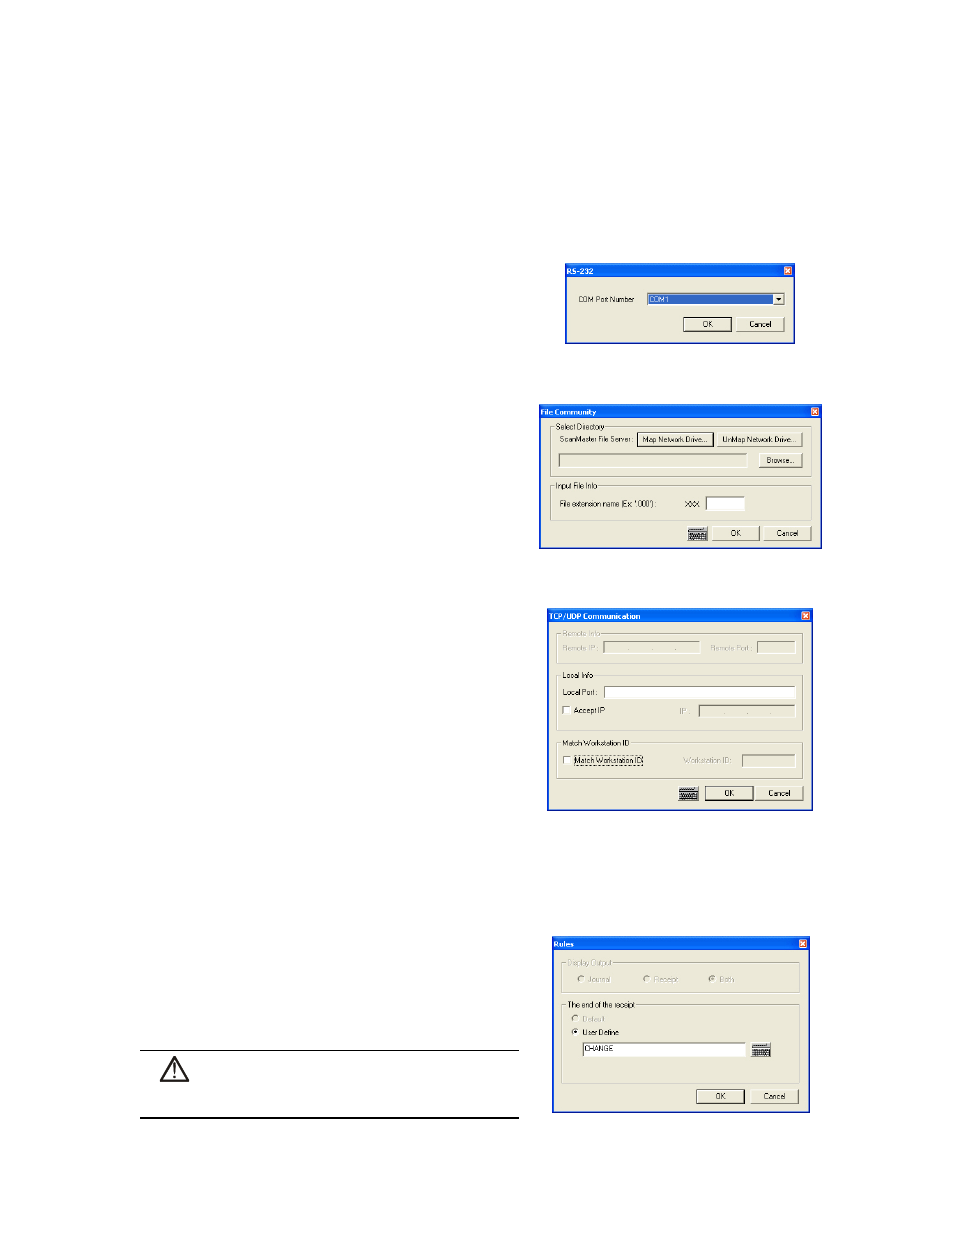
Add Protocol Windows
The Protocol window is displayed upon clicking Add on the Communication tab in the Options window. There are three separate
protocol windows which may be displayed. The three window types are RS-232, File Community, and TCP/UDP. Selecting the
protocol from the Protocol list on the Communication tab determines which protocol window will be displayed.
RS-232 Add Protocol Window
Enter the COM Port the RS-232 device is connected to.
File Community Add Protocol Window
1. Click Map Network Drive to add a network drive.
– or –
Click UnMap Network Drive to remove a network drive.
2. Click the Browse button to select a source location.
3. Enter the register ID of the connected register in the Input File
Info box
TCP/UDP Communication Add Protocol Window
1. Enter the remote POS server IP address and Port number.
- or-
Enter the local communication port and set a specific IP address
to accept transmissions from.
2. Select the Match Workstation ID check box to specify a specific
register in the Workstation ID box.
Communication Rules Window
The End of the Receipt text must be defined for proper operation of the software. This will finalize and write the transaction to the
RediWatch POS Database.
1. Click the Rules button on the Communication tab in the
Options window.
2. Select User Define.
3.
Enter the last line on the receipt (ex: phone number or address).
4. Click OK.
CAUTION: Failure to properly define the last item printed
will result in improperly recorded POS data.