H3C Technologies H3C S9800 Series Switches User Manual
Page 20
12
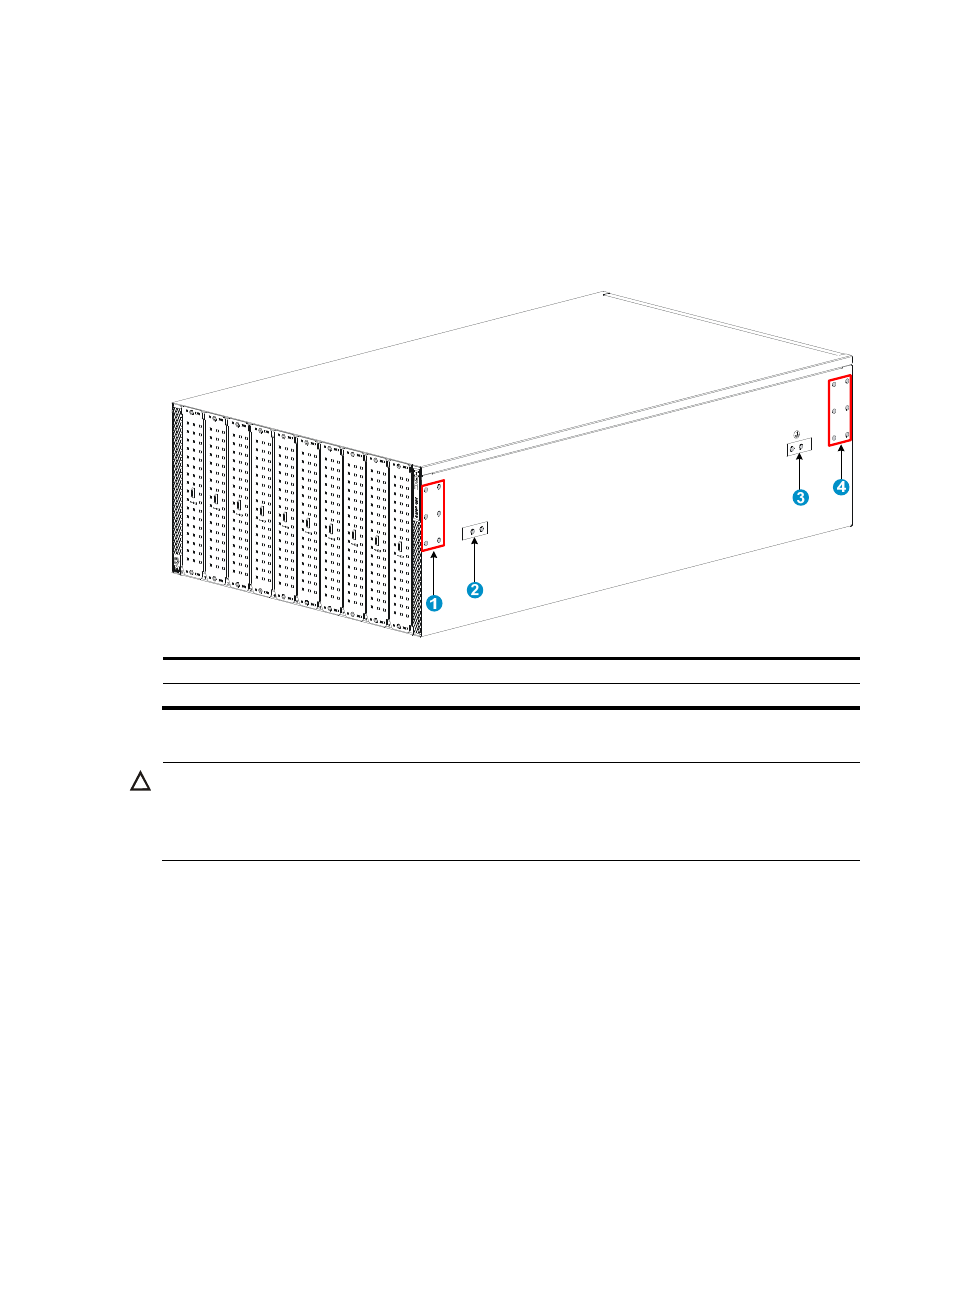
Installing the installation accessories for the S9810 switch
The S9810 switch has one front mounting position (near the network ports) and one rear mounting
position (near the power modules). The switch also has one primary grounding point (with a grounding
sign) and one auxiliary grounding point. Determine the positions for the mounting brackets and
grounding cable before installation.
Figure 17 Installation positions for the mounting brackets and grounding cable
(1) Front mounting position (network port side)
(2) Auxiliary grounding point
(3) Primary grounding point
(4) Rear mounting position (power module side)
Attaching the mounting brackets and grounding cable to the S9810 switch
CAUTION:
The primary grounding point and auxiliary grounding point are located on the right side panel. If you use
one of these grounding points, you must connect the grounding cable to the grounding point before you
mount the switch in the rack.
To install the mounting brackets and grounding cable on the S9810 switch:
1.
Determine the installation positions for the mounting brackets and the grounding cable.
2.
Align the screw holes in the mounting brackets with the screw holes in the mounting position, as
shown in
.
This example uses the front mounting position.
3.
Use the M4 countersunk screws supplied with the switch to attach the mounting brackets to the
chassis.
4.
Unpack the grounding cable and grounding screws.
5.
Use the grounding screws to attach the two-hole grounding lug of the grounding cable to the
grounding point, as shown in