H3C Technologies H3C S9800 Series Switches User Manual
Page 34
26
Installing the LSVM1S9810FAN/LSVM2S9810FAN fan tray
for the S9810 switch
The installing and removing procedures are the same for the LSVM1S9810FAN and LSVM2S9810FAN
fan trays.
Before you install LSVM1S9810FAN/LSVM2S9810FAN fan trays on an S9810 switch, follow these
guidelines:
•
Determine the required number of fan trays based on the number of installed switching fabric
modules. If one switching fabric module is installed, one fan tray is required (You must install the fan
tray in the lower fan tray slot). If two switching fabric modules are installed, two fan trays are
required.
•
Make sure the airflow direction of the fan tray meets the ventilation requirement at the installation
site.
•
Make sure a switching fabric module has been installed in the switching fabric module slot below
the target fan tray slot.
•
To install two fan trays, make sure the models of the two fan trays are the same.
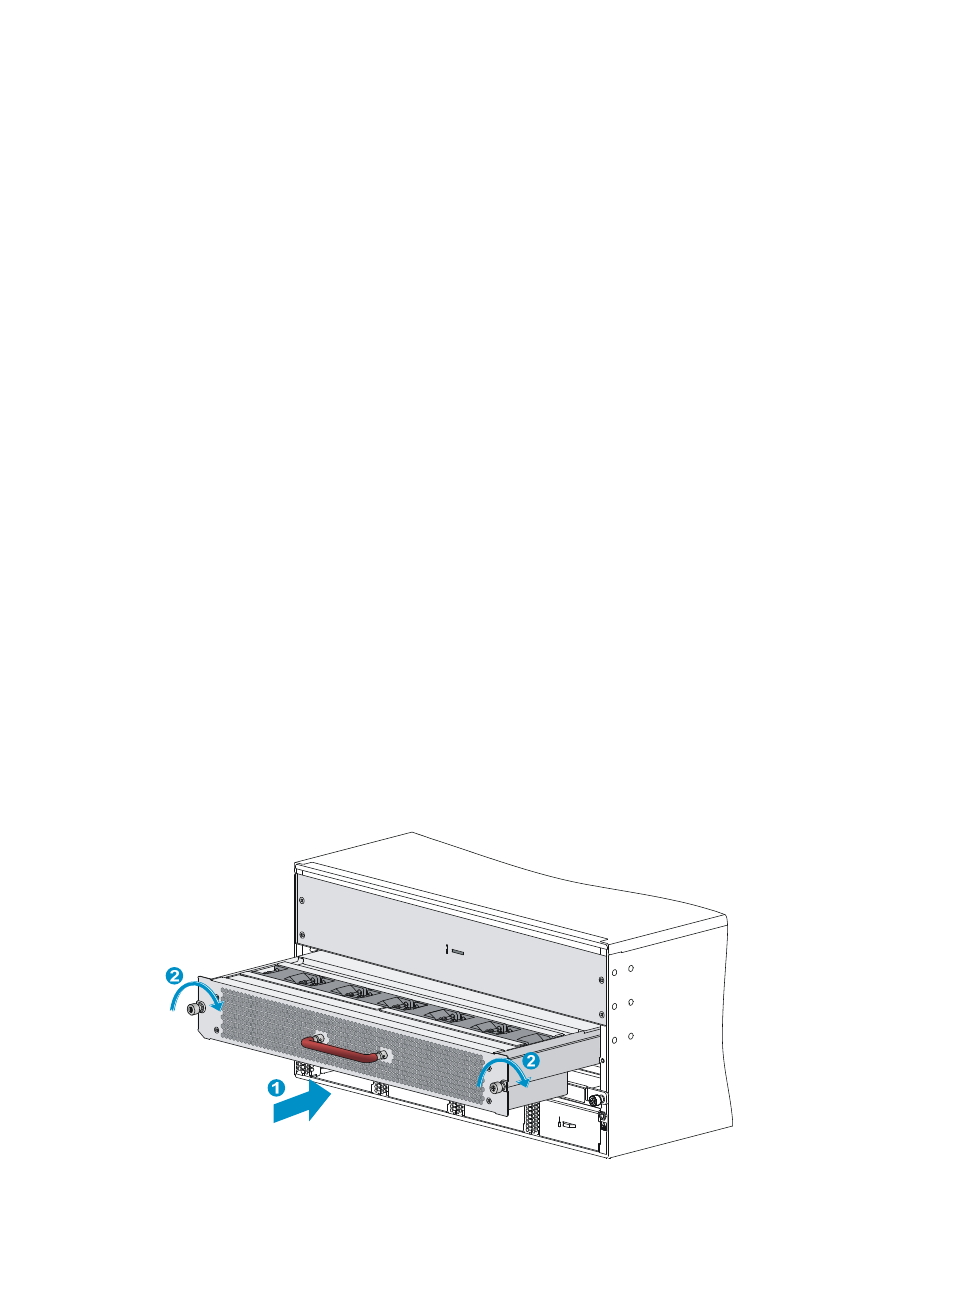
To install an LSVM1S9810FAN/LSVM2S9810FAN fan tray:
1.
Wear an ESD wrist strap, and make sure it makes good skin contact and is reliably grounded.
2.
Unpack the fan tray and verify that the fan tray model is correct.
3.
Holding the fan tray with both hands with the upside (marked with a "TOP" sign) up, gently push
the fan tray into the slot along the guide rails until the fan tray is completely seated in the slot. See
callout 1 in
.
To prevent damage to the fan tray or the connectors on the backplane, insert the fan tray gently.
If you encounter resistance while inserting the fan tray, pull out the fan tray and insert it again.
4.
Use a Phillips screwdriver to fasten the captive screws on the fan tray to secure the fan tray in the
slot. See callout 2 in
and
If the screws fail to be fastened, verify the installation of the fan tray.
Figure 32 Installing one LSVM1S9810FAN/LSVM2S9810FAN fan tray