Installing an lpu – H3C Technologies H3C S9800 Series Switches User Manual
Page 38
30
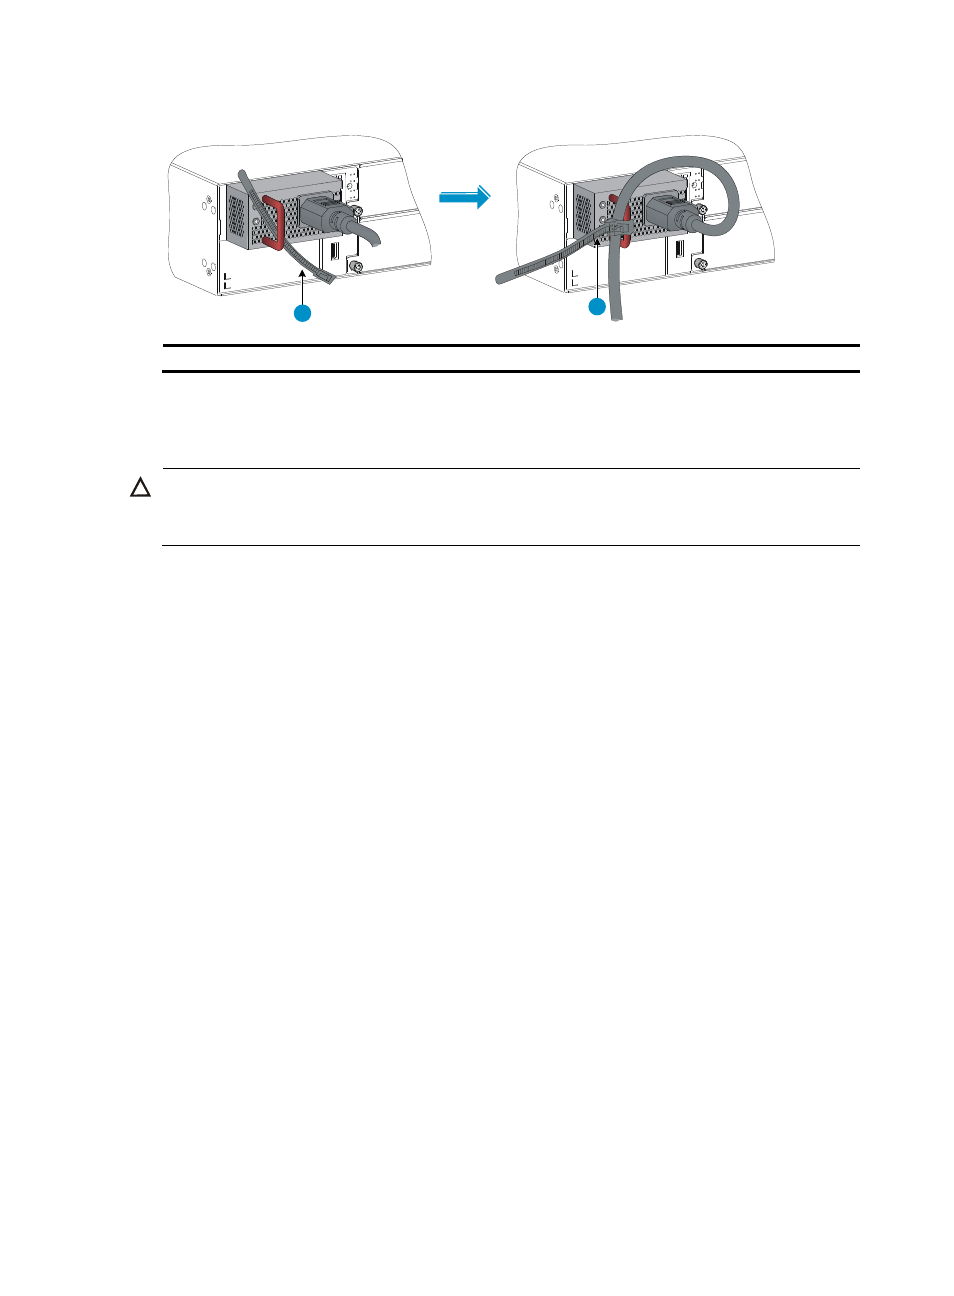
Figure 37 Connecting the AC power cord to the switch
(1) Cable tie
(2) Secure the power cord to the power module handle using the cable tie
Installing an LPU
CAUTION:
Do not touch the surface-mounted components directly with your hands when installing or removing an
LPU.
The switch comes with filler panels installed in all LPU slots except slot 1.
For LPUs available for the S9800 Switch Series, see "
Appendix B FRUs and compatibility matrixes
The installing procedures are the same for the LPUs. This guide uses the LSV1QGS12SA1 as an example.
To install an LPU:
1.
Wear an ESD wrist strap and make sure it makes good skin contact and is reliably grounded.
2.
If the slot has a filler panel, use a Phillips screwdriver to remove the mounting screws on the filler
panel, thread a flat-blade screwdriver through the handle on the filler panel, and pull out the filler
panel gently.
Keep the removed filler panel for future use.
3.
Unpack the LPU.
4.
Gently push the LPU in along the slot guide rails until the brakes on the ejector levers touch the slot
edges tightly.
Make sure the ejector levers are perpendicular to the LPU panel while inserting the LPU.
5.
Press the ejector levers inward and continue pushing the LPU until the ejector levers come in contact
the panel and the LPU seats on the backplane.
6.
Tighten the captive screws with a Phillips screwdriver to secure the LPU in the slot.
1
2