Creating header information, Entering your header information, Setting up date and time – Epson Stylus DX9400F User Manual
Page 12
12
Faxing a Photo or Document
Entering characters
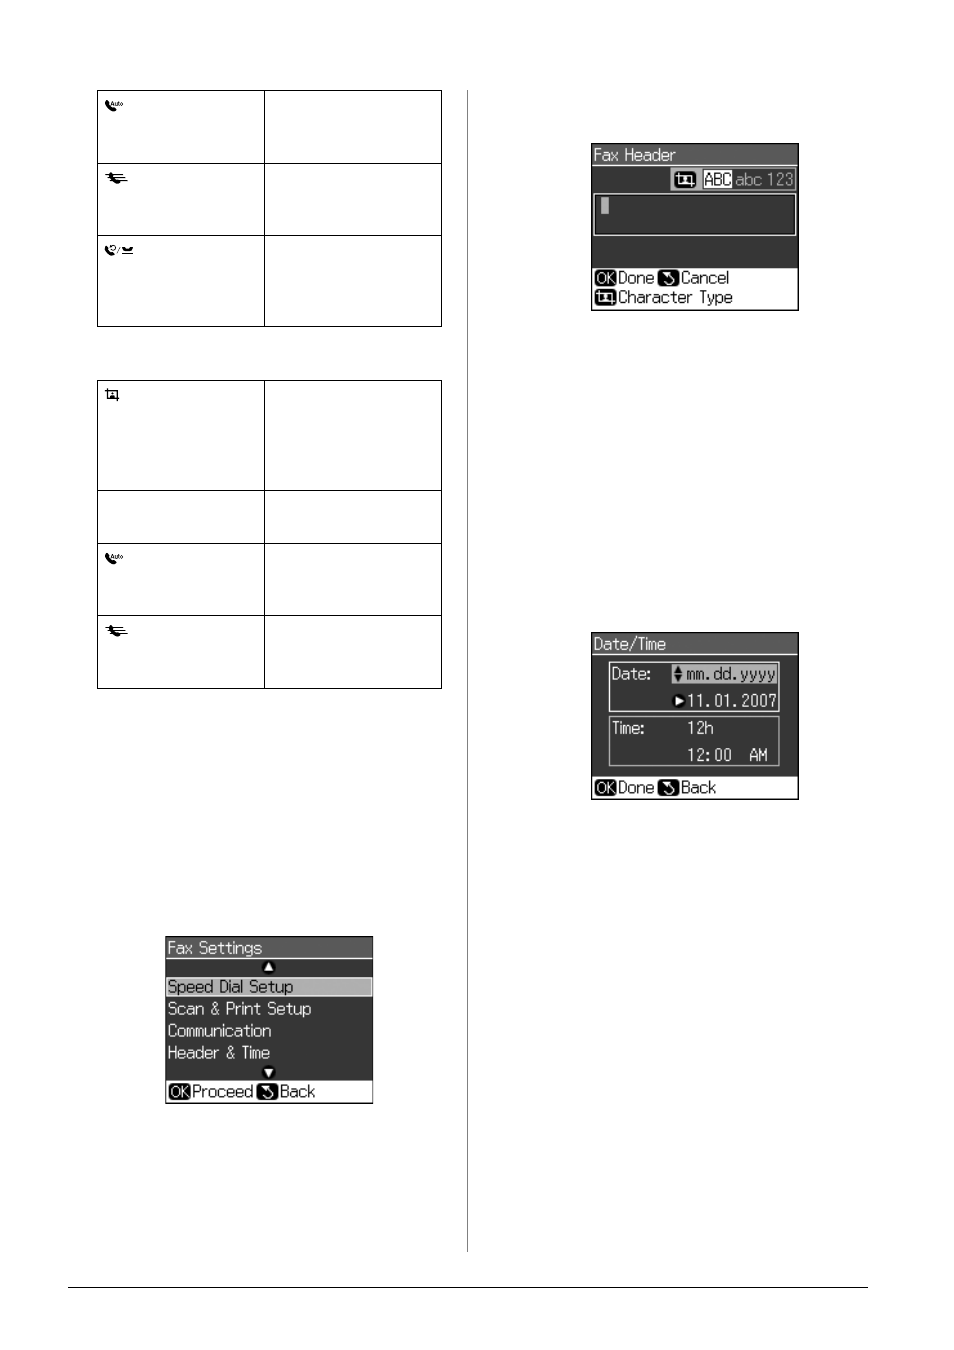
Creating header information
Before sending or receiving faxes, you can
create a fax header by adding information
such as a phone number or name.
Entering your header
information
1. Press F Setup.
2. Select Fax Settings, then press OK.
3. Select Header & Time, then press OK.
4. Select Fax Header, then press OK. You
see the header information input screen.
5. Use the numeric keypad with other
buttons on the control panel to enter the
header information (& “Using control
panel buttons in fax mode” on page 11).
You can enter up to 40 digits.
6. Press OK. You return to Header & Time.
Setting up date and time
After entering header information, you can
set or change the date and time settings.
1. Select Date/Time from the Header &
Time menu, then press OK. You see the
Date/Time screen.
2. Use u or d to select the type of date
display, and then press r.
3. Use the numeric keypad to change the
date.
Note:
To select daylight savings time, set Daylight
Time to On.
4. Use u or d to select a 12-hour or 24-hour
display, and then press r.
5. Use the numeric keypad to change the
time.
6. If you selected 12h, use u or d to select
AM or PM.
7. Press OK. You return to Header & Time.
Note:
To select daylight savings time, set Daylight
Time to On.
[Auto Answer/
Space]
Inserts a space or
moves the cursor one
character to the right.
[Speed Dial/
Back Space]
Deletes a character
or moves the cursor
one space to the left.
[Redial/Pause] Inserts a pause (-)
and moves the cursor
one character to the
right.
Display/Crop
Changes the input
characters between
uppercase,
lowercase, or
numbers.
l
, r
Moves the cursor to
the left or right.
[Auto Answer/
Space]
Inserts a space or
moves the cursor one
character to the right.
[Speed Dial/
Back Space]
Deletes a character
or moves the cursor
one space to the left.