Epson Stylus DX9400F User Manual
Page 28
28
Replacing Ink Cartridges
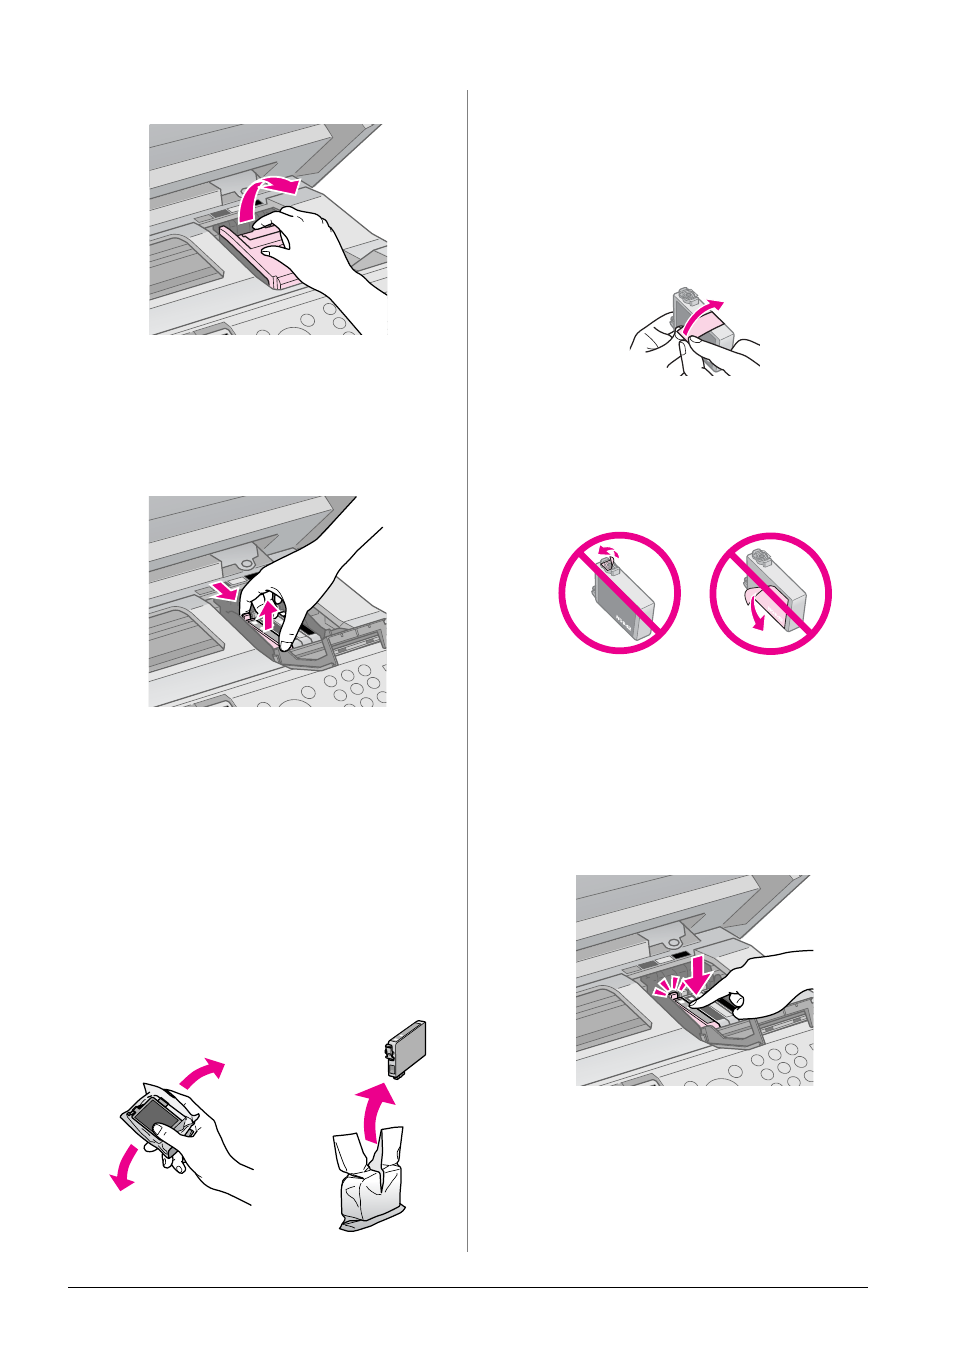
3. Open the cartridge cover.
c
Caution:
Never attempt to open the cartridge cover
while the print head is moving. Wait until the
print head has stopped at the replacement
position.
4. Squeeze the tab and lift it straight up.
c
Caution:
Do not refill the ink cartridge. Other products
not manufactured by Epson may cause
damage that is not covered by Epson's
warranties, and under certain
circumstances, may cause erratic printer
behavior.
Note:
If it is difficult to remove the cartridge, lift the
cartridge with more force until comes out.
5. Before you open the new ink cartridge
package, shake it four or five times. Then
remove it from the package.
c
Caution:
❏ Be careful not to break the hooks on the
side of the ink cartridge when you remove
it from the package.
❏ Do not touch the green chip on the side of
the cartridge. This can damage the ink
cartridge.
6. Remove the yellow tape.
c
Caution:
❏ You must remove the yellow tape from the
cartridge before installing it; otherwise,
print quality may decline or you may not be
able to print.
❏ Do not remove the seal.
❏ Be sure to always install an ink cartridge
into the printer immediately following the
removal of the current ink cartridge. If the
ink cartridge is not installed promptly, the
print head may dry out, rendering it unable
to print.
7. Place the new ink cartridge in the
cartridge holder and press it down until
it clicks into place.
8. Close the ink cartridge cover and press it
until it clicks into place.